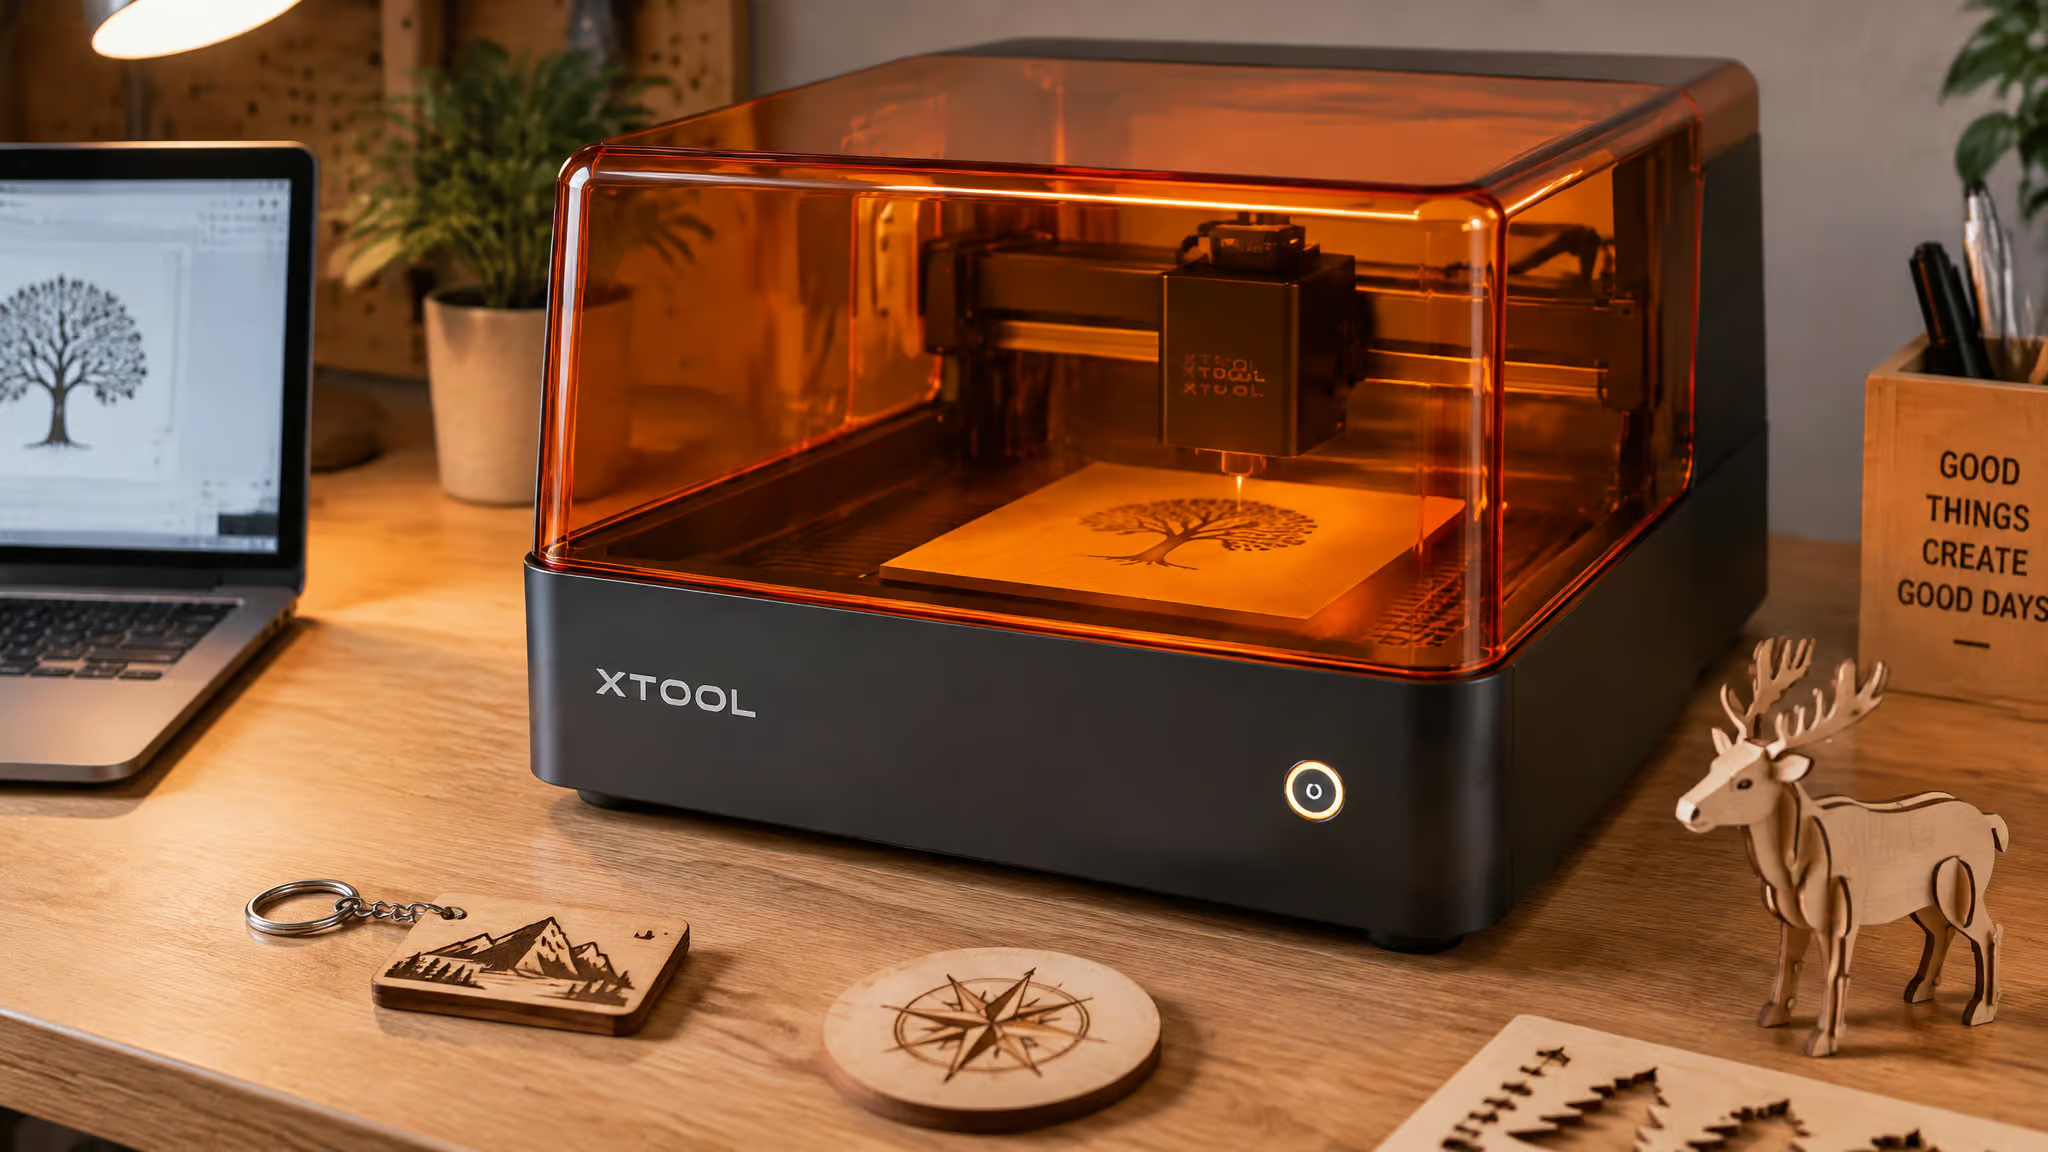
The most convincing piece of evidence for a first laser isn’t a spec sheet. It’s a plywood keychain with a toddler’s name on it, cut on day one by someone who had never touched a laser engraver before. That’s the record Robert Dehue brought back from 3DPrinting.com, where he ran the Creality Falcon A1C as his outlet’s first-ever laser review with zero prior hands-on laser experience. The machine lived on a spare-room desk, exactly where a real buyer would put a small wood engraving machine, and most of the projects it made served his two-year-old daughter.
Which, honestly, is this segment’s real use case. The stakes are real too: $200 to $1,100 on a first machine, and the nagging fear of picking one that’s too weak to cut wood, unsafe indoors, or collecting dust by week two. GeekExtreme didn’t run this machine. But our whole evidence standard is that a documented day-one outcome beats a marketing page, and this one is unusually well documented.
Key Takeaways
The Falcon A1C’s 10 W diode cuts 3 mm plywood comfortably and 5 mm barely in a single pass; Creality publishes no cut-through figure, so those tested numbers are the only real ones.
Configurations run $269 (5 W, no camera) to $399 (10 W plus camera), and the $30 camera mattered more day to day than the wattage jump.
The 1.2 W infrared module is a dark-things specialist: it engraved brushed stainless steel and black marble, beat the 10 W diode on slate, and does nothing on wood.
Table of Contents
| Model | Observed price (Oct 8, 2026) | Why it stands out |
|---|---|---|
| Creality Falcon A1C | $269 | Creality’s cheapest fully enclosed Class 1 diode laser, beginner-proof with AI camera positioning and arriving fully assembled. |
| 1.2 W infrared module 1064 nm | $519 | Best result of the review on brushed stainless steel (~30 min, estimate within 7 seconds), beating the 10 W diode on slate and dark marble. |
| Falcon Design Space | Not published | Falcon Design Space is free, runs on Mac and Windows, has a phone app, and was called ‘really easy to use, well thought out’ by TechRadar; LightBurn compatibility exists but was |
Prices are observed prices on the linked pages as of Oct 8, 2026 and change with promotions; the linked product page is always the current source.
Which laser type should a beginner actually buy?
The whole market sorts into tiers fast once you know what each one is for, and the choice matters more than any individual model.
Diode vs CO2 for a beginner engraving wood
A beginner-friendly wood engraving machine is typically a 5 to 10 W diode laser, and for a small home workspace an enclosed diode is the sweet spot, with 10 W as sensible entry wattage. The price-and-capability ladder: diode lasers run $200 to $1,000+ and are the cheapest way in, with the best photo detail on wood because the beam spot is smaller than a CO2’s. The trade-offs are speed and material range. Diodes are slow, and they can’t cut clear acrylic, bare metal, or uncoated glass, and at the low end of that price band, they’re really only good at etching organic material, so if you’re dreaming of big signs or cutting boards, check the work area before you buy.
CO2 machines run roughly $400 to $15,000+, with K40 units at $300 to $700 and desktop CO2 starting around $2,000. They cut fastest and handle acrylic and glass, but they want more maintenance, more space, and possibly a 20 A circuit. Fiber and galvo machines ($1,500 to $9,000+) are the pro-metal tier, out of beginner scope, and standalone infrared units run $1,000 to $2,000. If you want the full class-by-class breakdown, we keep a separate buyer’s guide to engraving machines.
Here’s the reframe that settles it: a diode’s limits show up in your projects, a CO2’s limits show up in how you live around the machine. The lifestyle limits disqualify first when the machine has to share your living space.
Do Cricut machines engrave wood?
Not the way a laser does. Cricut machines are drag-tool and blade craft cutters; a diode laser burns the design into the material. We didn’t test any Cricut machine for this piece, and we’re not claiming engraved-wood results for one. If your projects need actual depth and cut-through, that’s laser territory.
Creality Falcon A1C: the hands-on verdict from a first-time owner
Yes, the Creality Falcon A1C is a good first laser engraver when you want an enclosed machine for small personal projects, and the proof is that a complete beginner cut a 3 mm plywood keychain with his daughter’s name on day one, no tutorials consulted. That’s Dehue’s record at 3DPrinting.com, not ours, and it’s the strongest kind of evidence: first-time owner, first project, working result.
What arrives and how it’s built
This is Creality‘s cheapest enclosed laser, a compact fully enclosed Class 1 design with the orange lid doing the visual heavy lifting. It arrives fully assembled, so you skip an assembly marathon before the first burn. It measures 336 x 377 x 341 mm and weighs just under 10 kg, so one person can carry it to the desk and it fits there without negotiation. The work area is 150 x 150 mm.
Under the laser there’s 148 mm of clearance, which is generous for a machine in this price bracket, though actually using that clearance takes undocumented care (more on that below). The build is plastic but solid; TechRadar‘s tester found it slightly cheapish, not fragile.
Quick rundown:
- Fully enclosed, Class 1 rated, orange lid
- Arrives assembled, one-person liftable, just under 10 kg
- 150 x 150 mm work area, 148 mm clearance underneath
- Three modules: 5 W diode, 10 W diode at 455 nm (fitted in the box), 1.2 W IR at 1064 nm
First projects: what a beginner actually makes
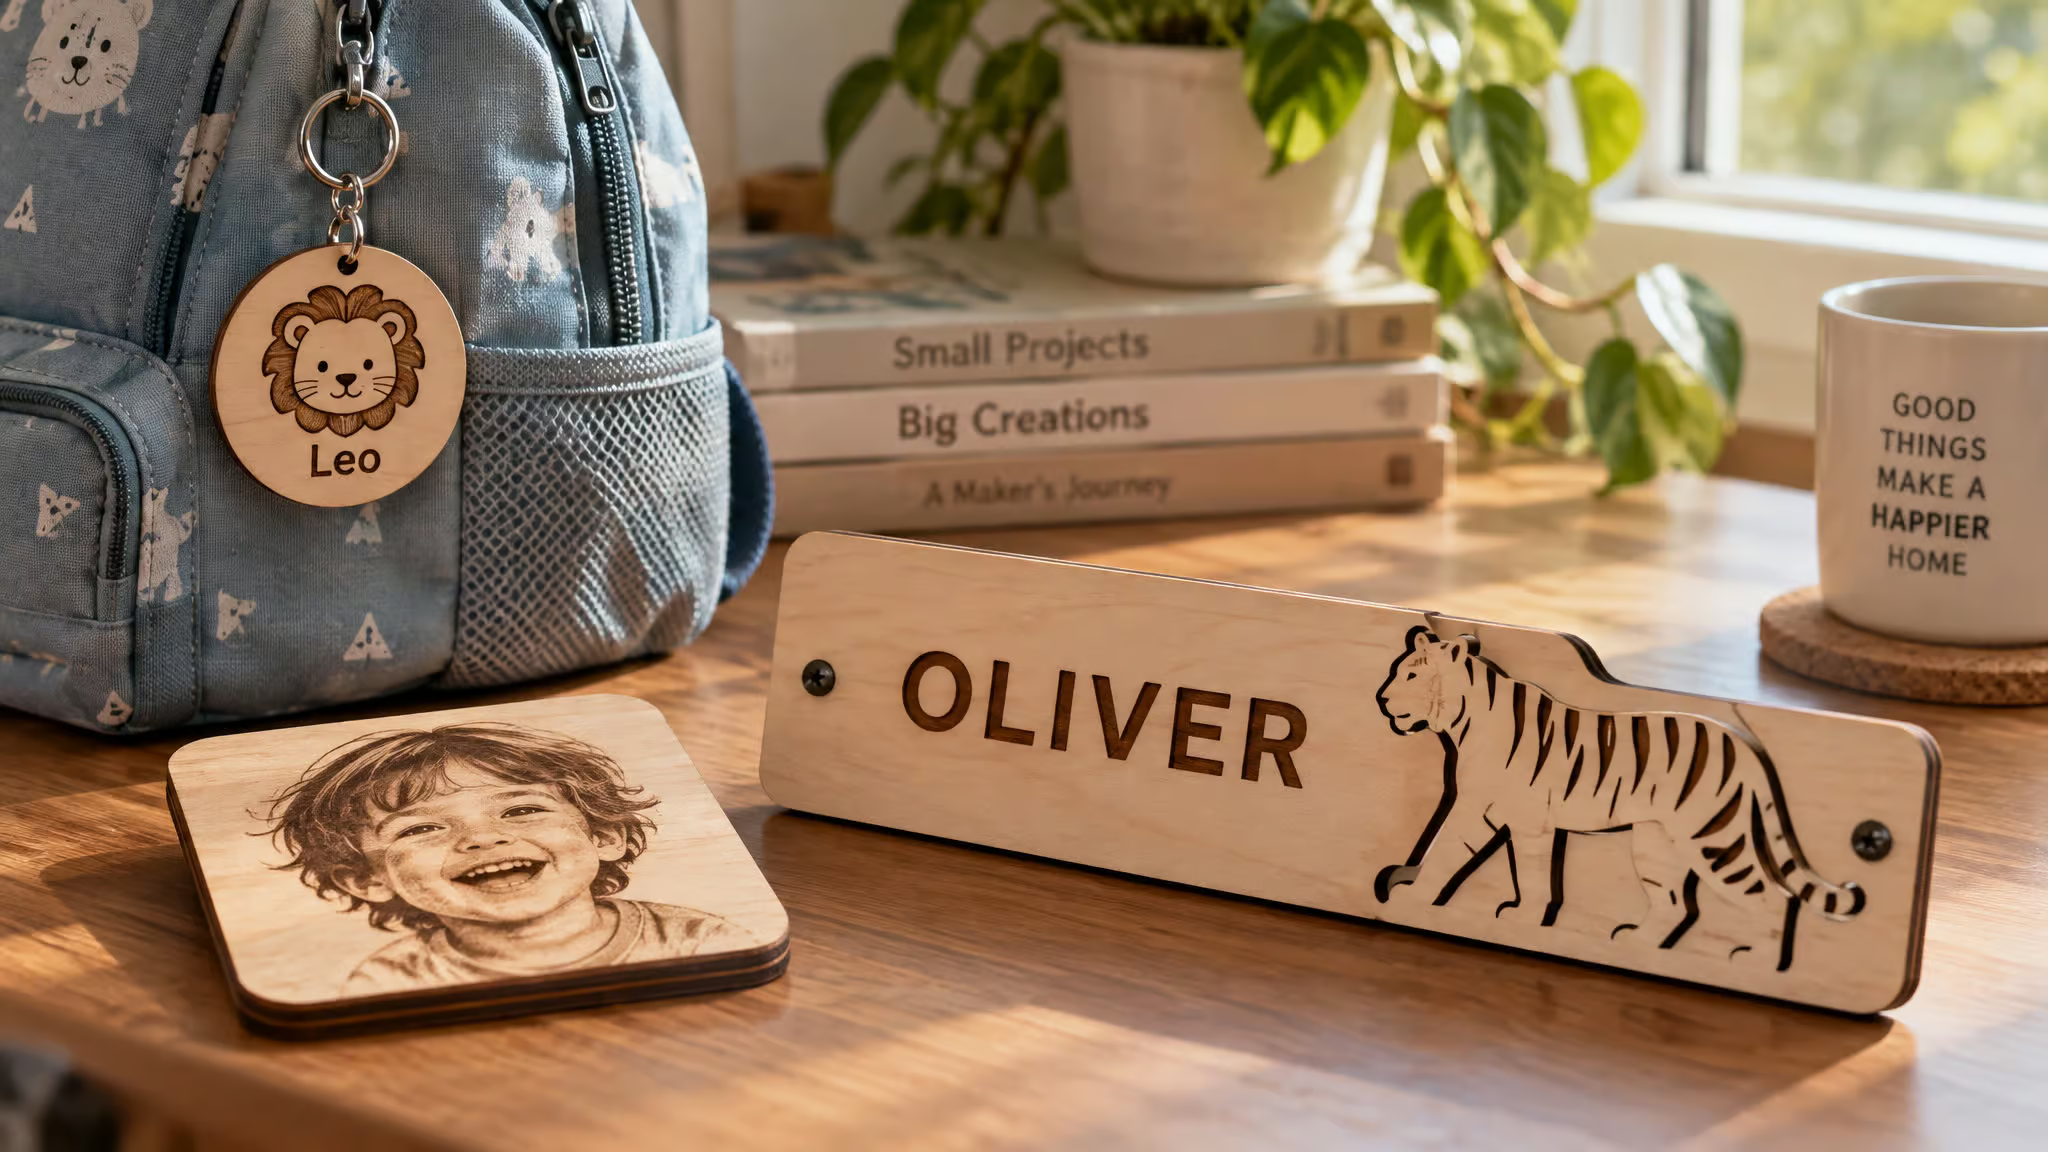
The day-one keychain broke under two-year-old handling; the 5 mm replacement survived on her backpack, which is the most honest durability data point we’ve seen in this price class. There was a coaster too, designed with an AI image generator from a photo of the daughter’s birth card. And a bedroom door name plate, cut in one pass from the Craftseek design “Personalisiertes Holzschild Tigerbaby” by Zeka Amintire. The waste silhouette came out tiger-shaped, which is exactly the kind of cut-quality detail that makes you grin at a machine.
Dehue’s argument here holds up: nobody buys this thing for aerospace parts, so test it against what buyers actually make. His most enthusiastic user was two years old.
Module system and the 150 x 150 mm bed
Module swaps are tool-free and take under 30 seconds, a small design win worth savoring. The catch: after every swap, the software demands an autofocus rerun and an unexplained camera recalibration. Mild friction, but it compounds if you swap often.
What the box doesn’t tell you: setup friction in week one
The hardware works on day one, but the setup chain nobody documents is the real beginner tax.
What’s actually in the box
Inside, you get the unit with the 10 W module already fitted, plus the 1.2 W IR module, an exhaust hose, a power supply, a USB cable, a safety key, a calibration card, and three small plywood squares. That’s it for materials; every other blank is on you. A sticker warns you to remove the protective silicone strips before running, which is the kind of gotcha that deserves exactly one line.
The camera ‘Disconnected’ error and other undocumented fixes
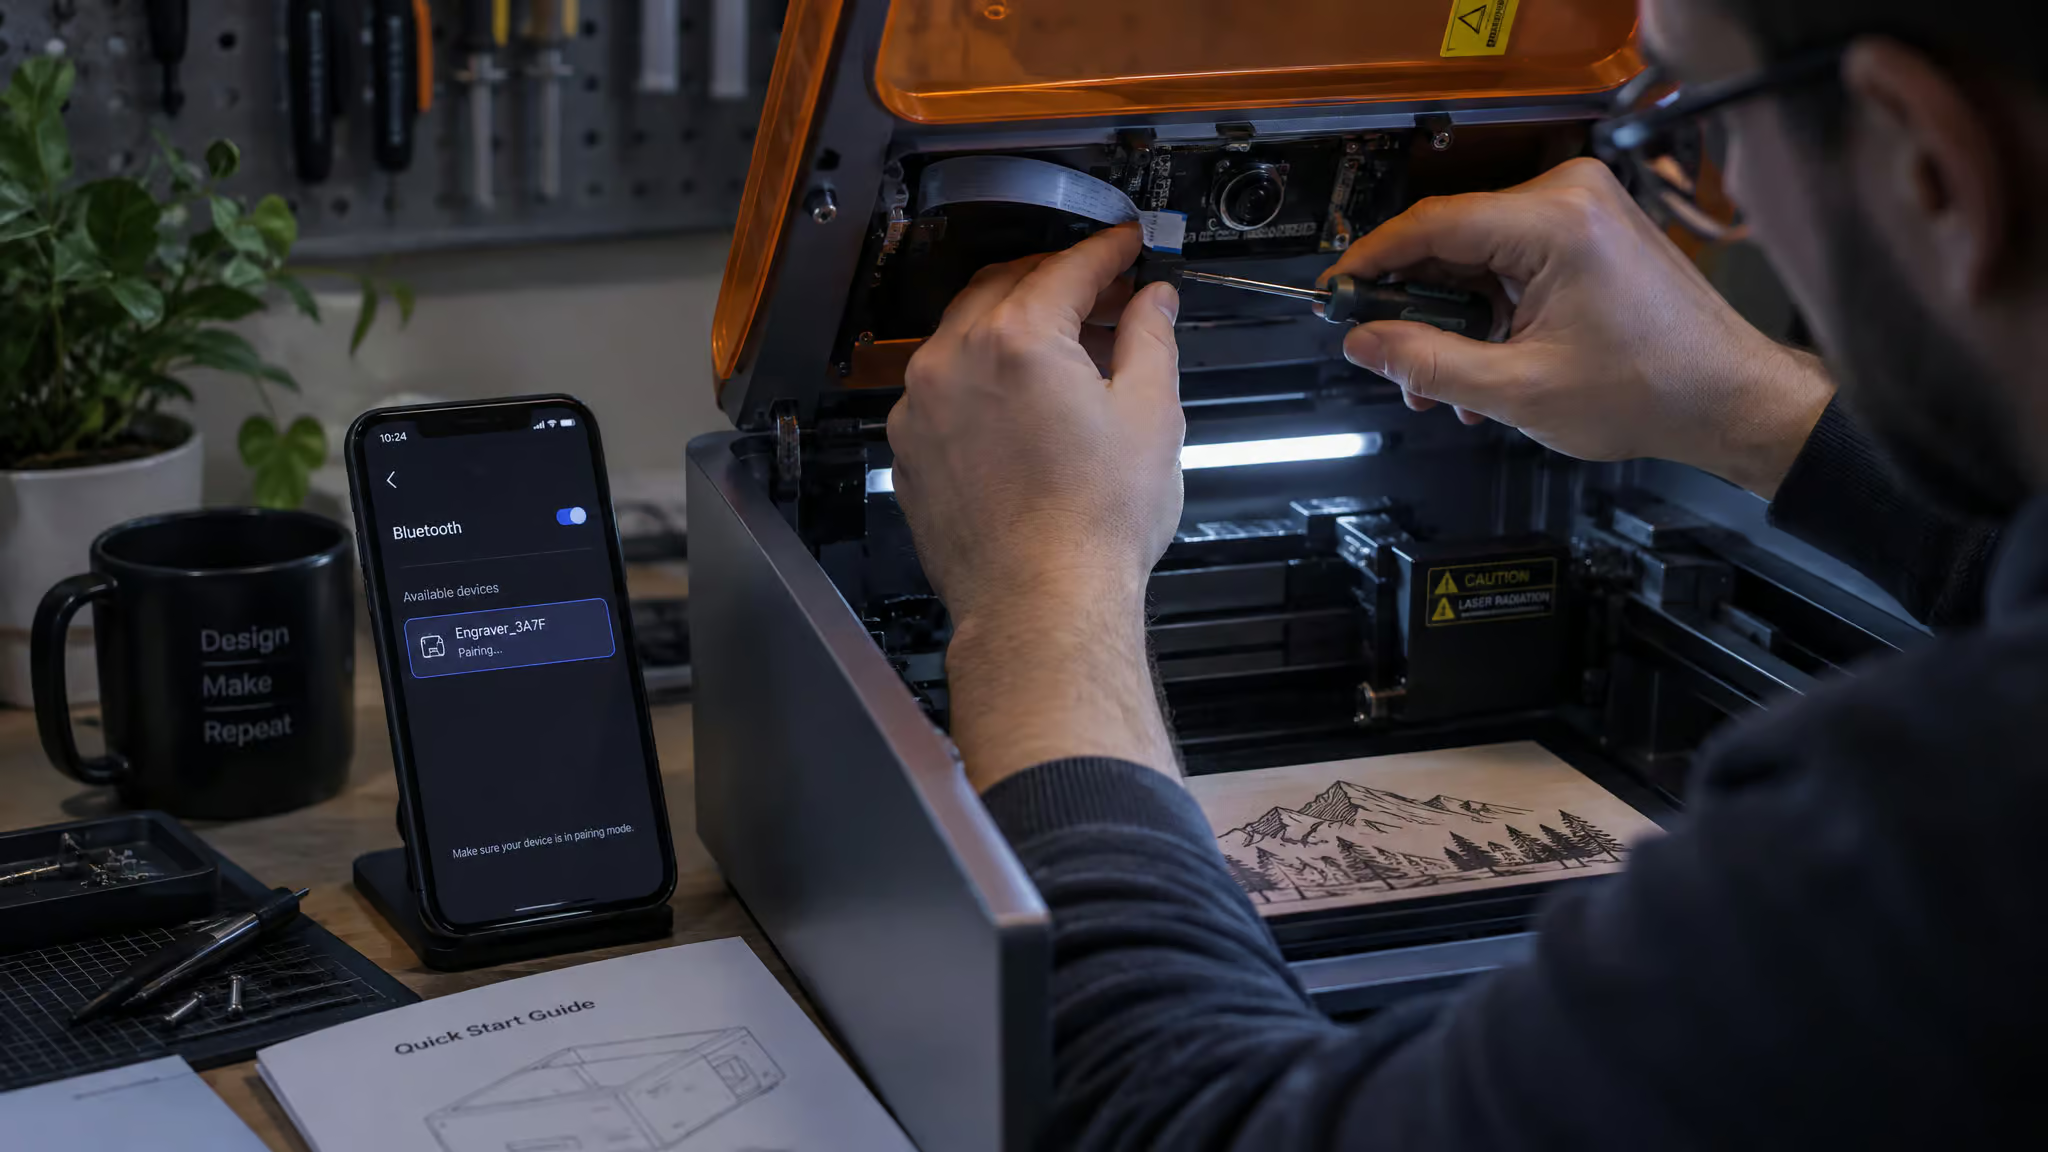
Setup runs through the phone app over Bluetooth, and the side pairing button is unlabelled. The network must be 2.4 GHz. The camera works only over Wi-Fi, never USB. None of this appears in the box materials. Then the big one: the camera cable in the lid shipped loose on Dehue’s unit, causing a month of ‘Disconnected’ errors through router band-splitting, re-pairing, firmware checks, and module swapping, until a Creality support call identified the fix: reseating the cable.
The documentation offers no connector-check hint anywhere. That’s a documented failure pattern on this one unit, not a claim about every Falcon A1C. But it’s the sharpest version of the distinction that defines this machine: beginner-friendly, not beginner-proof. The five-minute fix cost a month because nobody wrote it down.
Red flag: A month of camera disconnect errors on one unit traced back to a loose lid cable, not software, routers, or firmware.
What a 10 W diode actually cuts and engraves on wood
A 10 W diode like the Falcon A1C’s 455 nm module cuts 3 mm plywood comfortably and 5 mm barely, in a single pass. That’s the expectation to plan around.
The cut-through test Creality won’t publish
Creality publishes no cut-through figure, so Dehue ran his own. The basswood 5 mm preset (90% power, 300 mm/min, one pass) cut through 5 mm plywood, just barely. The 3 mm preset (90%, 450 mm/min) did not cut through. Treat these as one machine’s measured test rather than a universal diode-laser guarantee, but the rule of thumb is clean: 5 mm is the single-pass ceiling, 3 mm is comfortable. And before you commit to any machine, it pays to ask whether laser engraving is worth it, the deeper physics of how lasers interact with wood grain and species matters less than the profit-per-minute math and the 10-15 jobs rule.
Quick test: Before committing a project blank, confirm the sheet sits flat; a bowed board wreaks uneven tone no matter the wattage.
Photo engraving quality and the flatness lesson
Photo engraving on 5 mm plywood exceeded expectations: readable faces, real textures, genuine tonal range on a Mario Kart costume photo of two friends. Then the lesson: a bowed sheet produced uneven tone, because autofocus measures a single point. Flatness, not power, decides uniformity. Bench tips worth keeping: put scrap material underneath cloth, paper, and other thin materials since the beam goes through; for laser engraver settings for wood, hardwoods like maple and oak need more power to engrave deeper and cleaner, the tradeoff is power for detail, and softer woods burn quicker; slate engraves inversely to wood, leaving light grey on black, so wipe it with a damp cloth before judging the result; glass and stone need focus and speed care; paper and cardboard are the easiest materials but delicate.
The autofocus trap: which projects will physically jam this machine
If a project isn’t flat across the bed, this class of contact-pin autofocus will jam. A mechanical pin drops before each job, focus doesn’t carry over between jobs, and the software will start without warning if you skip focusing, which leaves soft, wide lines. After focusing, the head doesn’t lift; it travels at focused height. A mango wood bowl with its floor 15 mm below the rim jammed the head.
The machine was unharmed and the project was abandoned. So “can reach 148 mm of clearance” and “can engrave a bowl” are not the same claim: tall objects must sit flat across the bed or over the home corner.
The infrared module is a ‘dark things’ module, not a metal module
The 1.2 W infrared upgrade decision comes down to what colors you’ll mark, not the metal-module label on the product page.
What the 1064 nm module can and can’t mark
The IR module marks rather than cuts, it does nothing on wood, cork, cloth, or paper. Dark plastics are reportedly workable, but that stays unverified, so don’t count on it. The highlight reel: the best result of the whole review was a brushed stainless steel door cover engraved in about 30 minutes, with the software’s time estimate landing within 7 seconds of reality. Tiny wizardry. It also beat the 10 W diode on slate: a company logo was engraved onto black slate three times, with the drop shadow handled as three separate colour layers, and the infrared pass came out sharpest. The wavelength logic in one line: 455 nm blue diode for wood and light or coated surfaces, 1064 nm IR for metal and dark surfaces.
The marble color test that changes the upgrade decision
Polished white marble resisted both modules completely. Black marble engraved well with infrared. So color, not stone type, decides. If your project list is dark surfaces and metal, the IR module earns its spot. If it’s all light wood and paper, skip it and save the money.
Falcon Design Space in practice: where the software helps and where it bites
The free software is genuinely beginner-usable, but the best settings are not the defaults.
Presets: usually right, occasionally very wrong
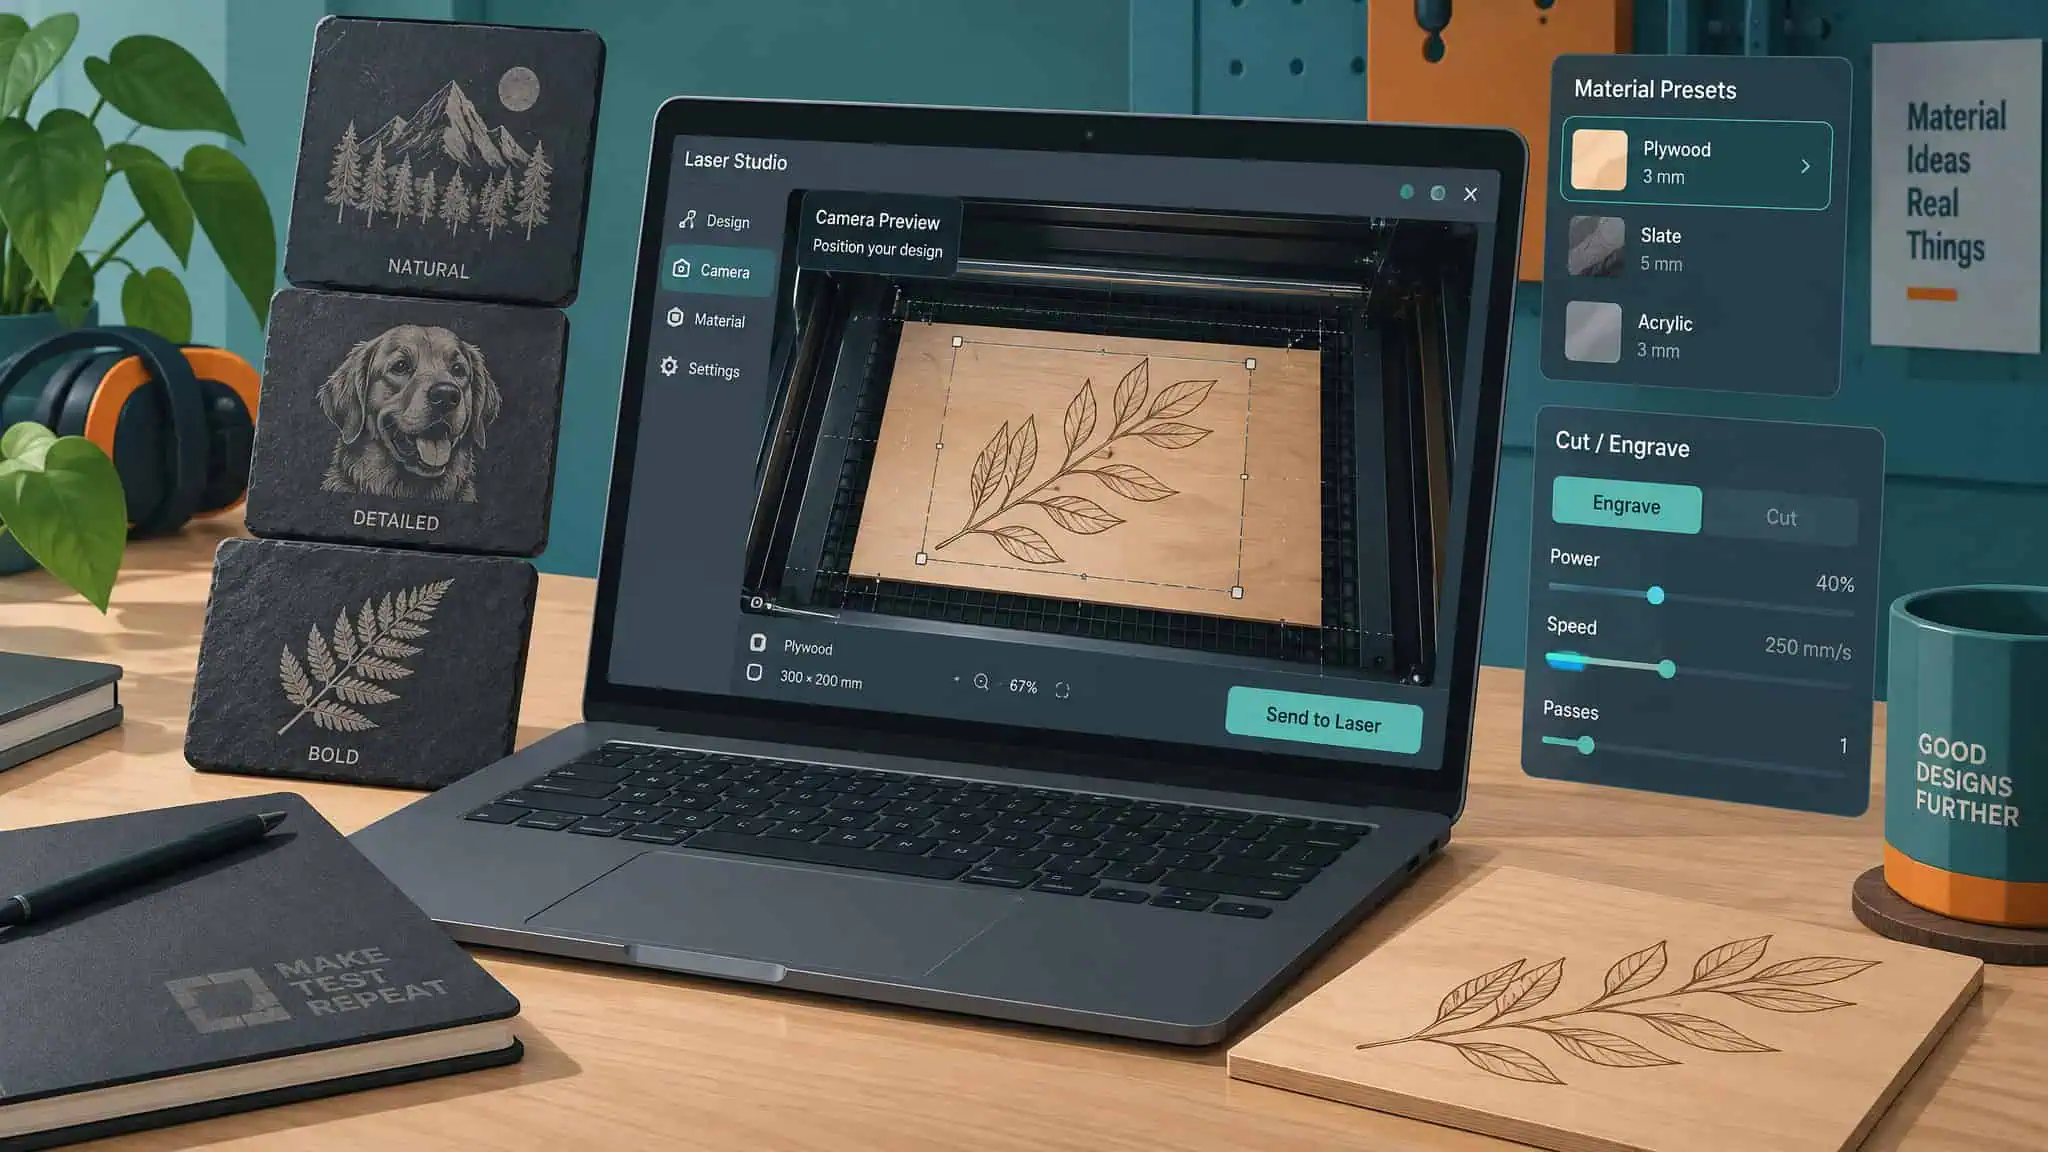
Falcon Design Space is free, runs on Mac and Windows, and has a phone app; TechRadar’s tester Alastair Jennings called it easy to use and well thought out. LightBurn is compatible (about $60/year per market data) but Dehue never needed it, and LaserGRBL exists in the wider ecosystem if you want an escape hatch. The presets are usually right and occasionally very wrong. There’s no cotton preset, so the denim preset at 35% power and 10,000 mm/min did the job. Stone runs 35% at 5,000 mm/min; the slate alternative is 55/35% at 4,000 mm/min.
The AI camera workflow and the white-background fix
What the camera actually does is photograph the bed and overlay your design on the live view, which makes placement accurate and reliable. Dehue called the $30 camera the easiest money he spent on the whole setup. The preview defaults to 15% brightness, which likely explains why TechRadar found the preview dark; a software setting masquerading as a hardware flaw. One real quirk: white-background designs hide the workpiece from the camera view until you run Image Tracing with Detail Restoration at maximum plus layer by colour. That same fix enabled the multi-layer drop-shadow engraving on slate.
LightBurn and the limits of the free app
The friction list, tight: time estimates run about 25% long (a 6:25 estimate took 10:45), no job history, poor library search (Craftseek’s web version handles that better), a macOS webcam permission prompt, and the autofocus rerun plus camera recalibration after every module swap.
Using a laser engraver safely at a home desk
- Yes, an enclosed Class 1 diode laser like the Falcon A1C is safe to run at a home desk, when the lid stays closed, venting goes outside or through a purifier, and the interlock is never bypassed.
- Class 1 means the enclosure contains the beam, so goggles aren’t required with the lid shut, though Dehue wore them anyway.
- Never bypass the interlock, and mind the fan: it stops with the laser right when the enclosure is at its smokiest, so leave the lid shut a minute or two after jobs.
- TechRadar’s tester hit the emergency stop, and the machine shut down completely as intended.
- Eyewear must match the module: blue-diode goggles don’t block 1064 nm infrared.
- The built-in fan cleared all smoke through the hose with none escaping, but it shuts off with the laser, right when the enclosure is at its smokiest, so leave the lid shut a minute or two after jobs.
- Ventilation to outside, or the separately sold Creality air purifier, is mandatory. The cautionary tale comes from the sibling machine: a Falcon A1 Pro reviewer filled his office with smoke on first use after mistaking the air assist pump for filtration. Air assist is debris control, not a filter.
- Never engrave PVC. The fumes are toxic.
- Power is a non-issue: hobbyist machines draw 30 to 50 W, roughly a PC, so no special wiring.
The real budget: what a ‘cheap’ laser actually costs
Under $500, the best beginner wood engraving machines are 5 to 10 W enclosed diode lasers, and the Falcon A1C runs $269 to $399 depending on configuration. Here’s the full ladder:
- $269 / €289: 5 W module, no camera. That’s the true entry point.
- +$30: the camera add-on.
- $299: 5 W plus camera.
- $339: 10 W plus camera, without the IR module. Worth flagging so you know the IR module is where the price jumps.
- $399 / €429: 10 W plus camera.
- $647 / €707 list for the tested kit (10 W + camera + 1.2 W IR), which was selling discounted at $519 / €629 at the time of the review.
These are prices at the time of the review, and sales are frequent enough that waiting can save real money.
Now the stuff the sticker doesn’t include. Ventilation is mandatory, so either a hose routed outside or the separately sold Creality purifier is part of the real cost. The box includes only three plywood squares, so starter blanks are a genuine line item. And three prerequisites decide whether the machine works at all in your space: a phone, a 2.4 GHz network, and a vent route. For market context, hobbyist machines draw 30 to 50 W like a PC, K40 CO2 units run $300 to $700, and desktop CO2 starts around $2,000, so the diode tier is the only one that fits a spare-room desk and a starter budget simultaneously.
The judgment that matters: the spec sheet ranks features in inverse order of daily satisfaction. The $30 camera matters more to daily use than the 5 W versus 10 W decision, and almost nothing else on the box comes close.
When to spend more: the upgrade path and the business ceiling
For a first laser, the cheaper A1C is enough unless one of its specific limits, the 150 x 150 mm bed, the 5 mm thickness ceiling, or the manual pin focus, is already a dealbreaker for your projects.
Upgrades mapped to the A1C’s specific limits
The Falcon A1 Pro (roughly $900 to $1,100, 20 W, 358 x 268 mm bed, automatic focus, QR-coded material presets, rotary option, removable bottom) removes the small bed and the pin focus. Different machine, don’t conflate the two. The Mecpow X4 Pro (sub-$1,000, 22 W, 410 x 400 mm) removes the bed limit. The xTool S1 40 W (sale price $1,699) removes the thickness limit, cutting 20 mm pine.
Beyond that tier, the xTool P2 is the best-overall CO2 benchmark, the Bambu Lab R1 ($2,499, 55 W CO2) and WeCreat Vision Pro serve business ambitions, and the Wainlux K10 (3 W, enclosed, USB-only) and TwoTrees TS2 (fiddly assembly, finicky iOS Wi-Fi) round out TechRadar’s budget picks. Tom’s Hardware’s roundup adds the Creality Falcon2 Pro 60W, the xTool F1 and xTool F2 Ultra, the Glowforge Aura, the Snapmaker Artisan, and the ComMarker B4 and Acmer P3 to the same second-hand pile. All of those come from roundups, second-hand evidence only; nobody at GeekExtreme or 3DPrinting.com tested them. If the wattage question is nagging at you, our take on the 20W versus 40W decision goes deeper.
Can a $400 diode laser make money?
One presenter grew a laser business from zero to over $6K/month using only a diode laser. That’s a record, not a promise. Profitability concentrates in personalised, corporate, and seasonal items, and powder-coated tumblers are the diode-workable metal project. The honest framing: a $400 diode laser is a business school, not a business.
The A1C’s small bed and slow speed cap production volume, but it teaches calibration, layers, and material settings on cheap mistakes. Rotary attachments and the A1 Pro’s removable bottom open up cylindrical work like bottles when you outgrow flat stock.
The buyer’s checklist: what no review measures, and the final verdict
Buy the Falcon A1C if it’s your first laser, you want an enclosed beam, you’re making small items on the 150 x 150 mm bed, you like camera-based placement, and you can route a hose outside. Don’t buy it if you need larger cuts, thicker than 5 mm plywood, or bowls and mugs with raised edges. You’ll also need a phone, a 2.4 GHz network, and a way to vent outside.
Questions to ask any brand before buying
The review’s own disclosed gaps double as your interrogation checklist for any brand: ask for a published cut-through thickness, noise and particulate numbers, and whether AI claims like material recognition and the 0.1 mm positioning figure were ever independently verified. Untested on this machine: batch engraving, phone-app job running, router-off operation, LightBurn performance, deliberate safety-sensor triggers, and IR on brass. Dehue’s wishlist, an autofocus warning, a head that lifts after focusing, a quick-start note covering the phone app, a camera troubleshooting entry, a starter material pack, a fan run-on timer, and job history, is the same list worth demanding from anyone selling you a first laser.
Frequently Asked Questions
What machine do you use to engrave wood?
For a home workspace, a 5 to 10 W enclosed diode laser is the sweet spot — it’s the cheapest entry point and gives the best photo detail on wood because its beam spot is smaller than a CO2’s. CO2 machines cut faster and handle acrylic and glass, but they cost more, need more maintenance and space, and may require a 20 A circuit. For metal and dark surfaces, a 1064 nm infrared module is the specialist tool.
Is the Creality Falcon A1C a good first laser engraver for someone with no experience?
Yes, when you want an enclosed machine for small personal projects. The strongest evidence is a documented day-one result: a complete beginner cut a 3 mm plywood keychain with his daughter’s name on it, no tutorials consulted. It arrives fully assembled, is Class 1 enclosed, and the free software is genuinely beginner-usable — just expect some undocumented setup friction, like a 2.4 GHz-only network and camera that works only over Wi-Fi.
Diode laser vs CO2 laser for a beginner engraving wood: which should you start with?
Start with a diode. Diodes run $200 to $1,000+ and fit a spare-room desk, while CO2 machines start around $2,000 for desktop units and demand more maintenance, space, and possibly a 20 A circuit. The reframe that settles it: a diode’s limits show up in your projects, a CO2’s limits show up in how you live around the machine — and lifestyle limits disqualify first when the machine shares your living space.
What can a 10W diode laser actually cut and engrave on wood, and where are its limits?
A 10 W diode cuts 3 mm plywood comfortably and 5 mm barely in a single pass — that’s the thickness ceiling to plan around. It engraves photo detail on wood better than a CO2 thanks to a smaller beam spot, but it can’t cut clear acrylic, bare metal, or uncoated glass, and it’s slow. Hardwoods like maple and oak need more power for deeper, cleaner engraving, while softer woods burn quicker.
