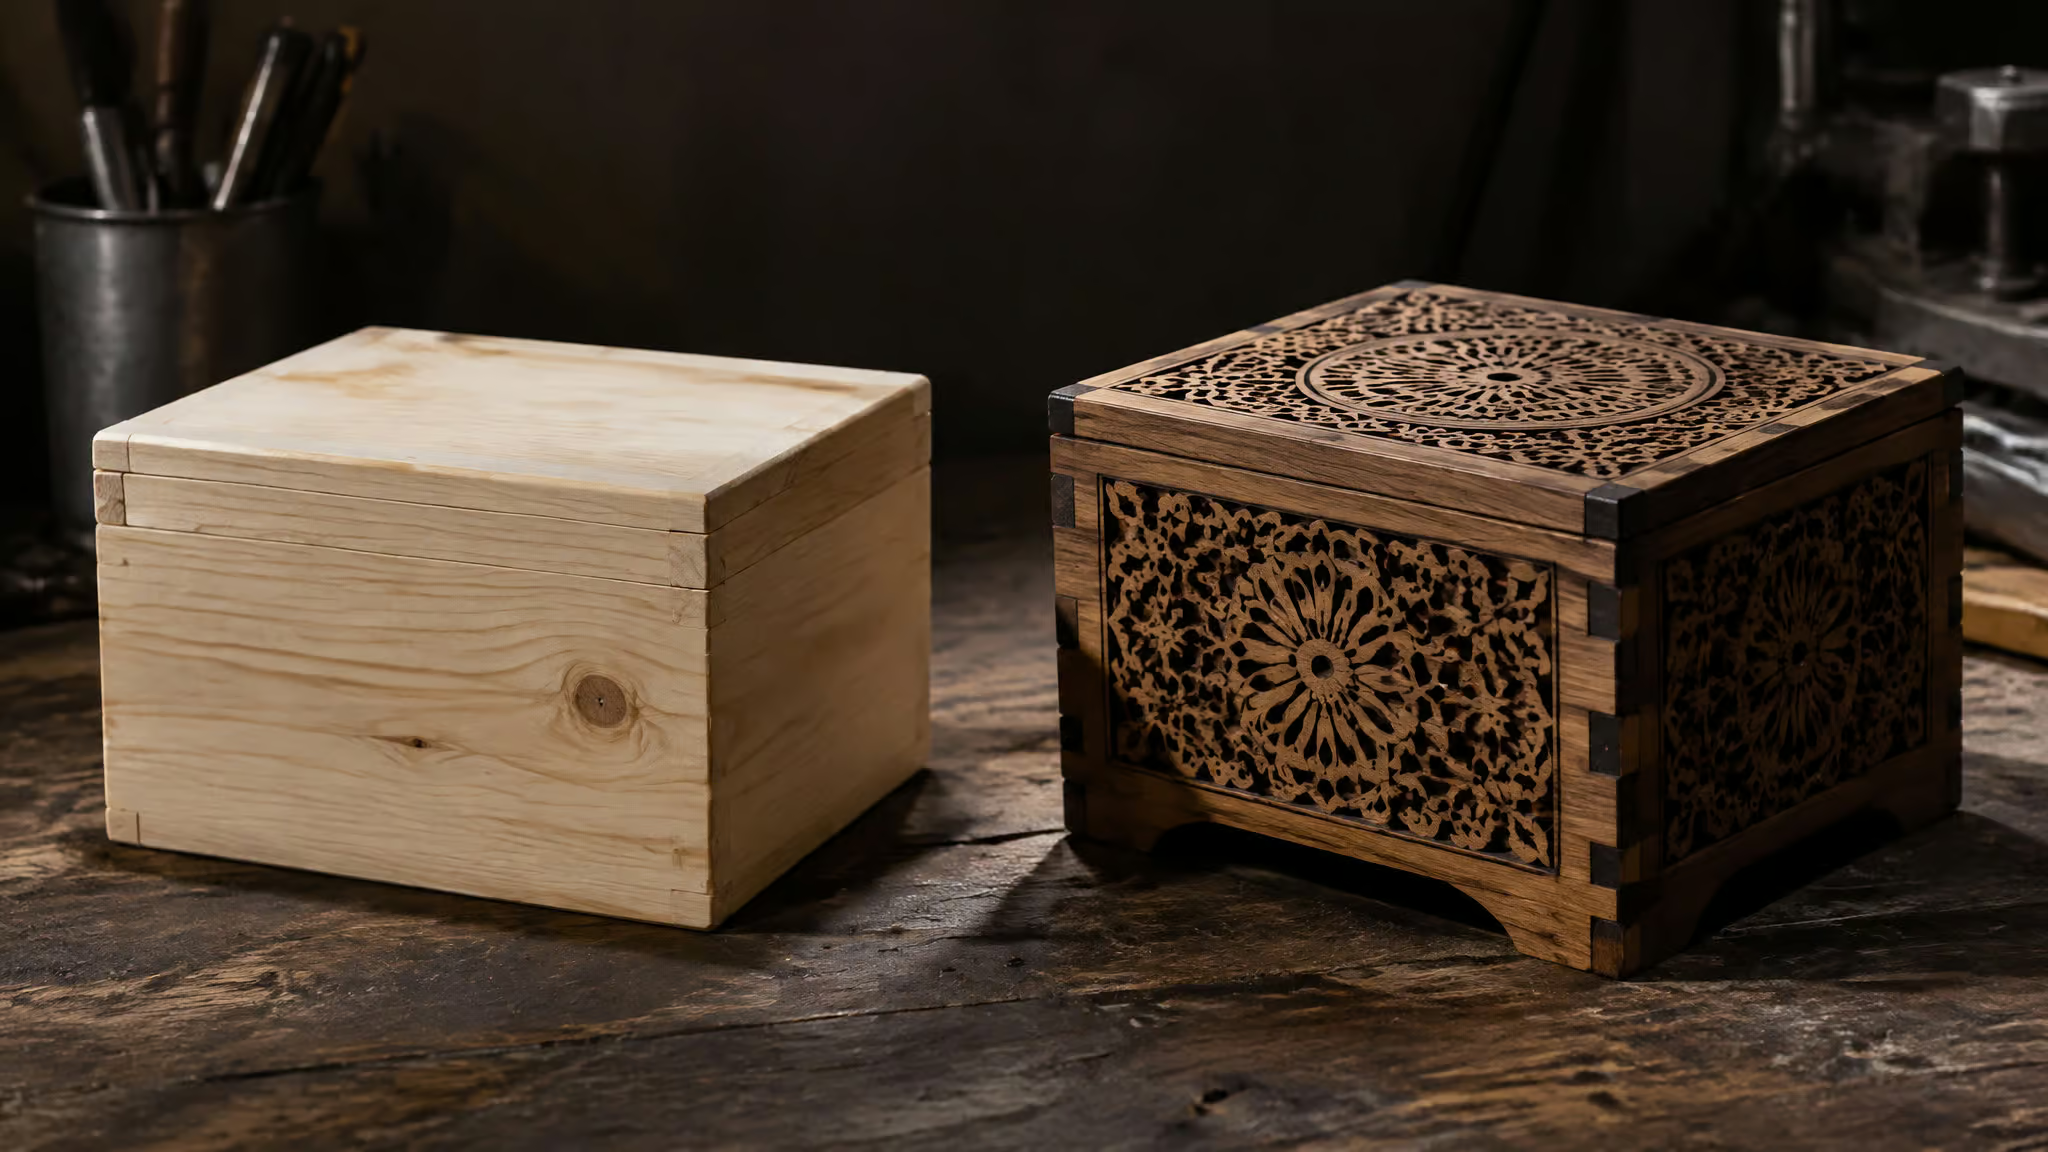
Two wooden boxes can come off the exact same laser bed looking like they belong in different tax brackets. One is a pre-made pine blank pulled off a Dollar Tree shelf for $1.25 and zapped with a monogram in three minutes. The other starts as a flat sheet of wood and folds into an unusual, premium drink-packaging box that looks like boutique architectural joinery. Neither result depends on some proprietary “laser clean cut system” sold in a shiny marketing deck.
What actually separates crisp, soot-free edges from charred firewood is setup discipline: dialing in focal distance with a focus stick, clamping the sheet flat so it can’t shift a millimeter, prepping clean vector layers, and staining in the right sequence. In the Instructables wooden box build and Leen Laser’s shop runs, that discipline scales from a single $1.25 blank to an 80-box beekeeping order leaving roughly $560 after direct production costs. Push that to a 150-box run and it nets about $1,350 before labor, shipping, and taxes.
Key Takeaways
Engraving two $1.25 Dollar Tree pine blanks and one $1.50 blank ($4 total material cost) and selling the trio for $20 yields a $16 profit contribution, while cutting 80 custom boxes from 3 mm sheet stock leaves roughly $560 after direct production cost.
Well-fitted interlocking finger joints hold a laser-cut box together without glue when kerf width and 3 mm sheet thickness stay consistent, leaving superglue or wood glue as optional backup insurance.
Staining pine or plywood with golden oak, guntock, or mahogany requires about 2 hours of drying time before engraving, whereas post-assembly staining keeps the box interior natural and requires sanding away glue squeeze-out first.
Table of Contents
The full workflow, step by step
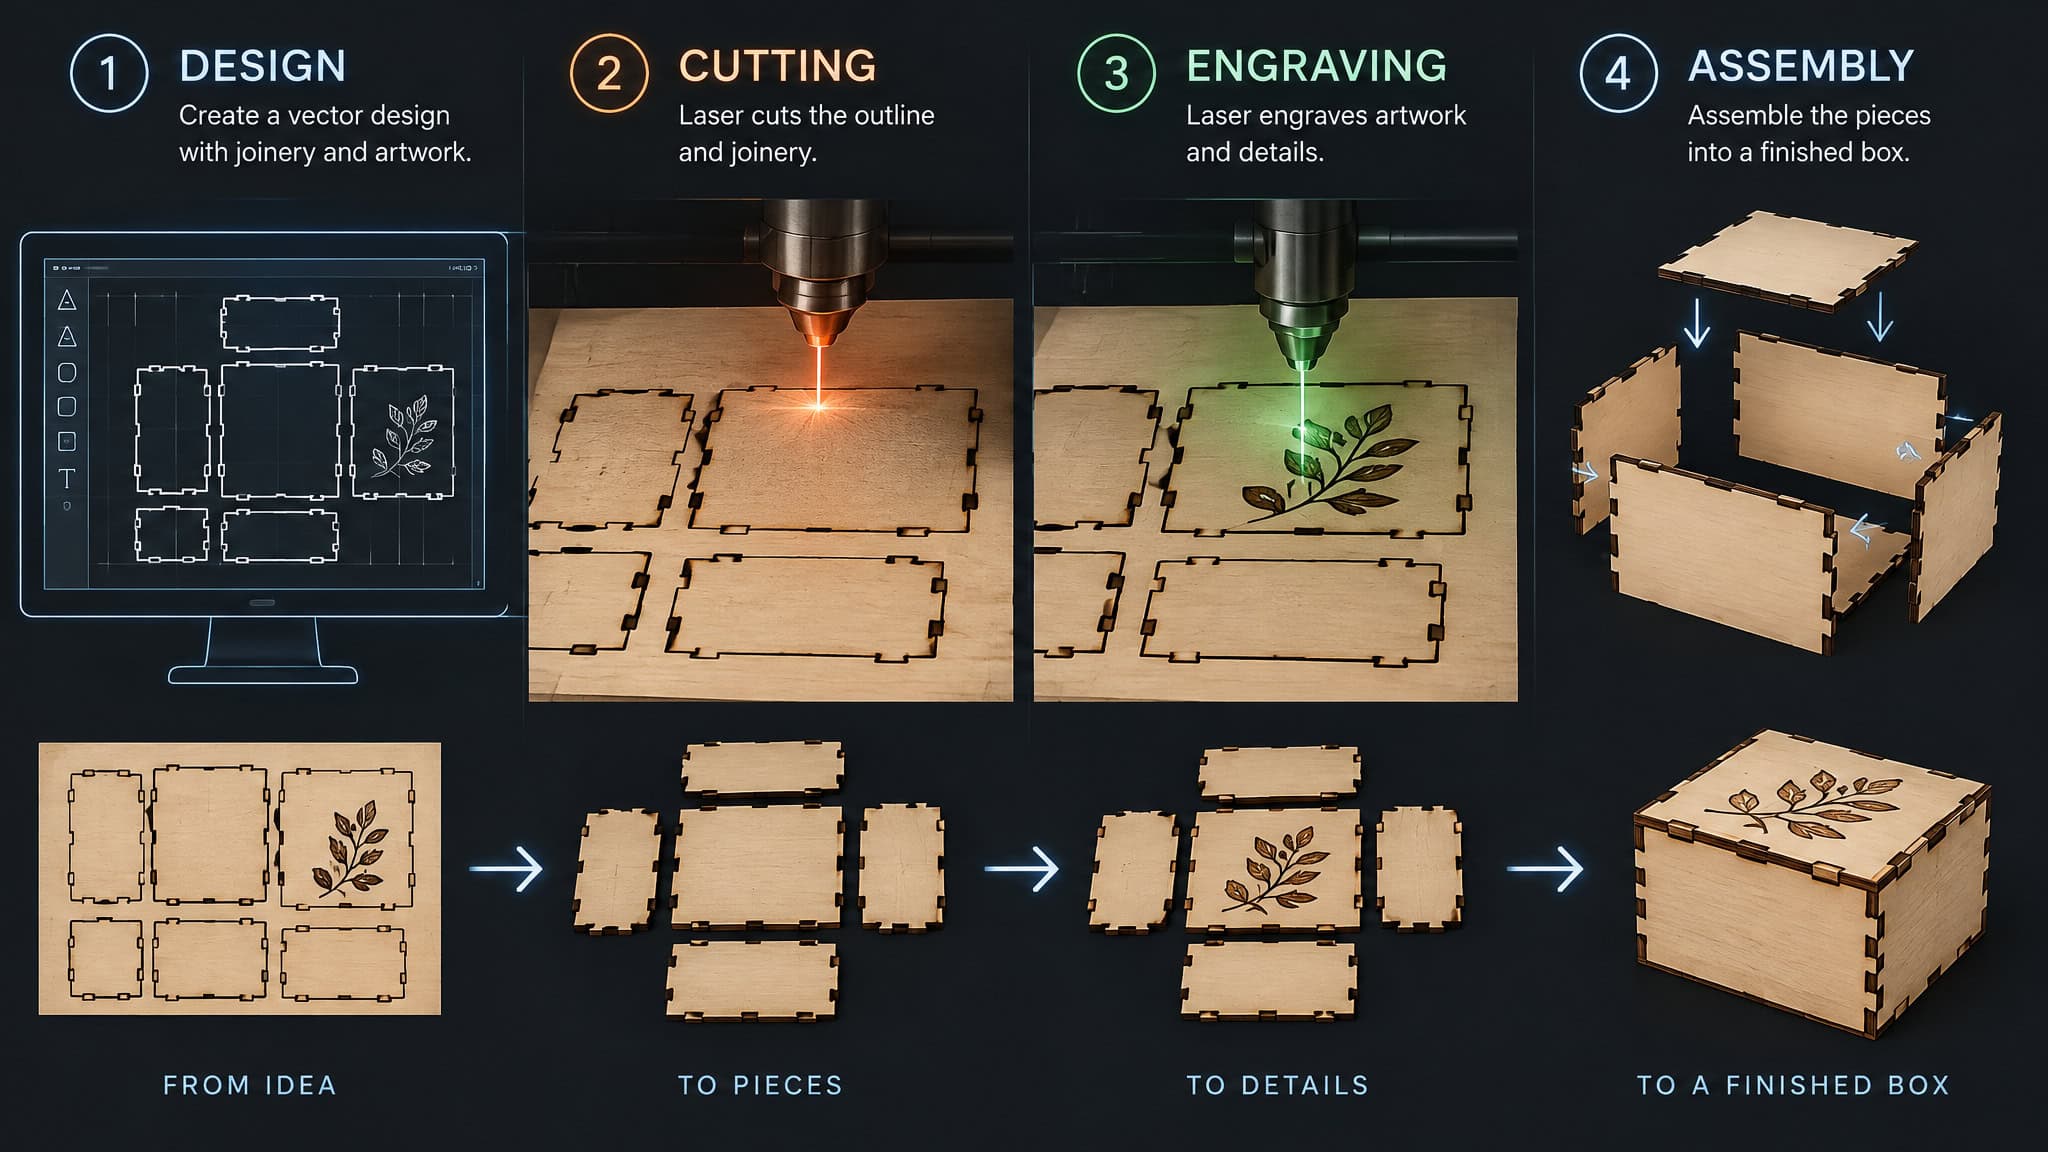
Making a laser-engraved wooden box is a four-stage process of designing the structure, cutting the panels, engraving the surface artwork, and assembling the interlocking parts, provided the sheet stays flat and the beam is properly focused. That holds true for quick lid engravings and full sheet-stock builds alike. In the Instructables wooden box workflow and Leen Laser’s shop runs, nine disciplined checkpoints prevent scorched edges and wasted boards far better than any overhyped “laser clean cut system.”
- Choose the build route and stock thickness: grab a pre-made pine box for quick surface personalization, or select 3 mm MDF or 3 mm plywood (stepping up to 4 mm material for larger boxes or heavy structural parts) for a full cut.
- Lightly sand the wood surface before cutting or finishing so stain and paint lay down smoothly.
- Source or generate the vector box template and surface graphics in Gamba or Canva.
- Prep the file in LightBurn or LaserMaker by assigning distinct color-coded layers for engraving versus cutting, scaling the drawing to its exact final physical dimensions, and cropping out all empty white space.
- Lay the wooden sheet flat on the honeycomb worktable, aligned and firmly secured so it can’t shift mid-job.
- Set the focal distance via auto-focus, or manually bring the laser head down to meet the board against a properly angled focus stick, then click Frame or Border to preview the footprint on the board.
- Run the laser in a well-ventilated workspace while staying next to the machine to watch for heavy smoke, small flame-ups, or material movement.
- Pop the cut panels out carefully and dry-fit the interlocking tabs into their slots, adding a dab of glue only if you want extra insurance.
- Apply wood stain with a small brush, buff off any leftover stain using a dry cloth, and seal with butcher block oil or accent paint.
Every piece of gear in that working kit earns its spot on the bench by saving time, ruined stock, or cash. Using 3 mm MDF or 3 mm plywood keeps per-unit material costs low and cuts fast, while 4 mm stock prevents larger spans from bowing. A honeycomb worktable protects the underside of the wood from flashback scorch marks and lets smoke clear the cut channel, which cuts down post-burn sanding. LightBurn and LaserMaker prevent ruined sheets by locking cut lines and engrave passes onto separate layers and driving the Frame preview before the tube or diode fires.
Gamba and Canva speed up graphic layout without requiring complex CAD skills. Finally, keeping golden oak, guntock (gunstock), mahogany, and rustic oak stains alongside butcher block oil, gold paint, superglue or wood glue, and clamps, rubber bands, or masking tape lets you turn raw panels into retail-ready gifts without waiting on specialty hardware.
Engrave a pre-made box or cut your own
Pre-made $1.25 Dollar Tree pine blanks skip fabrication for fast resale margins. Cutting 3 mm sheet stock takes more bed time, but it gives you exact dimensions and custom joinery.
Engraving a $1.25 pre-made pine box
In Leen Laser’s demonstrated workflow, a quick Dollar Tree haul, one pine box at $1.50 and two smaller ones at $1.25 each, though retail shelf prices can vary, puts three blanks on the workbench for a $4 total investment. Engraving that trio and selling the set for $20 brings in $16 in profit contribution. A customer can buy chocolates anywhere, but housing them in a wooden box engraved with a name, date, or message turns a disposable treat into a keepsake that holds jewelry or small items long after the candy is gone. Better yet, swapping the engraving file adapts the exact same pine blank for weddings, anniversaries, or birthdays with zero new product development.
Cutting the box from 3 mm sheet stock
Fabricating from 3 mm MDF or plywood takes longer on the laser bed and requires full layout prep, but it unlocks custom product footprints, snug removable lids, and heart-shaped or bottle-sized geometries that dollar-store shelves never carry.
Wood choice: 3 mm MDF, plywood, or pine
Comparing 3 mm MDF, 3 mm plywood, and solid pine comes down to repeatable production packaging versus organic grain character: 3 mm MDF and plywood deliver consistent, low-cost cuts for bulk runs, whereas solid pine demands careful stain management to handle uneven absorption. Picking the right wood for laser engraved boxes is really an advance decision on how you plan to finish the piece and what your unit math looks like.
mm MDF vs 3 mm plywood for production work
For bulk orders like the 80-box beekeeping packaging run, 3 mm MDF and 3 mm plywood are the workhorse sheets (with 4 mm reserved for larger builds). Both cut cleanly, hold strong interlocking tolerances, make a removable lid feel genuinely premium, and keep direct material costs around $2 per box. MDF has no grain, so it works well left completely natural for clean product packaging or sprayed with several light coats of paint with full drying time between coats. Plywood costs roughly the same per unit but takes wood stain beautifully, bringing out rich grain lines that make a simple 3 mm panel look like pricey hardwood.
How solid pine behaves differently
Solid pine blanks behave like the wild west under a brush. Pine drinks up stain unevenly and exaggerates dark grain stripes. On pine, golden oak stain cures into a rich, darker brown, while guntock (gunstock) pulls distinctly orange-red, a useful contrast to keep in mind when matching client branding across different projects.
Interlocking joints that fit without glue
Interlocking finger joints hold a 3 mm laser-cut box together without glue as long as the cut kerf matches the sheet thickness tightly enough for each tab to seat snugly in its slot. The joints carry the structural load on their own, so glue stays optional backup insurance:
- Kerf width: The laser beam vaporizes a tiny channel of wood as it cuts; accounting for that removed width keeps slots from coming out loose and wobbly.
- Material thickness tolerance: Nominal 3 mm plywood or MDF varies slightly from sheet to sheet. Check your stock with calipers so the tabs sit flush.
- Edge quality: Crisp, focused cuts slide together smoothly without charred buildup blocking the corners.
- Auxiliary glue use: A small dab of superglue or wood glue is only needed when you want extra insurance against rough handling.
Getting kerf and finger joints right on the first test cut does more than save you from sticky fingers. Clean, exact edges are the dividing line between a box that looks like a weekend hobby project and one that looks commercially manufactured, and they save hours of post-cut cleanup while preventing cracked tabs during dry-fitting.
Free box templates, generators, and Canva art
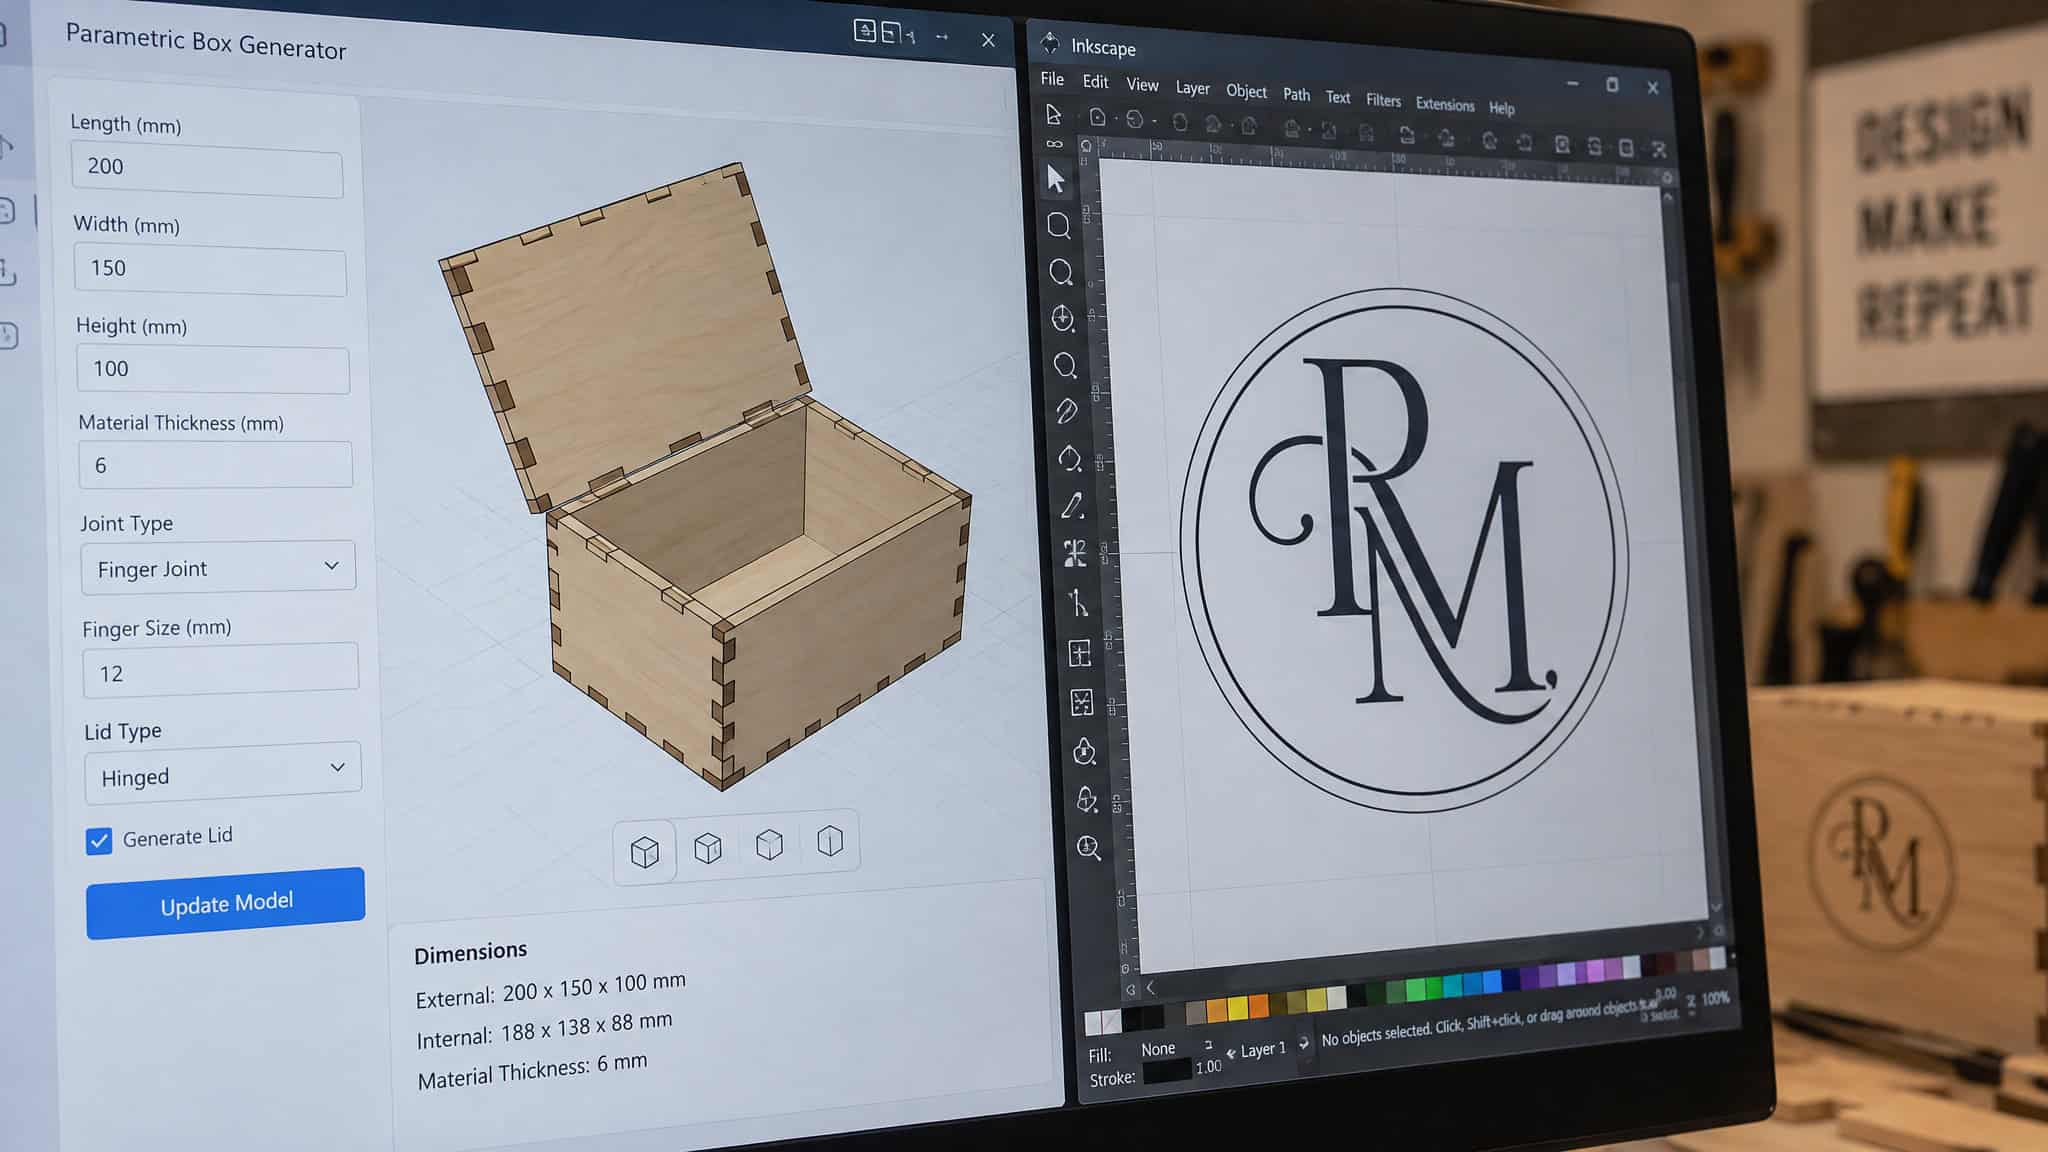
Free laser-cut box templates and parametric box generators are browser-based tools and downloadable vector files that output cut-ready SVG or DXF box plans tailored to your exact wood thickness and finger-joint dimensions. Instead of drafting dozens of interlocking tabs by hand in CAD, makers generate the structural layout automatically and pair those cut lines with surface art pulled from Canva or Gamba:
- Parametric box generators: Free web tools like Boxes.py, MakerCase, and Box Designer take your target width, height, depth, and 3 mm or 4 mm material thickness and calculate all the interlocking finger joints automatically.
- Ready-made SVG and DXF downloads: Repositories of free laser cut box templates give you pre-tested gift, heart-shaped, and drink-packaging layouts ready to drop straight into LightBurn or LaserMaker.
- Surface graphic tools: Gamba and Canva handle the decorative lid and side-panel engraving files using built-in vector elements and borders.
Box generators and free SVG/DXF templates
When a client asks for a custom bottle box or a small honey-jar crate, running a parametric laser cut box generator lets you dial in the exact interior clearance and export a clean vector layout in seconds. After export, pick SVG or DXF box files based on what your controller imports without scrambling scale or layers.
Sourcing engraving art in Canva or Gamba
You don’t need to be an illustrator to make the lid look expensive. In the demonstrated Gamba and Canva workflow, start by opening a blank whiteboard and clicking into the Elements tab. If you’re hunting for a monogram, say, the letter “V” for a spouse’s or client’s name, type “V” into the search bar, filter the results to Graphics, and use Magic Recommendations to surface matching styles. One quirk to watch for: searching a single letter often returns the initial already attached to extra floral or geometric flourishes. You can either crop out those attached extras or grab a plain initial and frame it with a separate decorative border.
Motifs that engrave well
Celtic borders, framed monogram initials, trees, and birds engrave cleanly on wooden gift boxes because solid, high-contrast vector graphics burn at a uniform depth without losing fine lines to the wood grain. Exploring different laser engraving design ideas for wooden boxes lets you keep one reliable box template on the bench and simply swap the surface graphic to spin up heart-shaped Valentine’s Day boxes, wedding keepsakes, anniversary gifts, or high-end drink packaging.
File prep in LightBurn and LaserMaker
Preparing engraving files so the laser only processes the design area requires tightly cropping all empty white space around the graphic and assigning separate color-coded layers for cutting and engraving before sending the job to the bed. LightBurn, LaserMaker, and stock machine controllers all handle layer color-coding and dimensional scaling the same way here. Open the software that talks natively to your laser and run this four-point pre-flight check:
- Crop out all white space: Lasers don’t ignore blank margins in an image file; if you leave empty white space around a monogram, the head will waste time sweeping back and forth over empty air or offset your placement.
- Color-code your layers: Assign one layer color to surface engraving and a second color to through-cutting so the software knows which paths to score and which to sever.
- Scale to final physical dimensions: Lock in the exact millimeter width and height in software, never eyeball panel sizes on the canvas.
- Verify design elements: Double-check which decorative flourishes to keep or delete before hitting start.
Machine setup, focus, and running the job
Laser engraver settings for cutting and engraving 3 mm wood are a combination of machine-specific power and speed values paired with three universal physical controls: securing the sheet flat on a honeycomb bed, setting exact focal distance, and verifying alignment with a Frame preview. Because wattage and tube or diode efficiency vary across machines, raw speed and power percentages must be tuned to your hardware, while physical bed setup follows a strict mechanical checklist:
- Flat honeycomb mounting: Lay the 3 mm or 4 mm sheet flat on the honeycomb worktable, aligned and clamped down so airflow clears the cut and the board can’t budge.
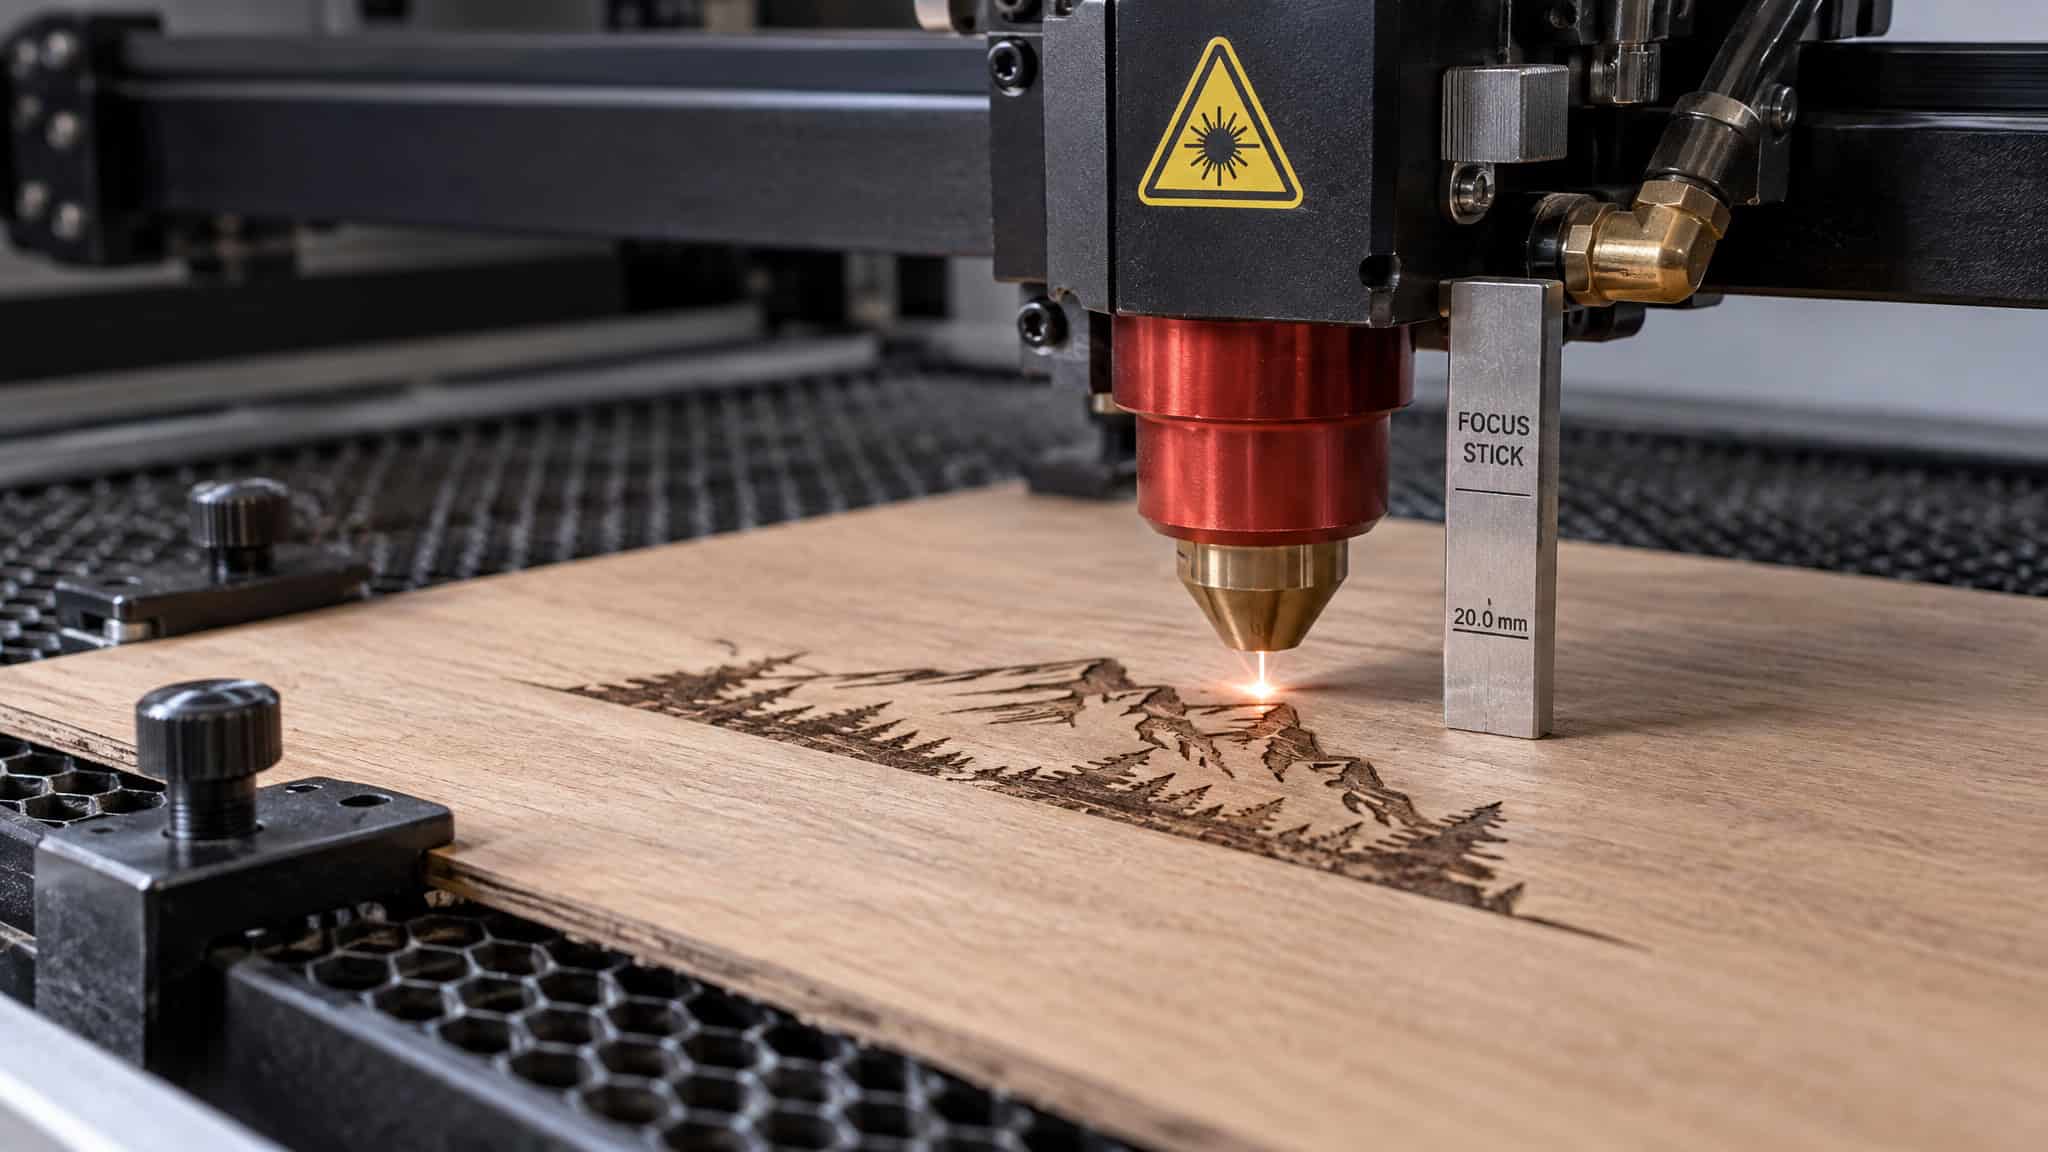
- Focal distance calibration: Trigger auto-focus, or manually drop the laser head down to rest against the focus stick on the wood surface at the proper angle.
- Frame/Border verification: Click Frame or Border in software to watch the laser head trace the exact bounding box over the wood before firing the beam.
Securing the sheet and checking focus
Precision dies the split second a sheet shifts on the honeycomb table, and an out-of-focus beam turns a crisp vector line into a wide, fuzzy trough. Always double-check focus and run the Frame preview before cutting to confirm the design clears the edges of your board.
Monitoring the job for clean edges
Burnt, sooty box edges happen when the beam loses focus, smoke lingers in the cut channel, or small flare-ups go unwatched. You don’t need a proprietary “clean cut” add-on to fix them; tight focus, active ventilation, and staying at the machine handle it. As the laser works through each section, the box takes shape visibly with clean, polished edges and no surface burn marks, provided you run in a well-ventilated room and stay right beside the bed to catch heavy smoke, small flame-ups, or material movement immediately.
Assembly: dry-fit first, glue as backup
Pop the cut panels out of the sheet gently and dry-fit the interlocking tabs into their slots before touching any glue. Well-cut tabs lock into a solid build on their own. On boxes with a removable lid, use the outer ring strictly as a dry positioning guide, don’t glue it to the lid, while the smaller inner piece keeps the lid from sliding off the finished box. If you want extra reinforcement, add a tiny dab of superglue or wood glue and hold the assembly with clamps, rubber bands, or masking tape until dry.
Stain before or after engraving?
Stain wood before laser engraving when working with pine or plywood that needs deep contrast and even coverage across every panel, and stain after assembly when you want a natural, unfinished interior with a warm exterior tone.
Stain first, engrave second
For pine blanks and plywood panels finished in golden oak, guntock (gunstock), or mahogany, brush a tiny amount of stain onto every single piece with a small brush, rub off the unabsorbed finish using a dry rag, and allow roughly 2 hours of drying time before putting the stock under the laser. Because soft pine absorbs stain unevenly, building up two light coats prevents the blotchy dark patches you get from slathering on one heavy coat.
Finishing after assembly
Assemble multi-piece rustic oak or mahogany sheet-cut boxes before staining so you can coat the exterior walls while leaving the inside bare and natural. If you used glue on the joints, sand off any dried squeeze-out around the corners first; glue blocks stain absorption and leaves bright, uneven scars under the finish. Once the stain cures, seal the wood with butcher block oil and finish, or add custom gold paint accents for high-end presentation pieces.
What the boxes cost and earn
Making a laser-engraved wooden box to sell costs $1.25 to $1.50 per unit when buying pre-made Dollar Tree pine blanks for quick retail sets, and roughly $2 in direct material cost per box when cutting 3 mm MDF or plywood for bulk business orders. The pre-made blank route fits makers testing local gift markets with minimal setup: as documented in Leen Laser’s financial examples, buying two $1.25 boxes and one $1.50 box ($4 total) and selling the engraved trio for $20 leaves $16 in direct profit contribution. Cutting from sheet stock fits B2B packaging runs: an 80-box order for a beekeeping business at roughly $2 per box in direct cost generated about $560 in profit before labor, shipping, and taxes, while a larger 150-box order left roughly $1,350 on the same pre-labor basis.
Landing those bulk local orders requires walking physical packaging samples containing the prospect’s actual product directly into small businesses rather than waiting on crowded online marketplaces. Cut a batch of sharp samples, small honey crates, heart-shaped gift boxes, and custom drink packaging, and walk them straight into beekeeping businesses, local chocolate shops, florists, gift shops, wine shops, and distilleries. Put their bottle or product inside the box during the demo and let the presentation do the talking. You aren’t selling raw 3 mm wood; you’re selling a complete gift upgrade that makes their product look more valuable on the shelf and brings in repeat box orders every time they restock.
Presentation as part of the product
Treating the build process itself as high-craft visual entertainment turns a simple wooden box into a piece of marketing theater that commands premium attention. Look at animator omozoc‘s (often spelled Omozooc) viral YouTube stop-motion build of a hand-built wooden tissue box, which Grace Ebert profiled for Colossal in late July 2022 (the 20th): shooting 791 individual photos across 22 days, omozoc made a bare fingertip appear to slice, bevel, and assemble solid wood with no visible tools or fasteners. Even though that project is pure hand-tool animation rather than laser cutting, the lesson translates directly to the laser bench, when your process video and in-person bottle demo look effortless, customers pay for the craft, not the plywood.
Frequently Asked Questions
Where can I get a laser cut wooden box template as a free SVG or DXF download?
Browser-based parametric generators like Boxes.py, MakerCase, and Box Designer let you plug in your target dimensions and 3 mm or 4 mm sheet thickness to export custom-fitted SVG or DXF layouts for free. You can also pull pre-tested heart, gift, and bottle box files from free template repositories, then add surface graphics and borders using Canva or Gamba.
How much does it cost to make a laser engraved wooden box to sell?
Pre-made Dollar Tree pine blanks cost $1.25 to $1.50 apiece (though retail shelf prices can vary), letting you turn $4 worth of three boxes into a $20 retail set with $16 in profit contribution. Cutting custom boxes from 3 mm MDF or plywood runs about $2 per box in direct material costs, which leaves roughly $560 on an 80-box order or $1,350 on a 150-box run before labor, shipping, and taxes.
