There’s a moment every laser owner knows. You find a settings chart, some kind soul’s forum post or the vendor’s own PDF, you punch in the numbers, and fifteen minutes later you’re staring at a workpiece that’s either scorched black or barely scratched. The chart didn’t come with an asterisk, but it should have: every settings table is a hypothesis for one specific machine. The wattage, the optics, the age of the tube or diode, even the humidity in the room, all of it shifts the answer.
So the real deliverable here isn’t a magic number set. It’s two things at once: validated starting numbers for your laser class, and the tuning method that turns any chart into a working config. We’ll walk the five core parameters and how they actually interact, why presets fail on other people’s machines, the test-grid method that replaces guessing, and reference tables for diodes and CO2 machines. That’s the GeekExtreme approach to laser engraver settings: numbers you can trust as a starting line, plus the method that gets you the rest of the way.
Key Takeaways
Settings don’t transfer between machines: a CNX Software reviewer found the Falcon A1 Pro’s recommended 10mm basswood settings (100mm/m, 100% power, 1 pass) burned the wood and failed to cut, while 600 mm/m at 85% power with 7 passes worked in 10 minutes 15 seconds. When you retune from a burned preset, change only one parameter at a time and keep each adjustment to 10% or less, testing on scrap before committing the good material.
A power/speed test grid (a 4×4 or 5×5 matrix on scrap) beats guessing, where random picks across 10-100% power and 1-600 mm/s have worse odds than flipping heads 16 times in a row.
DPI is a runtime decision: 1200 DPI takes twice as long as 600 DPI, and most 72-300 DPI source images gain nothing above 600.
Table of Contents
Load the material preset before touching any numbers
Even if you already know your speed and power, load the material preset first, because presets can carry hidden settings that change how the job runs. The preset is a bundle, not two numbers, and the same logic applies as with any generated config: you don’t hand-edit what the system built for you until you’ve seen what’s in it.
The path is quick:
- Open the material list on the right side of the software.
- Select your material.
- Click Load.
- Hop back to the General tab to adjust speed and power from there.
Despite the wall of settings staring at you, most jobs only touch speed, power, and piece size. It’s like a synth with 200 controls where you’ll actually use three knobs. That’s also why you load the preset even when you already know your speed and power: a preset can quietly bring along other settings that affect the job, so skipping it means numbers you didn’t choose are still in play. And one caveat worth internalizing early: neither PPLD nor Epilog guarantees any preset will work or avoid material damage, so testing on scrap is the default expectation, not the exception. No warranty covers your material.
The five core settings and how they interact
The five core laser engraving settings are speed, power, DPI/resolution, passes, and focus, and none of them behave like independent dials. The interaction is the whole game. Power is a percentage of your module’s maximum, which means the number is a lie until you know the base: 50% on a 20W diode is roughly 10W actual, but 50% on a 5W module is about 2.5W. Same setting, four times the energy.
The tradeoff worth internalizing is energy per unit length. High power plus low speed drives deeper cuts, with more charring and a wider kerf. Low power plus high speed gives light surface marks and crisp detail. Medium on both axes is the safe starting point. And watch the scales: engraving and cutting speeds aren’t comparable, so a “high” cutting speed might mean just 10%.
Passes repeat the toolpath, which is how you cut thick stock without scorching it. Focus sets the smallest spot size, which means sharper detail and a narrower kerf. Air assist blows debris and smoke out of the beam path. The full list runs longer: speed, power, Hz, passes, air assist, Z-offset (controlled defocusing), and resolution. More power means darker, deeper engraving, but adjust in small increments, because everything multiplies together.
Why every settings table is only a starting point
Settings don’t port across machines, or even across two locations of the same machine, because laser wattage, speed, and age all vary, and no conversion algorithm exists. Trial and error on scrap is the only path. Your tuned config is machine-local, like firmware calibrations that don’t survive a transplant.
There’s a documented case that makes this vivid. In a CNX Software review of the Creality Falcon A1 Pro, the vendor-recommended settings for 10mm basswood (100 mm/m, 100% power, 1 pass) burned the wood and failed to cut through, leaving the reviewer to extract the piece manually with a cutter, chisel, and hammer. The working settings turned out to be 600 mm/m at 85% power with 7 passes, taking 10 minutes 15 seconds total. That’s the classic pattern with thick stock: the single-pass, full-power recommendation scorches and stalls, and a slower multi-pass approach cuts cleanly. The vendor wasn’t lying; the physics just doesn’t generalize.
And the drift is real even on your own bench. Laser age changes output, wavelength absorption matters (clear acrylic simply passes diode wavelengths through), plywood glue content varies by brand, and dust or resin on the optics quietly cuts effective power while blurring the spot. Every table in this article is a hypothesis. Validate it.
Dial in any material: the test-grid method
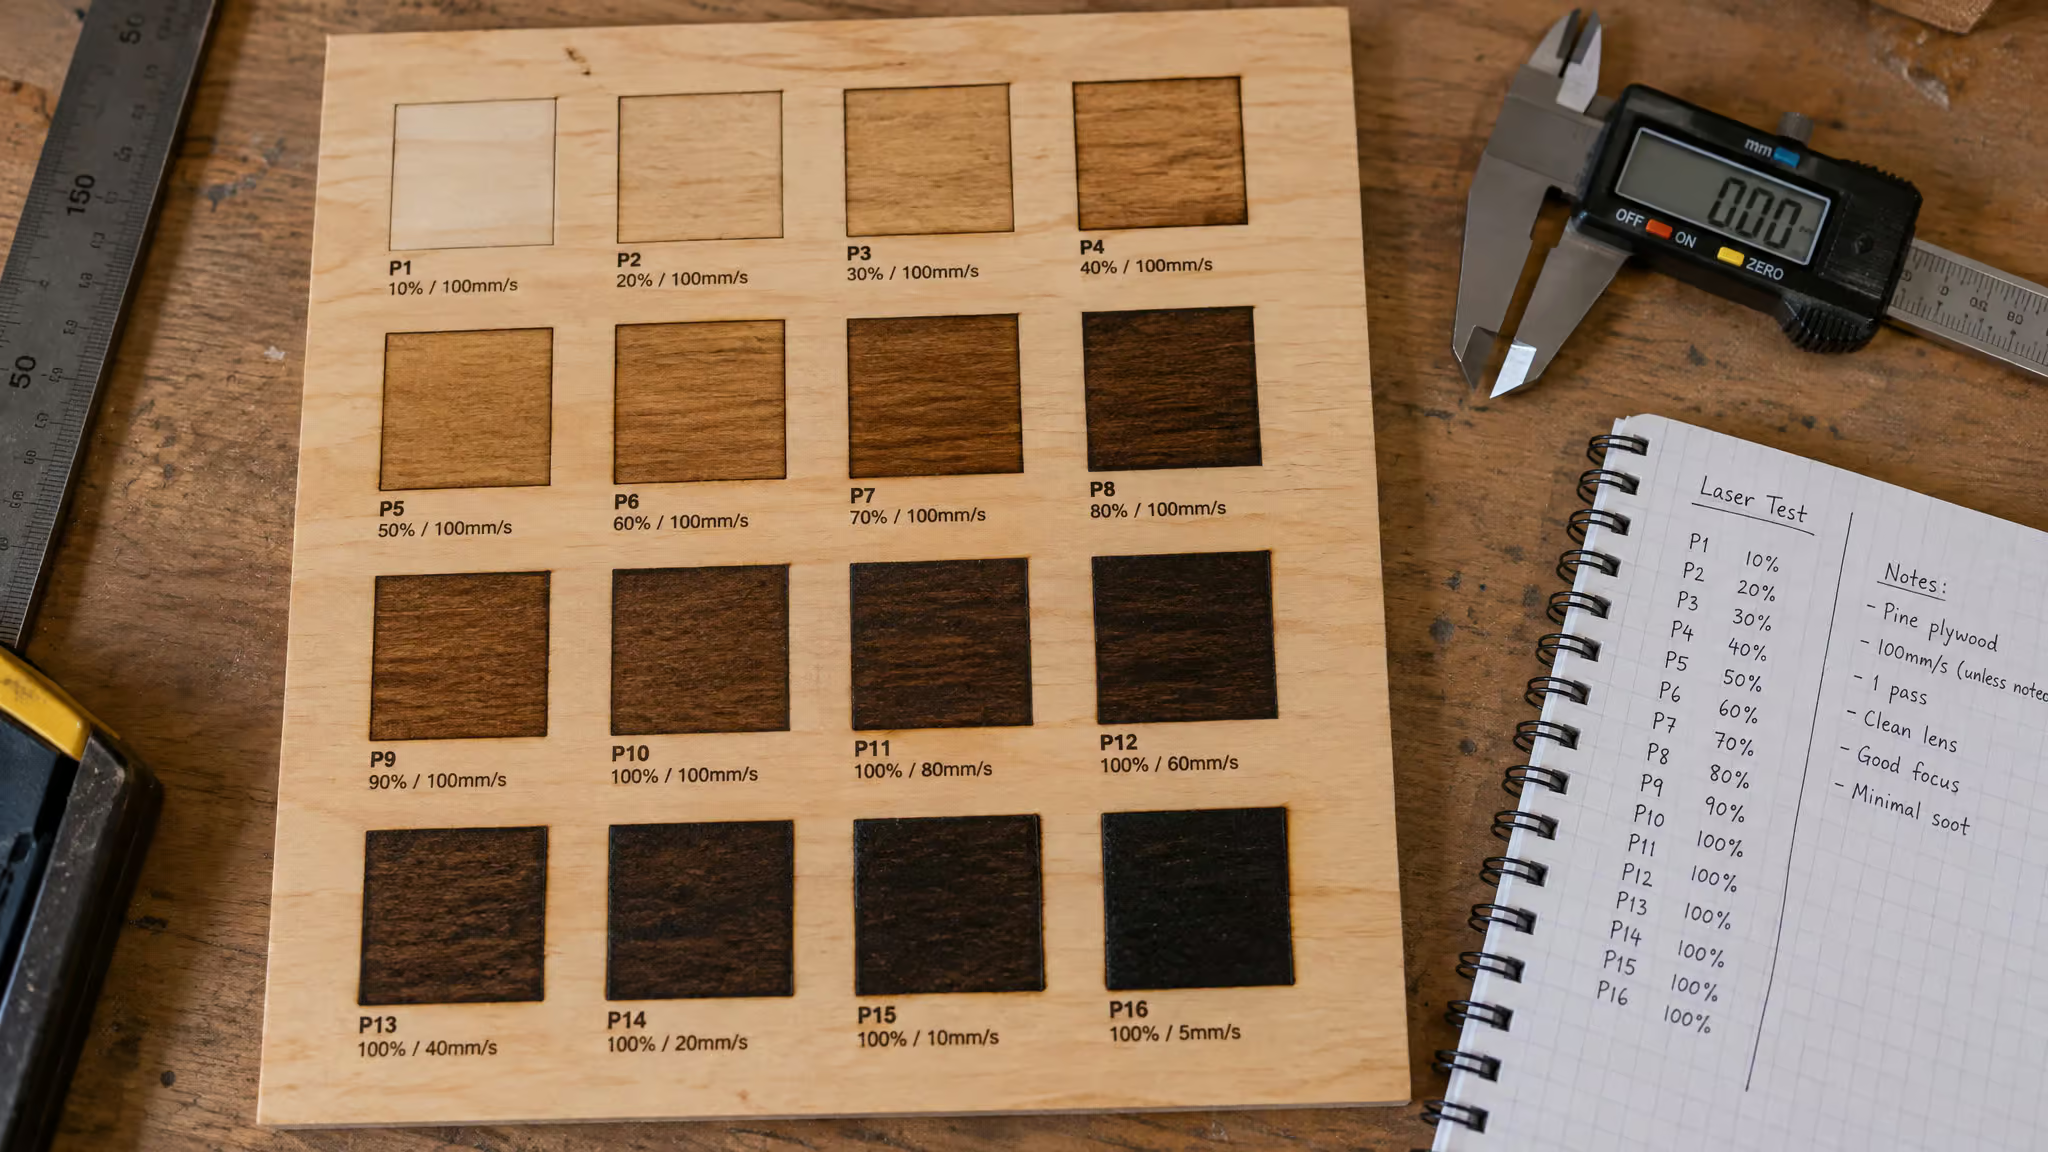
A power and speed test grid works by engraving a small matrix of combinations on scrap and narrowing the range iteratively, and it’s the single most useful habit in laser tuning. Random guessing is mathematically hopeless: across power 10-100% and speed 1-600 mm/s, your odds of landing a good combo are worse than flipping heads 16 times in a row. Binary search on a physical machine beats that every time.
- Run a 4×4 or 5×5 matrix, or a 10-15 square grid, on scrap of your actual material.
- Change only one parameter per test. Power first, in 5-10% increments, never more than 10% per change, then speed. It’s basic debugging discipline: change one thing, rerun, observe.
- For unknown materials, start low power and high speed. Probe before you commit, like testing an API with a read-only call.
- Iterate: run defaults, discard the non-working extremes, tighten the range over about 3 runs, and pick a working midpoint. In one demo from the Steve Makes Everything video, this narrowed LightBurn defaults down to roughly 300 mm/s at about 75% power on matte 3mm acrylic with a 60W MOPA Galvo laser.
- Keep the best tile as a physical reference and save the validated settings to a material library.
Quick test: Change one parameter per run — power in 5-10% steps first, then speed — and tighten the grid over about three runs.
The cost of skipping this is real. In that same video, a viewer described wasting $20-25 worth of tumblers because he didn’t know where to start with material tests. Trotec-style reusable artifacts help too: a grayscale matrix maps color intensity across settings in one pass, and a cutting template (a rectangle with two differently rounded corners, started at 5-10% higher speed and lower power) exposes corner behavior. Never run 100% power continuously, though, because max throttle shortens the diode’s lifespan, and that’s the part you can’t easily replace.
DPI and resolution: the runtime-quality tradeoff
DPI for laser engraving runs from 75 to 1200 and applies only to raster images; vector lines have no traditional resolution. The tradeoff is runtime, and it’s roughly linear: 1200 DPI takes twice as long as 600 DPI for the same image. Most source images are made at 72-300 DPI, so upscaling to 600 helps, but there’s little improvement between 600 and 1200, so running above 600 is usually wasted time unless your source was actually made at 1200 DPI.
Here’s the part that saves you half a job: most source images are made at 72-300 DPI. Upscaling to 600 helps significantly, but there’s little improvement between 600 and 1200, so running above 600 is usually wasted time unless your source was actually made at 1200 DPI. Cap the render where extra pixels stop buying anything.
The invisible trap is in your vector file. Lines thicker than 0.025mm in Inkscape or .001pt in Illustrator get silently converted to raster and engraved instead of cut, and the threshold shifts with DPI. Keep cut lines at minimum thickness, or the software changes your job type without telling you.
Diode laser settings by wattage (5W / 10W / 20W+)
A 10-watt diode engraves 3mm plywood at 30-50% power at 3000-5000 mm/min and cuts it at 90-100% power at around 600 mm/min with 2-3 passes. That’s the tier most hobbyists land in, and the full printable speed/power reference chart below extends the same logic up and down the wattage ladder. Every value here is a starting point for test-grid validation, never a guaranteed setting.
| Material | 5W | 10W | 20W+ |
|---|---|---|---|
| 3mm plywood, engrave | 40-60% @ 2000-3000 | 30-50% @ 3000-5000 | 20-40% @ 5000-8000 |
| 3mm plywood, cut | 100% @ ~300, 3-4 passes | 90-100% @ ~600, 2-3 passes | 80-100% @ ~1000, 1-2 passes |
| Opaque 3mm acrylic, cut | 100% @ ~200, 6-8 passes | ~400, 3-4 passes | ~600, 2-3 passes |
| Leather 2-3mm, engrave | 20-40% @ 3000-4000 | ||
| Leather 2-3mm, cut | 100% @ ~400, 3 passes | 80-100% @ ~600, 2 passes | 70-90% @ ~800, 1-2 passes |
| Paper/cardboard, engrave | 5-15% @ 5000-8000 | ||
| Paper/cardboard, cut | 20-30% @ ~3000 | 15-25% @ ~4000, 1 pass | 10-20% @ ~5000, 1 pass |
| Anodized/coated metal marking | 10-20% @ 2000-3000 | 10-15% @ 4000-5000 | 5-10% @ 6000-8000 |
Notice how low the paper powers are. That’s the flammability showing. And marking metal is a low-power, high-speed game entirely: you’re marking the coating, not the metal, since diodes can’t cut metal and bare aluminum won’t mark well without coatings.
The capability ladder: 5W engraves wood, leather, and paper and cuts about 2-3mm of soft wood with multiple passes. 10W is the balanced tier at roughly 3-5mm of plywood or acrylic. 20W+ engraves faster at lower power and cuts up to about 8-10mm of wood with passes. Two hard limits: clear acrylic is unreliable on diodes because the wavelength passes straight through (use opaque cast acrylic, or engraved painted/blackened surfaces), and for the basswood question specifically, the CNX Software Falcon A1 Pro testing found 4mm basswood line engraving came out cleanest at 5,000-6,000 mm/m at 30% power, though remember that grain, hardness, and moisture all shift those ideal wood settings. If you’re hunting a diode speed and power chart PDF, this chart plus a test grid is the honest version of that download.
CO2 reference tables: Epilog Helix 75W and Zing 60W
The Epilog Helix 75W and Zing 60W suggested-settings tables are material-by-material starting values for those specific CO2 machines, published on PPLD’s public laser settings page, and they should never be averaged with each other or with any other machine. Bench-tested, machine-local: treat both tables that way, every time you open them.
Epilog Helix 75W:
| Material | DPI | Speed | Power |
|---|---|---|---|
| Acrylic, photo | 300 | 90s | 40p |
| Acrylic, text/clipart | 300 | 90s | 60p |
| Acrylic, text/clipart | 600 | 90s | 55p |
| Acrylic cut, 1/8″ | 5000f | 25s | 100p |
| Acrylic cut, 1/4″ | 15s | 100p | |
| Acrylic cut, 3/8″ | 5s | 100p | |
| Alumamark | 300 | 90s | 20p |
| Alumamark | 600 | 90s | 10p |
| Anodized aluminum, text | 600 | 90s | 40p |
| Glass | 300 | 35s | 100p |
| Leather cut, 1/8″ | 500f | 30s | 60p |
| Stainless steel with Cermark | 600 | 45s | 100p |
| Rubber stamps | 400 | 50s | 100p |
Epilog Zing 60W:
| Material | DPI | Speed | Power |
|---|---|---|---|
| Wood, photo | 600 | 60s | 100p |
| Wood cut, 1/8″ | 500f | 45s | 100p |
| Wood cut, 1/4″ | 25s | 100p | |
| Wood cut, 3/8″ | 12s | 100p | |
| Acrylic, photo | 500 | 90s | 15p |
| Acrylic, text/clipart | 400 | 90s | 30p |
| Acrylic, text/clipart | 500 | 90s | 20p |
| Acrylic cut, 1/8″ | 5000f | 50s | 100p |
| Acrylic cut, 1/4″ | 30s | 100p | |
| Alumamark | 400 | 90s | 35p |
| Alumamark | 500 | 90s | 30p |
| Anodized aluminum, text | 500 | 90s | 30p |
| Glass | 400 | 35s | 100p |
| Leather cut, 1/8″ | 500f | 80s | 50p |
| Stainless steel with Cermark | 500 | 35s | 100p |
The deltas prove the whole thesis concretely: the Helix cuts 1/8″ acrylic at 25s, the Zing needs 50s. Same material, same nominal job, different machine, nearly double the time. The full PPLD coverage list runs wider than these highlighted rows: acrylic, Alumamark, anodized aluminum, cork, cotton, denim, fleece, glass, leather, mat board, marble, painted brass, plastics, rubber stamps, stainless steel with Cermark, and twill.
The embedded technique notes are where these tables get fun. For fabric and glass, change the graphic to 80% gray and use the Jarvis dithering pattern, and every fabric needs a swatch test first. Glass gets the hack that sounds ridiculous and works: a thin sheet of dish soap on the surface diffuses heat while etching. Yes, dish soap, on glass, and it helps. Mat board is engraved bottom-up.
Every slab of marble is different, so on a never-used piece, start low and increase power on a second run finding your own optimum is really what test runs are about. Plastics settings generalize across many plastics, including phone cases, which is a rare case where tuning actually transfers.
Acrylic has its own nerdery moment: cast and extruded look identical and behave differently. Cast frosts when engraved, extruded cuts with smooth edges, so pick by job type. Moving the focus about.030″ (.762mm) closer to the lens improves edge quality on 1/4″+ acrylic, and two passes may cut thicker material. For wood, multiple passes can cut thicker stock, just readjust focus between passes, stepping the focal point progressively deeper toward the middle of the cut. If you’ve been searching for a CO2 speed and power chart PDF, these two tables are the real answer: machine-scoped, vendor-tested, and still requiring your own scrap test.
Fiber and galvo lasers: frequency, Q pulse, and metal
Diodes need only power and speed tuning, but fiber and galvo lasers add frequency and Q pulse as job-specific dimensions, plus interval adjustment for line density and brightness. Different laser class, more knobs. A worked example from iterative grid narrowing on matte black acrylic landed at frequency ~20 and Q pulse 130, which is one machine’s saved library entry, not a universal value.
The metal boundary matters here: only high-power fiber lasers work aluminium, stainless steel, brass, and copper, and coated metals may need specialized settings. One warning from the ComMarker B6 MOPA (20W and 30W models): pushing fiber power too hard can bend the metal. And the decisive acrylic difference ties the whole article together: a diode can’t cut clear acrylic because the wavelength passes through, a CO2 handles clear acrylic and glass, and fiber handles metal. Which class you own changes which settings even apply.
Software workflow traps that masquerade as settings problems
A misaligned or half-disappearing job is often a workflow error, not a power/speed problem. Layout software like Inkscape or Adobe Illustrator supports both raster and vector, and jobs can be resent separately by type without changing the layout or the power/speed settings. Honestly kind of elegant.
The traps:
- If only Raster or only Vector is selected, the other data type is silently ignored. The data’s there; the machine just skips it. Classic “why did half my job disappear” bug.
- Combined mode does one pass of all rastering, then one pass of all vector cutting, like a build system batching tasks by type.
- Run all rastering before cutting. The piece is loose the second you cut it out, so engrave first or chase it around the bed.
- Piece size needs to be in inches and match the Workspace/Artboard, or engravings and cuts won’t line up. The classic coordinate-mismatch bug, and the fix protects the piece you’d otherwise waste.
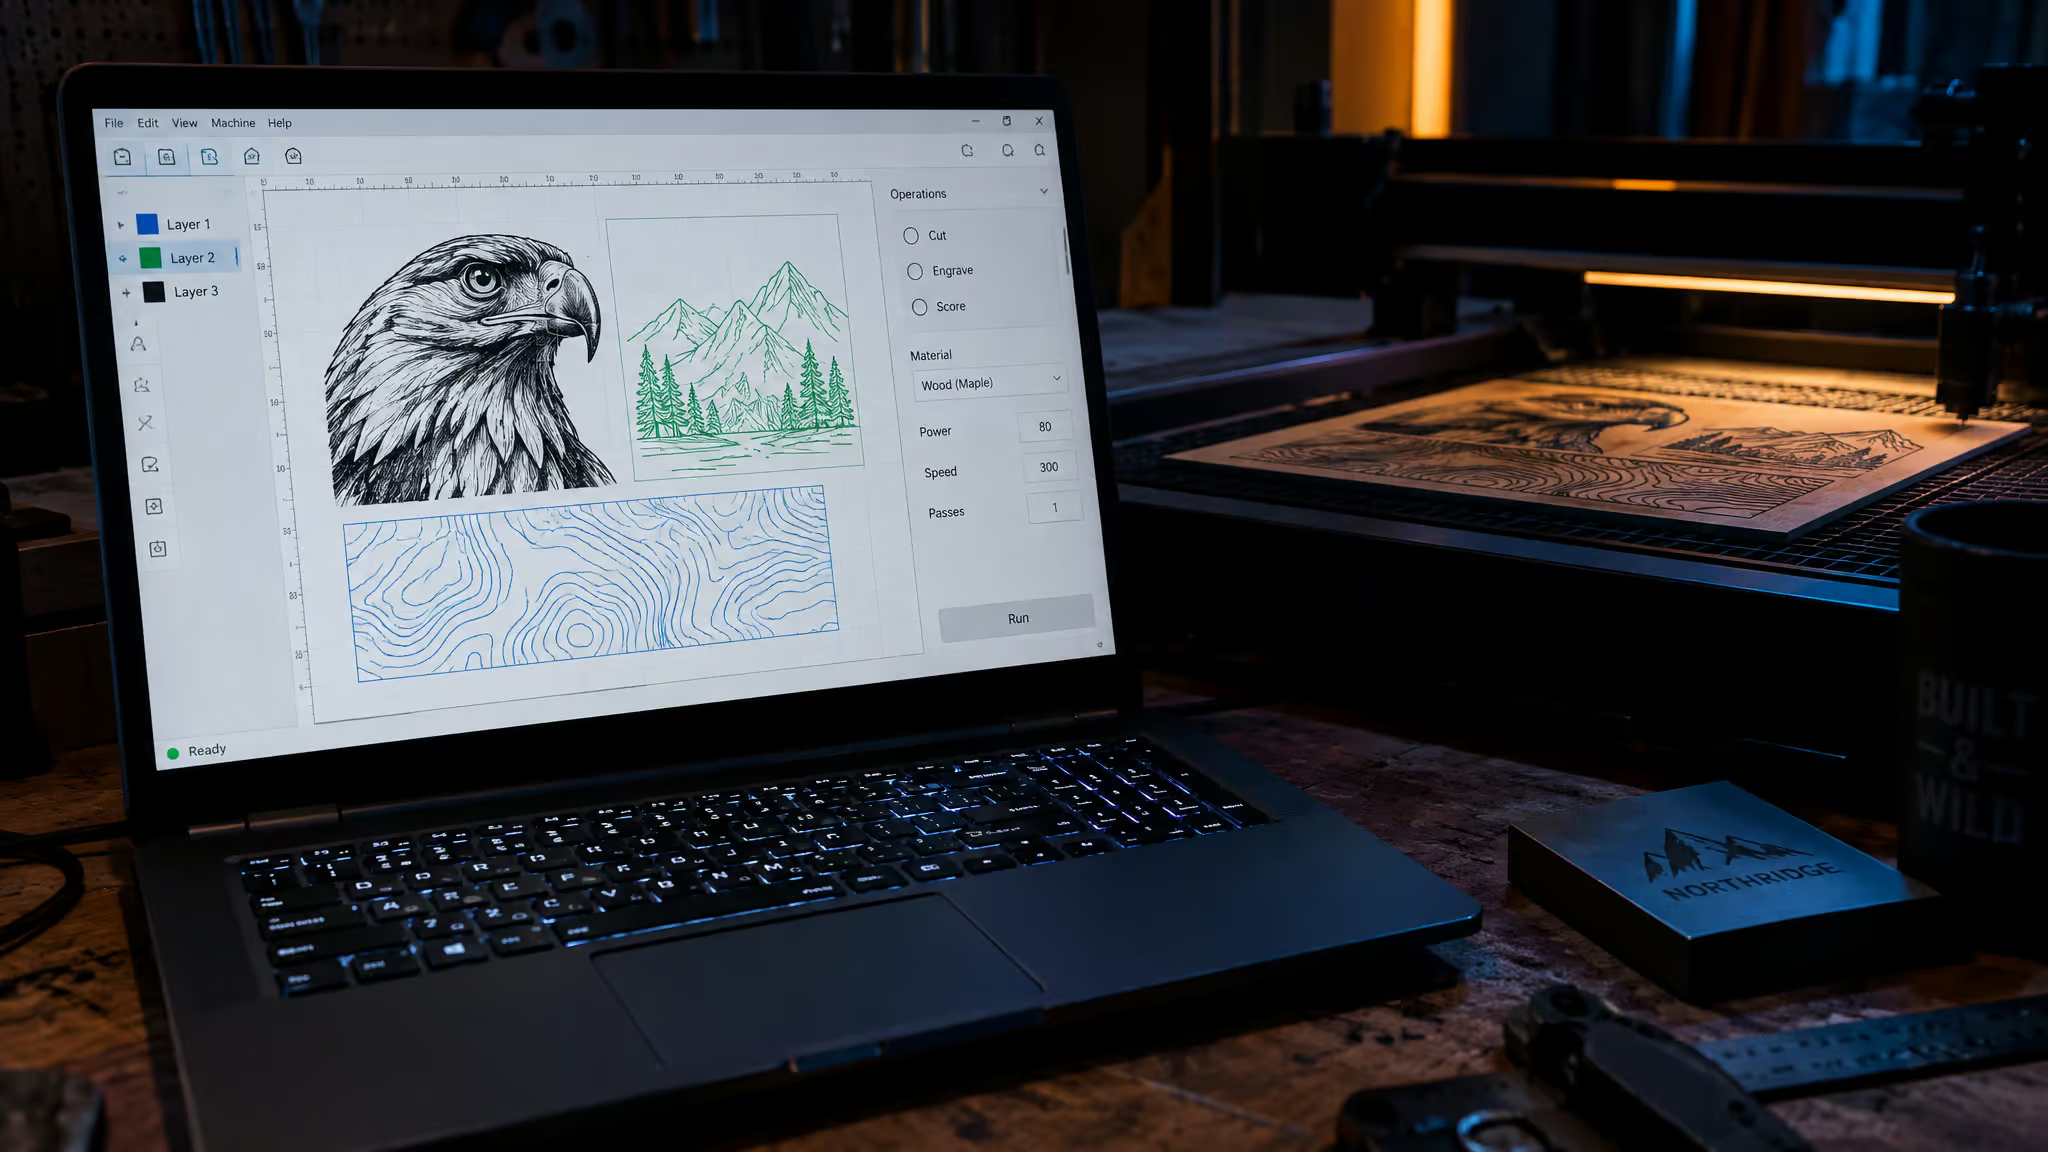
For Creality owners, Falcon Design Space runs on Windows, macOS, Android, and iOS (no Linux except via LightBurn), with three color-coded layer modes: line engraving in blue, fill engraving in green, and line cutting in black. LightBurn and LaserGRBL are supported third-party alternatives, so you’re not locked into the bundled app.
Material cautions: which materials punish which mistakes
Yes, run air assist on wood and acrylic cuts: it blows debris and smoke away from the beam, improving cut quality and reducing scorch marks, and skipping it is one of the most common beginner mistakes. It’s the cheapest quality upgrade on the bench.
The material-specific reality checks:
- Plywood glue content varies by brand, so identical-looking sheets need different settings. Wood is a lottery ticket. Masking tape reduces smoke stains on 3-5mm plywood.
- MDF chars easily: use air assist and more, lighter passes.
- Leather darkens unpredictably and needs ventilation. Lower power, faster speed, and test every piece.
- Paper and cardboard are highly flammable. Never leave the job unattended, keep a spray bottle nearby, and one clean pass is safest for cutting.
- Acrylics are the most commonly engraved plastics with crisp results; softer woods engrave more easily but burn quicker; glass and stone etching needs special focus and speed to prevent cracking.
Red flag: PVC releases toxic fumes when engraved. Avoid it entirely, regardless of settings — this isn’t a tuning problem.
And the one hard line, stated plainly: PVC releases toxic fumes when engraved and must be avoided entirely, regardless of settings. This isn’t a tuning problem. Don’t put PVC under any laser.
Multiple moderate passes produce cleaner edges and less char than one scorched high-power pass, and never run 100% continuously, because max throttle wears out the part you can’t easily replace. Eye protection and fume extraction are essential. As for beginner mistakes, we’ve all done at least one of these: cutting clear acrylic with a diode, running everything at 100% power, skipping air assist, forgetting to refocus between materials or after re-clamping, ignoring material variability. No shame here. The test grid forgives all of it.
Focus and optics: the settings nobody adjusts
Dust and resin on the optics cut effective power and blur the spot, a gradual quality decline that owners often blame on their settings file. Refocus for every new material thickness; being off by even a few millimeters degrades the cut. The acrylic trick from the CO2 tables carries over: moving focus about.030″ (.762mm) closer to the lens improves edge quality on 1/4″+ stock, and for thicker wood, refocus between passes, stepping the focal point deeper toward the middle of the cut.
Build your own material library
The endgame isn’t finding settings online; it’s replicating the vendor database structure yourself, with two tuned sets per material: one fast, one fine. Trotec’s model shows what that looks like at scale: pre-tested parameters for 50 materials, with two parameter sets per product group, optimized for time versus quality. Quality sets suit fine details, small fonts, high contrast, and flame-polished acrylic edges; speed sets suit simple shapes. JobControl updates parameters via software releases, Ruby syncs new materials via the cloud, and users can add their own to both. The settings library is alive.
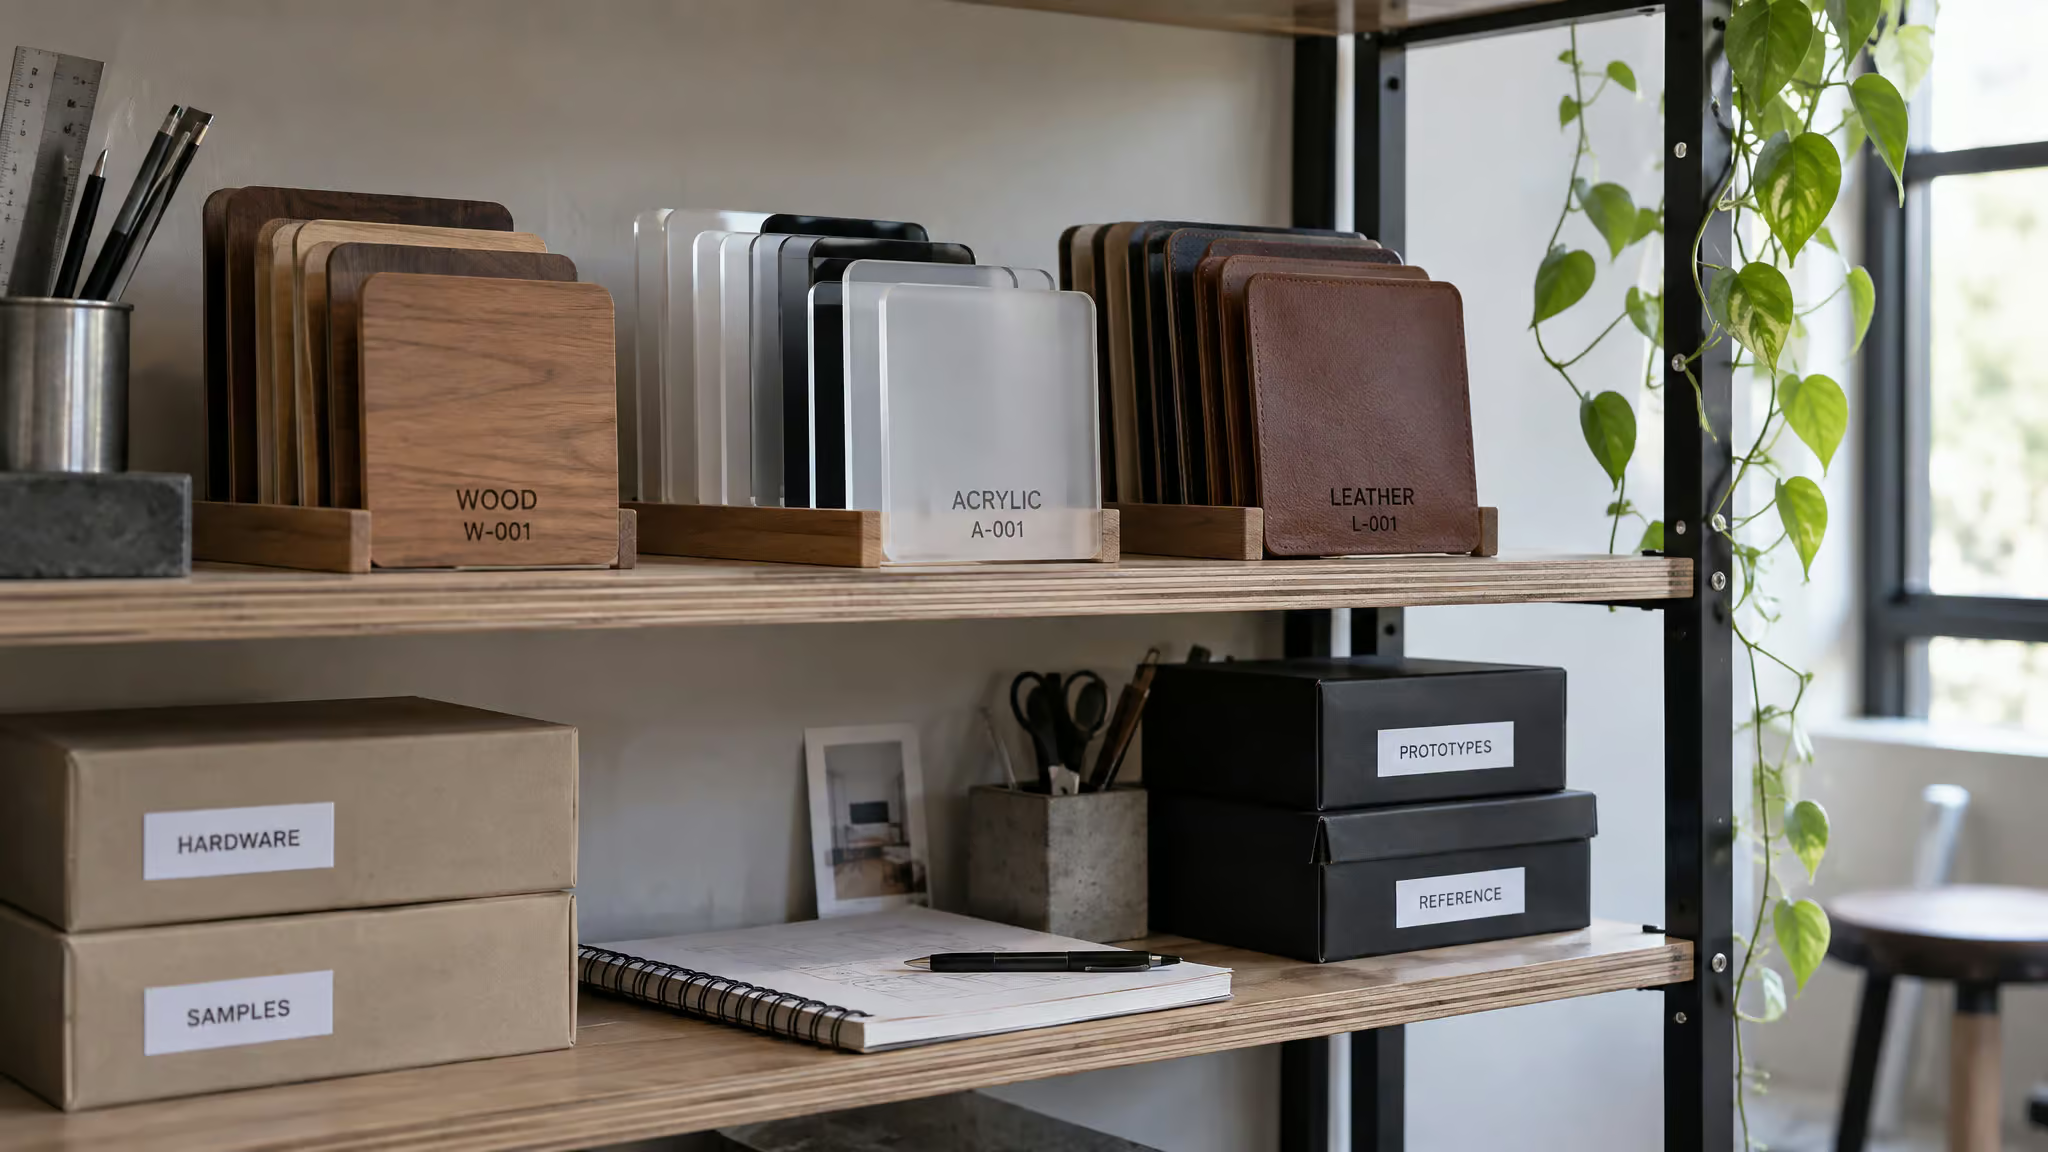
Save your validated test results, including galvo frequency and Q pulse entries, to a reusable library file so tests are never paid for twice. Keep the grayscale template and the two-corner cutting template as standing artifacts. On settings calculators versus manual test grids: the evidence here supports test grids and iterative narrowing, and offers no evaluation of calculators, so the honest position is that no conversion algorithm exists. The grid plus the library is the real replacement for the universal-chart search. Your test results are an asset; version-control them.
What your laser type can and can’t do
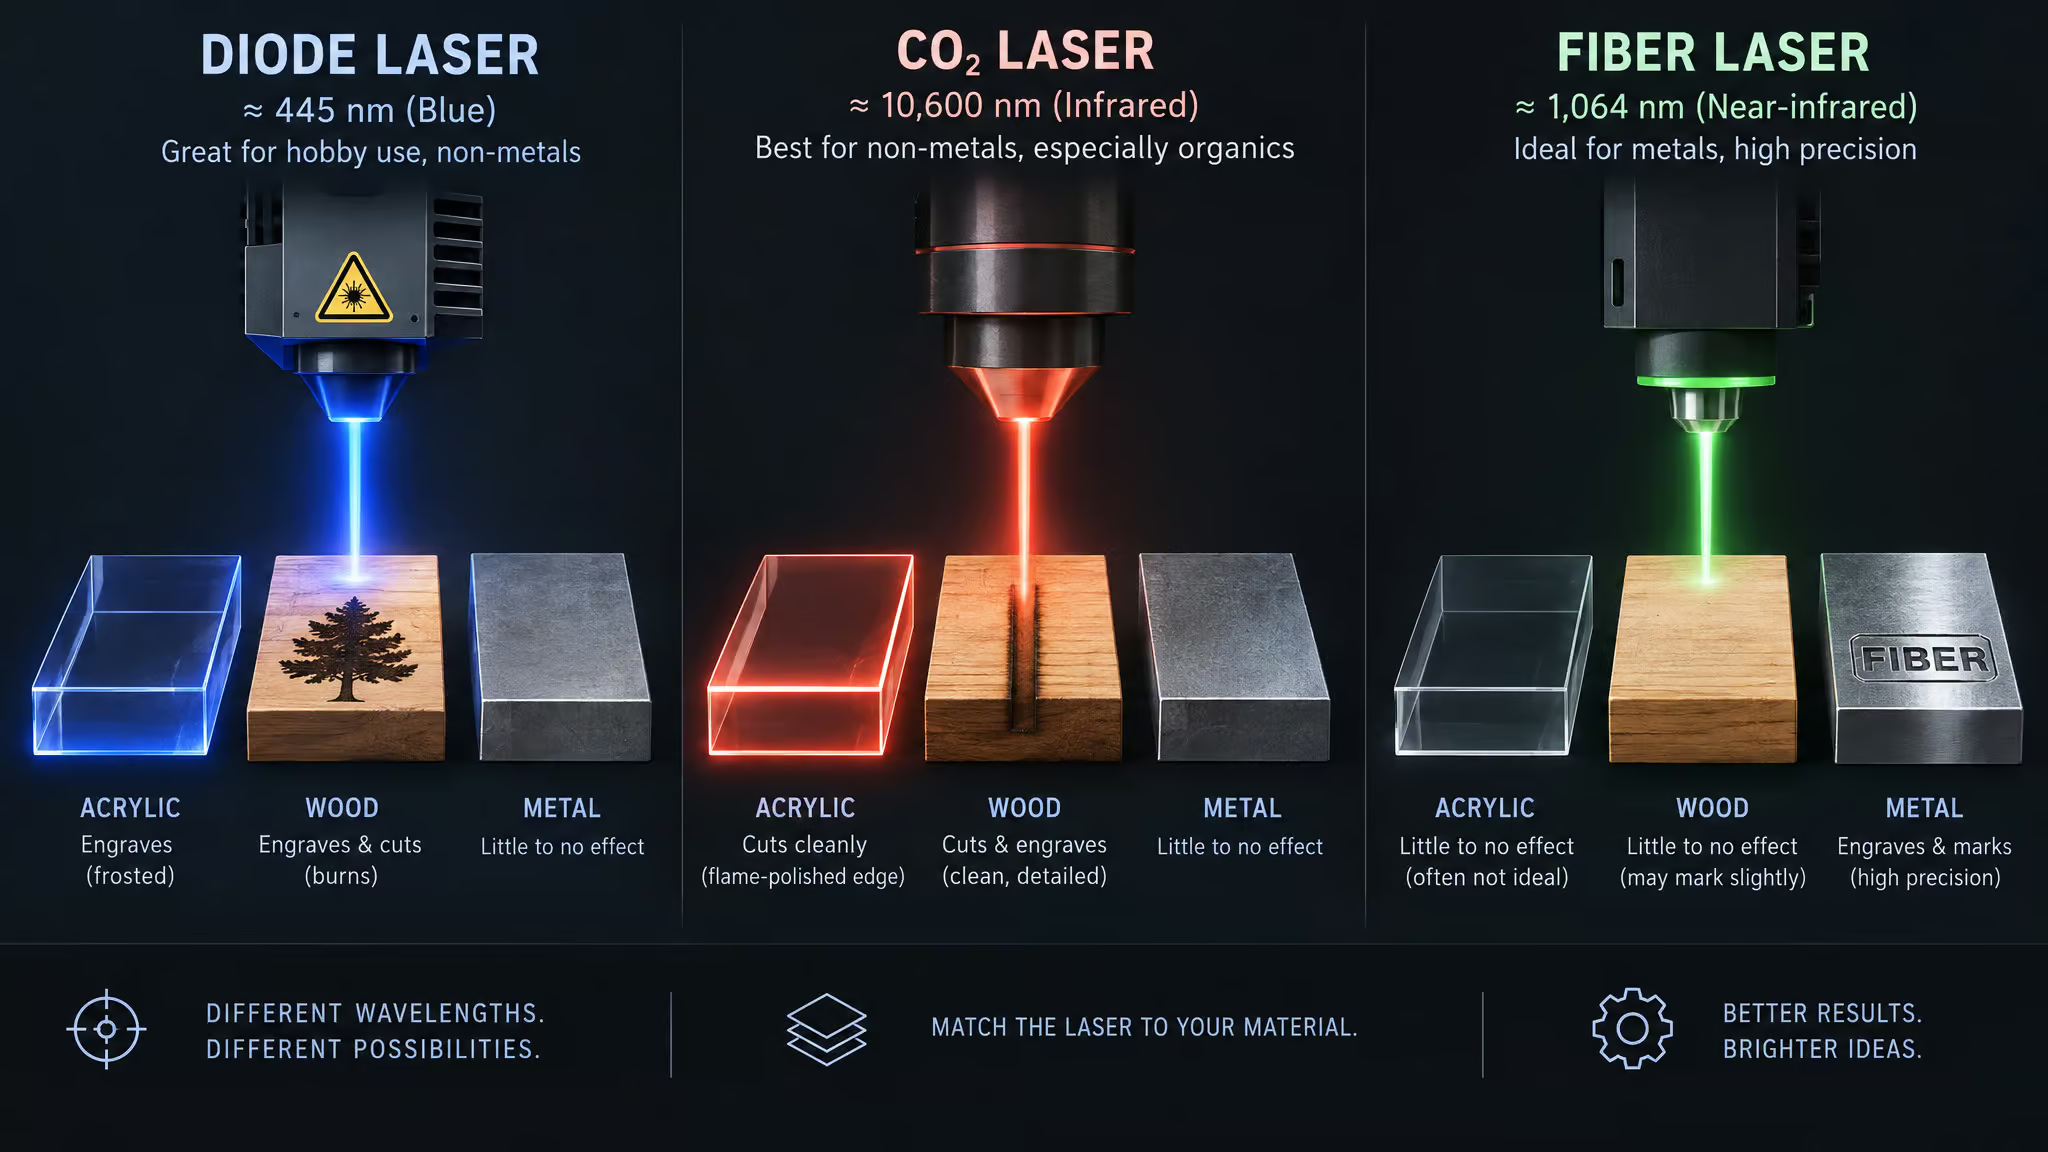
A laser engraving speed chart only means something once you know which laser type and wattage produced it, which is exactly what the Epilog Helix/Zing tables and the diode starting-settings charts above are: chart content, scoped per machine. The compatibility map below is the frame that tells you whether any given chart applies to your beam at all.
| Laser type | Wood | Paper/cardboard | Leather/fabric | Clear acrylic | Dark/opaque acrylic | Glass | Stone | Bare metal |
|---|---|---|---|---|---|---|---|---|
| CO2 | Yes (cuts and engraves) | Yes | Yes | Yes | Yes | Yes | Yes | No |
| Diode | Yes | Yes | Yes | No (wavelength passes through) | Yes | No | Yes | No |
| Fiber | No | No | No | No | Yes (plastic) | No | Yes | Yes (high-power only) |
IR lasers are lower-powered fiber, engraving only. The buying logic follows directly: CO2 suits clear acrylic or glass, diode suits wood and leather, fiber suits metal, and only high-power fiber works aluminium, stainless steel, brass, and copper.
Power consumption context, because your wall outlet cares: hobbyist machines draw 30-50W, like a PC. Mid-range 60-100W units pull like a gaming PC or microwave. Industrial 150W+ needs a dedicated power source.
For machine-class context on which settings tier applies, the 2026 TechRadar buyer’s guide ranked a spread of options: the xTool P2 took best overall (a fully enclosed CO2 with wide compatibility and RA2 Pro add-on support, though it needs two people to move and the software lacks bed image tracing); the Wainlux K10 was the budget pick (3W upgradeable to 5W, good but slow results on metal and painted surfaces, USB-A/USB-C only, slight misalignment on curved engraving); the TwoTrees TS2 was best for beginners (build quality and safety justify the higher price, though setup is fiddly, Wi-Fi is unreliable on iOS, and there’s no enclosure); the Creality Falcon A1 Pro was the crafts pick (enclosed 20W with air assist for wood, leather, acrylic, and glass, no metal, with an optional 2W IR 1064nm module supporting gold, silver, brass, steel, aluminum, titanium alloys, slate, and ceramic; $1,099, though prices may vary); the ComMarker B4 was the business pick (fiber, 20W review unit available up to 100W, suited to small production runs on dogtags and phones, smaller work area, wood needs preparation); the Acmer P3 was the 2-in-1 (IR and diode via toggle, CoreXY belt system up to 800mm/s, removable tray for items up to 4m long at 400mm width, 10W base upgradeable to 24W or 48W, with the reviewer recommending at least 24W); the ComMarker B6 MOPA was the high-volume pick (all metals fast, 110×110mm expandable to 200×200mm, 20W and 30W models); and the Glowforge Pro was the schools pick (no assembly, air filter a must-have indoors, needs reliable Wi-Fi, temperature sensitive, Premium subscription pricey for individuals but good value educationally). The machines exist to scope which settings tables apply, not to sell you one. Eye protection and fume extraction are essential regardless of class, and enclosures plus built-in safety features are part of why prices climb.
Pick one material, run a 10-15 square test grid on scrap this week, and save the winning tile as the first entry in your material library. The Falcon A1 Pro basswood case is the template: the vendor’s numbers failed, the tested multi-pass settings worked, and the validated result went into a reusable library. That’s the whole method, and it starts with one grid.
Frequently Asked Questions
What is the best setting for laser engraving?
There’s no universal best setting — every settings table is a hypothesis for one specific machine, because wattage, optics, tube or diode age, and even room humidity shift the answer. The safe starting point is medium power and medium speed, then refine with a power/speed test grid on scrap of your actual material. Change one parameter at a time, in 5-10% power increments, and tighten the range over about three runs.
What are the 5 parameters of laser?
The five core laser engraving parameters are speed, power, DPI/resolution, passes, and focus. None behave like independent dials: power is a percentage of your module’s maximum (so 50% on a 20W diode is roughly 10W actual, but 50% on a 5W module is about 2.5W), passes let you cut thick stock without scorching, and focus sets the smallest spot size for sharper detail and a narrower kerf. The full signature also extends to Hz, air assist, and Z-offset (controlled defocusing).
What are the recommended settings for a laser cutter?
Cutting settings depend entirely on your machine class and material thickness. As a reference point, a 10W diode cuts 3mm plywood at 90-100% power around 600 mm/min with 2-3 passes, while a 75W CO2 like the Epilog Helix cuts 1/8″ acrylic at 100% power at 25 speed. The pattern that holds everywhere: multiple moderate passes produce cleaner edges and less char than one scorched high-power pass, and every value still needs test-grid validation on your own machine.
Can a diode laser cut clear acrylic?
No — clear acrylic is unreliable on diode lasers because the diode’s wavelength passes straight through the material instead of being absorbed. Use opaque cast acrylic instead, or engrave painted or blackened surfaces. This is also where laser classes diverge: a CO2 laser handles clear acrylic and glass, while only fiber lasers handle metal.
Why did half my laser job disappear when I sent it to the machine?
That’s usually a workflow error, not a power/speed problem. If only Raster or only Vector is selected in the job setup, the other data type is silently ignored — the data is there, the machine just skips it. Also make sure your piece size is in inches and matches the Workspace/Artboard, or engravings and cuts won’t line up, and run all rastering before cutting so the piece isn’t loose on the bed mid-job.
