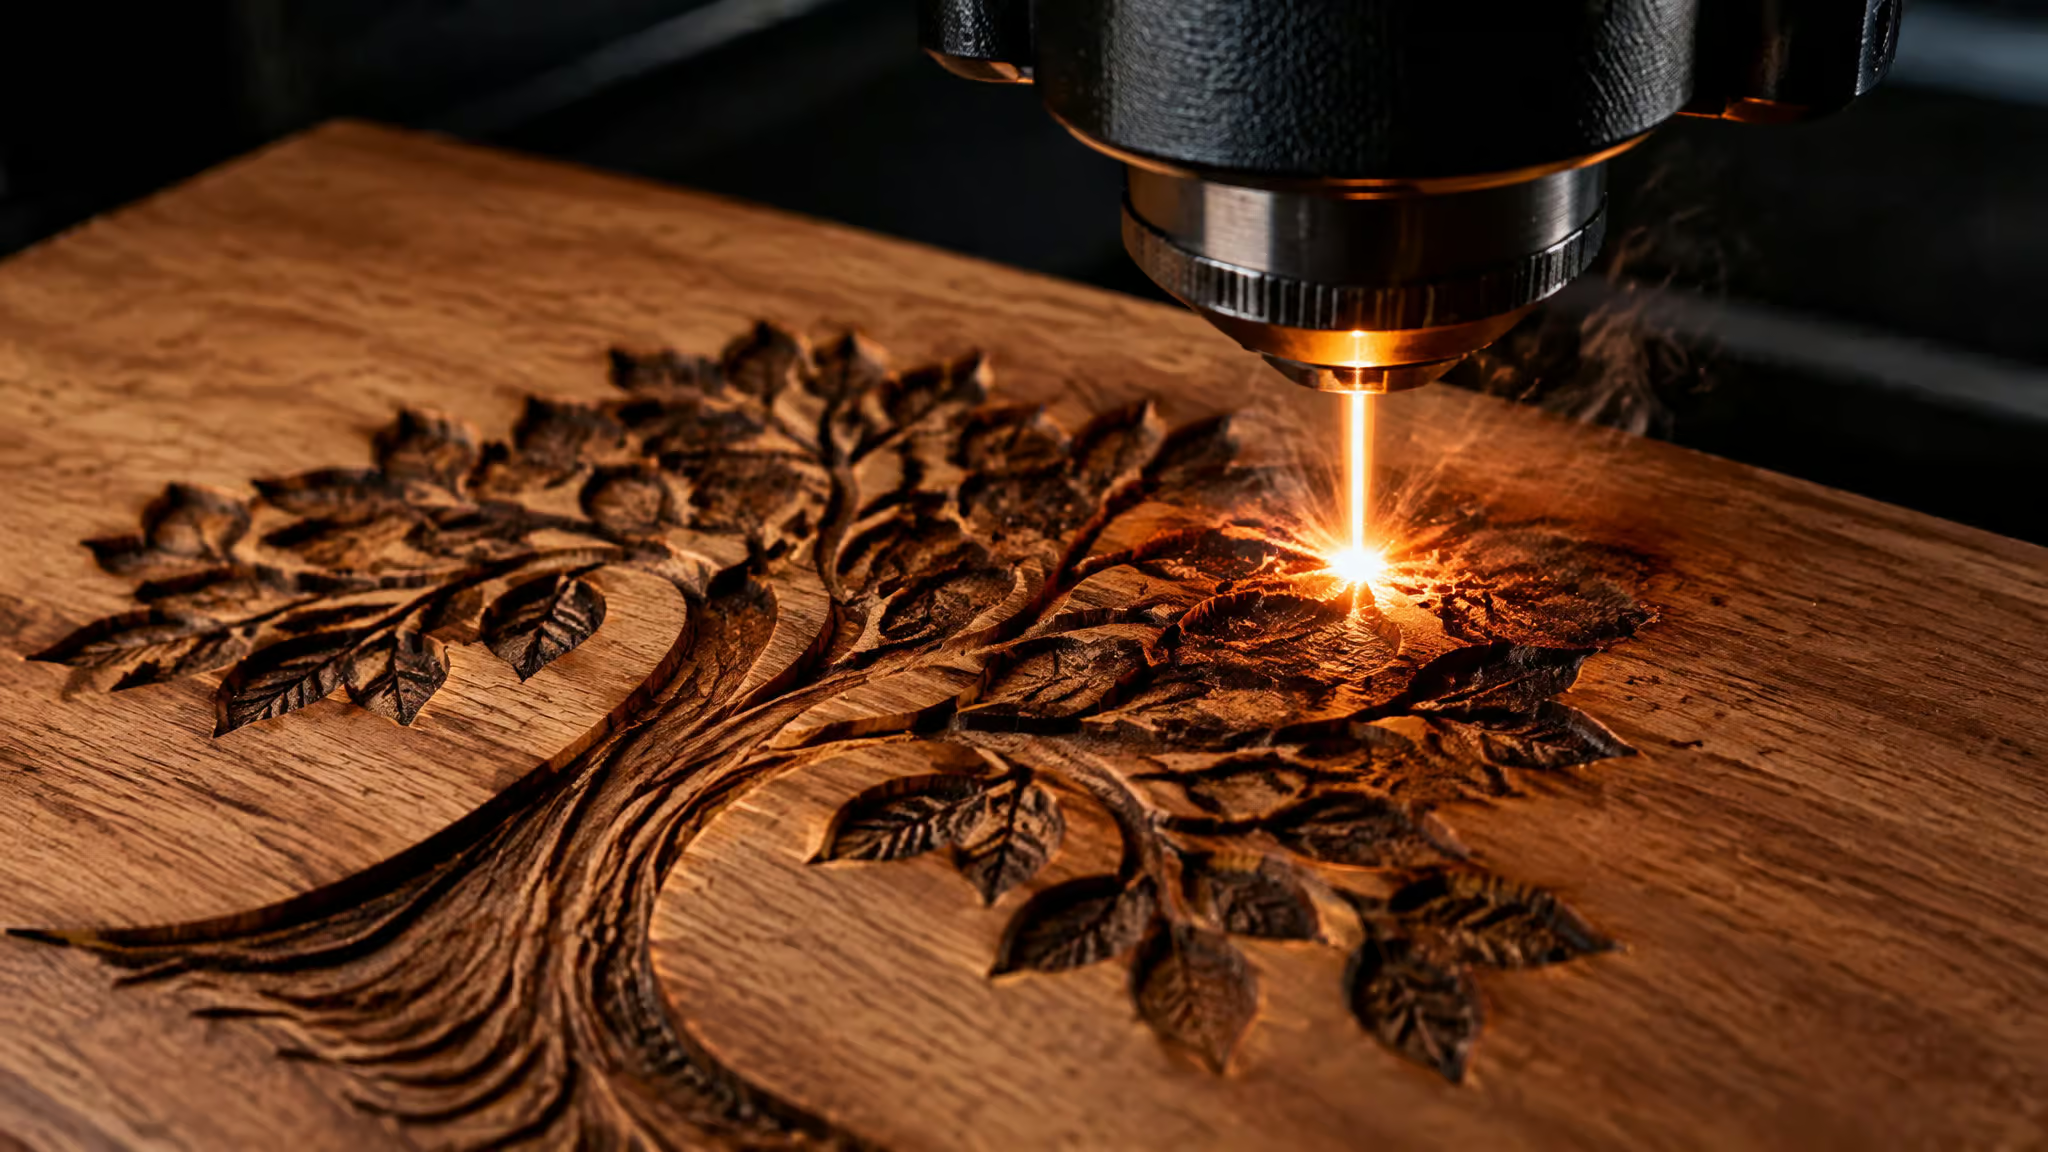
My first attempt at deep laser engraving on wood produced a shallow brown smudge. The second carved a charred trench that ate every detail I cared about. The third came out of a “3D” preset flat as a sticker. All three failures trace back to the same variables: pass strategy, image contrast, and wood choice.Tune those and deep relief, the kind you feel with a fingertip on cutting boards, wall art, and wedding decor, stops being luck.
Key Takeaways
On a Trotec Speedy 400 with a 2-inch lens, four passes at 4x speed removed 25% more material from solid cherry than one slow full-power pass, with less char and similar total processing time.
“3D engraving” is per-pixel grayscale depth mapping: each pixel’s 0-255 value sets burn depth, and low-contrast depth maps are why so many results come out flat.
Basswood, birch plywood, maple, and cherry hold deep detail; resin-heavy pine chars easily, and dark woods like walnut need a contrast strategy, not just more depth.
Table of Contents
What deep laser engraving on wood actually is
There’s no “deep” button: deep engraving on wood is variable-depth cutting driven by per-pixel grayscale values, not a special machine setting. Every job sorts into one of three modes. Uniform-depth engraving marks or cuts the surface at a single depth, which is what most first projects are.Concave engraving cuts down into the pattern itself, and that’s the deep engraving direction. Convex engraving does the opposite: it removes the material around the pattern so the design sits raised, which is what people mean by embossing.
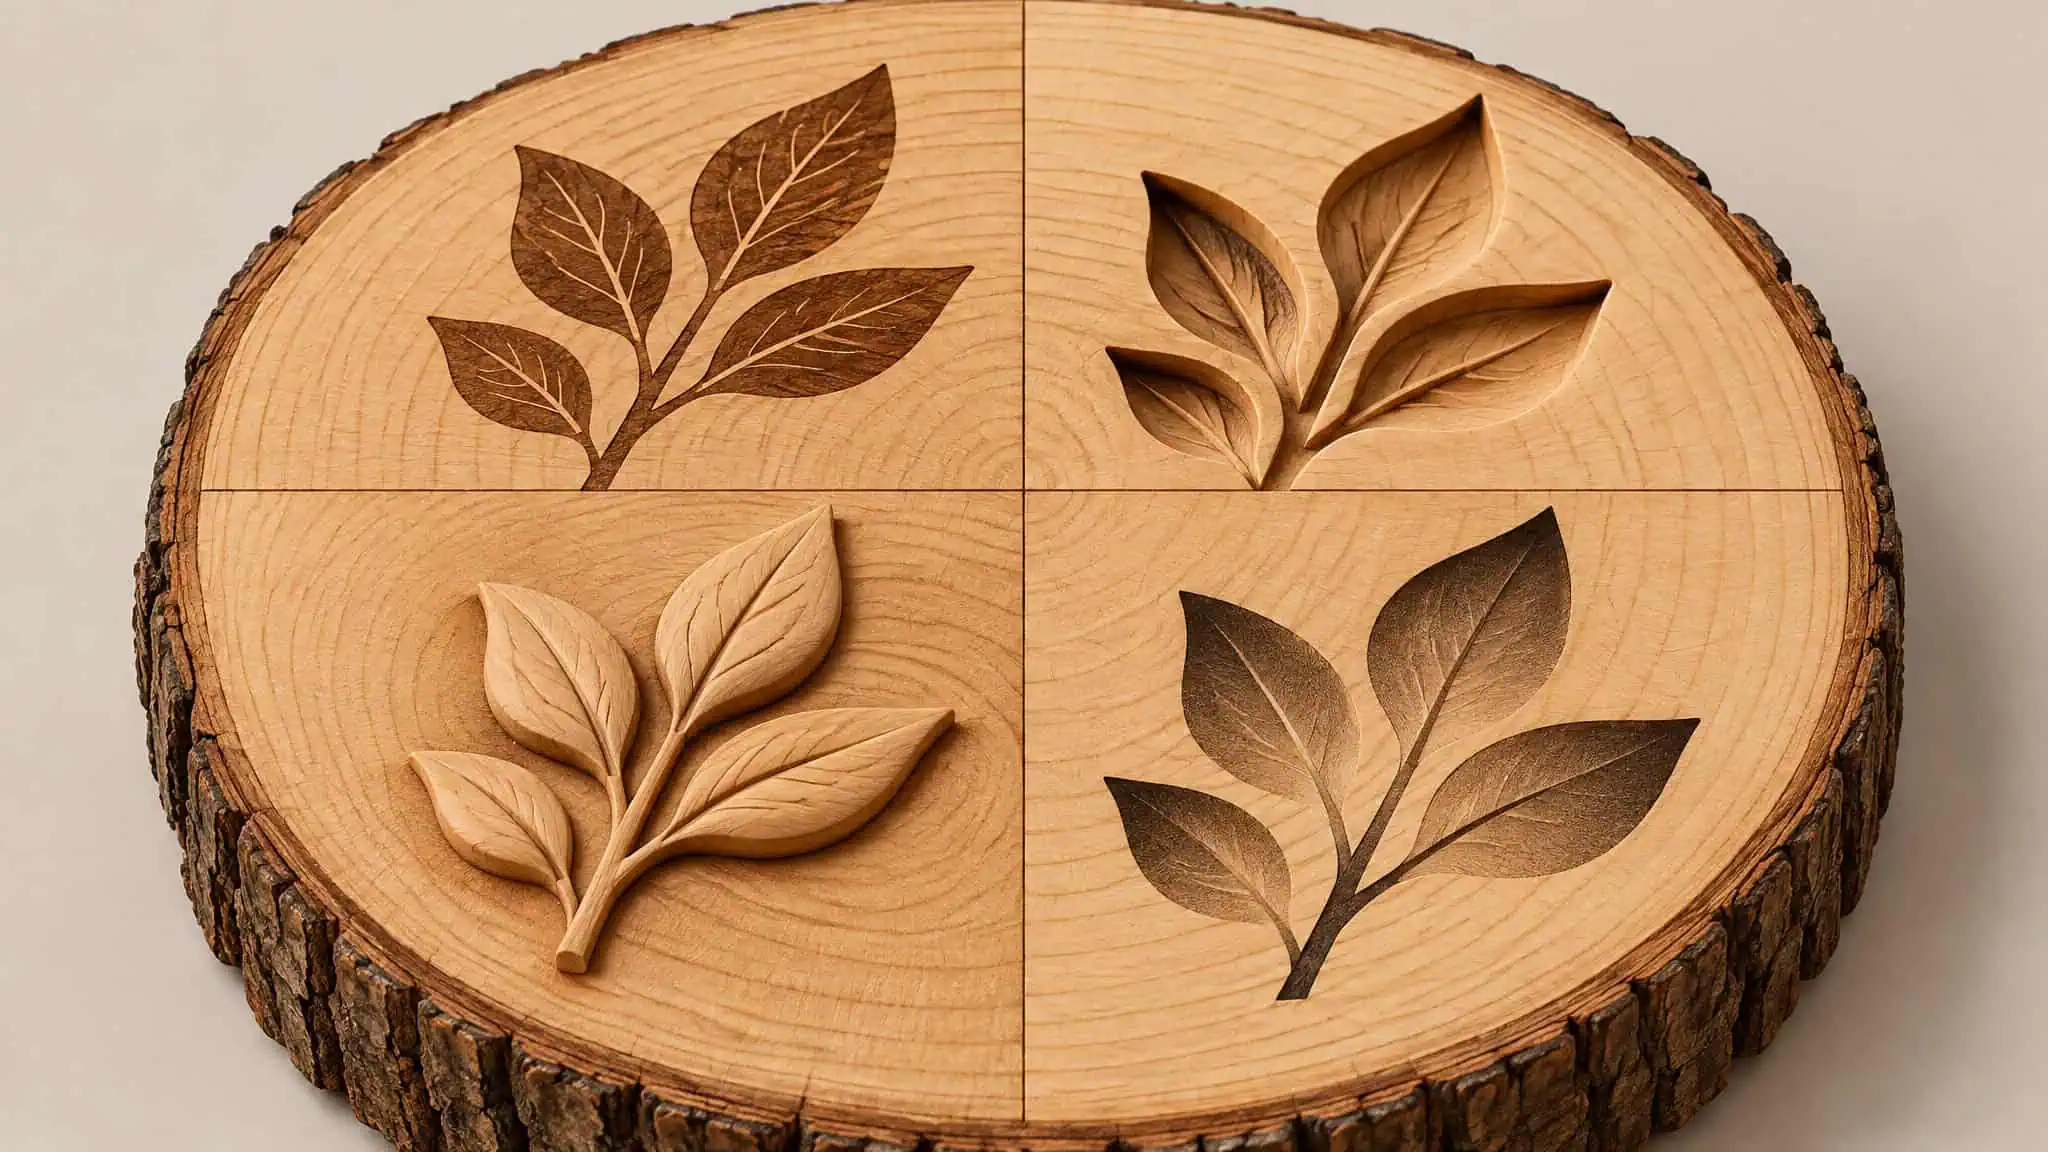
Three modes, one mechanism underneath. Each pixel’s grayscale value, running 0 to 255, sets how deep the burn goes.Dark pixels carve low, light ones stay proud, and the result is actual tactile relief. On a LaserPecker LP5, the concave-versus-convex choice lives in the LDS software’s Effects menu under 3D Grayscale; LightBurn and ImagR expose equivalents for other machines.
The LP5’s 20W diode is enough to run this workflow in soft and medium-density woods. Full settings come later.
How deep can you laser engrave wood?
There’s no universal maximum depth in millimeters, and anyone quoting one is guessing. Depth is a function of four factors: heat buildup and char, focal falloff inside the channel, wood thickness, and laser type. Each factor has a workaround.
Heat is the one multi-pass engraving solves, and that gets its own section below. Optics is the sneaky one: as the channel deepens, the focal plane ends up above the channel floor, so the bottom goes shallow and patchy even though nothing changed in your settings. The community workaround, reported rather than measured, is raising the bed after several passes on 3/4-inch wood so the beam refocuses down inside the cut. Material limits are straightforward: use stock at least 15mm thick for 3D work, because you need depth to carve into, and deeper engraving headroom lets you raise the layer height setting.Laser class sets the power ceiling, which is why a 60W CO2 finishes dense stock faster than a 20W diode.
For shallow results, keep the piece flat and weighted so focus stays consistent across the whole job, and run a Material Test on scrap whenever marks come out light.
Woods that hold deep engraving detail without charring
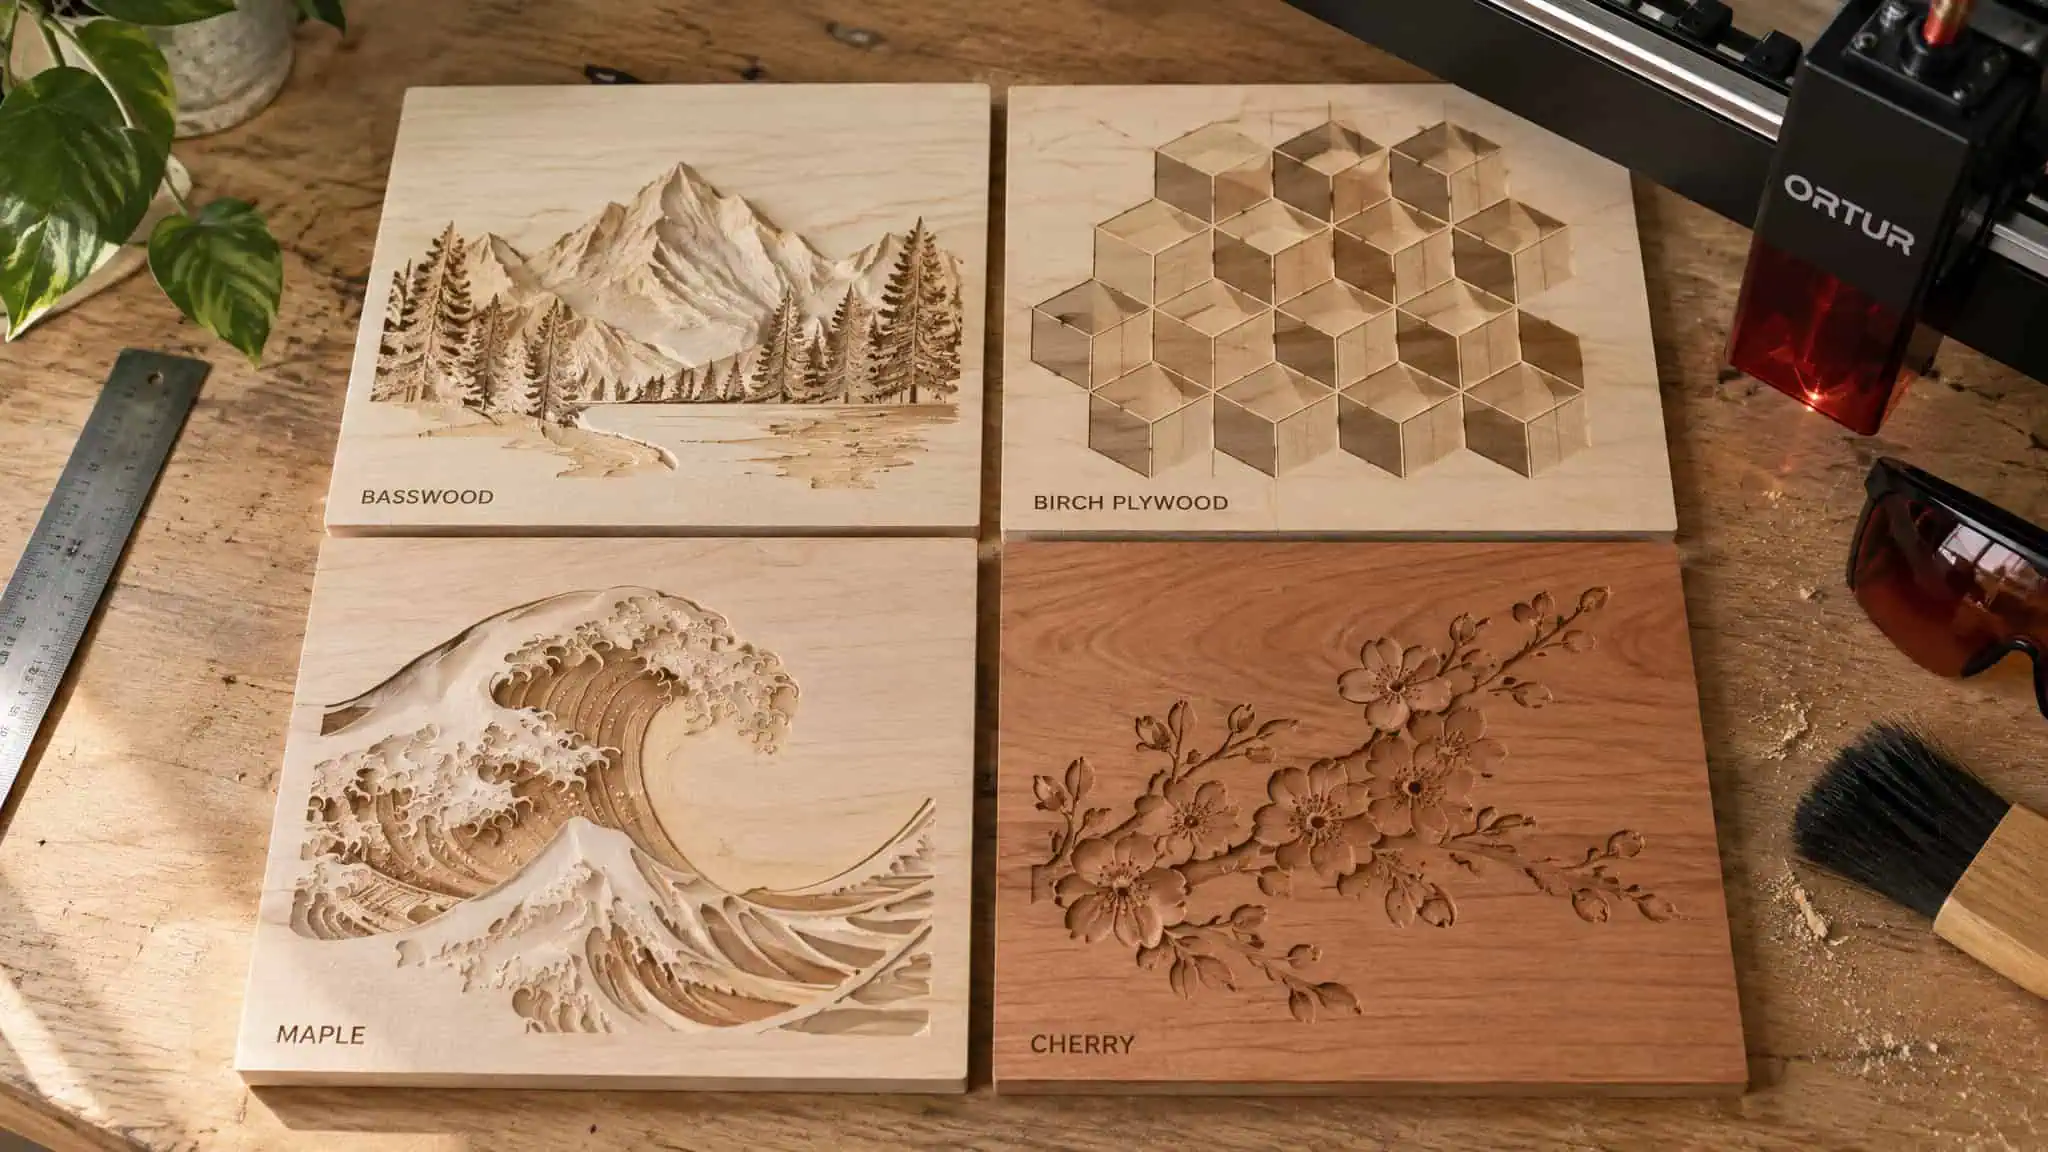
Basswood, birch plywood, maple, and cherry are the woods that hold deep detail. Skip resin-heavy softwoods like pine, which char easily and have uneven texture.Wood choice is a depth-versus-contrast tradeoff: the densest, prettiest board is not automatically the one that shows your engraving best.
The four winners each earn their spot differently. Cherry is dense with rich grain and engraves deeply with a warm finish; it’s the wood the Trotec depth tests ran on. Basswood is soft with consistent grain and takes fine detail well, which is why it tops the list for fine work. Birch plywood is affordable and forgiving, the material I’d hand anyone starting out.Maple is smooth and practically built for high-contrast work.
| Wood | Character | Holds depth | Shows contrast |
|---|---|---|---|
| Basswood | Soft, consistent grain, takes fine detail | Yes (soft, so depth comes fast) | Yes (light surface shows the burn) |
| Birch plywood | Affordable, easy to engrave | Yes (easy material to work) | Yes (light face) |
| Maple | Smooth surface | Yes | Yes (great for high-contrast work) |
| Cherry | Dense, rich grain, warm finish | Yes (engraves deeply) | Partial (darker wood, needs a strategy to make the design pop) |
| Walnut / espresso-stained plywood | Dark hardwood | Yes (engraves beautifully) | Partial (crisp high-contrast marks are tricky, so the burn needs a strategy to pop) |
| Pine | Resin-heavy softwood | No (chars easily, uneven texture) | Partial |
The dark woods deserve their own beat, because they’re the trap. Walnut and espresso-stained plywood look the most premium on the shelf and engrave beautifully, but getting a crisp, high-contrast mark on them is tricky. Light woods like birch and maple show the burn naturally, which makes them easy mode. That tradeoff decides which darkening technique you’ll need later, so pick the wood with the finish in mind, not just the cut.
A viewer, @MzCereusBiz1, reported light, spotty engraving when cutting with the grain and fixed it by weighting the wood pieces down. The takeaway is to engrave against the grain, and to treat flat, weighted stock as non-negotiable. Flat wood means consistent focus, and consistent focus means consistent results.
Preparing a grayscale depth map for 3D relief
If your 3D engraving came out flat, the machine probably wasn’t the problem. The depth map was. Low-contrast grayscale is the most common cause of flat results, because the mid-tones of a 0-255 depth map collapse into one uniform burn level, which makes image prep the actual skill here. The image is the depth map, pixel by pixel.
Depth maps come from online sources, LaserPecker’s CraftZone library, or third-party software. One demo I traced used an image straight from the LDS clipart library; another started from a CraftZone sample. Neither required generating art from scratch.
The flat-result failure mode has a clean cause: grayscale converted straight from a color photo carries smooth mid-tones, and the engraver reads those mid-tones as one uniform depth.Everything in the middle of your tonal range collapses into the same burn level, so the “3D” output has barely any layers to it. Boosting contrast before engraving is the fix, and strong 3D work lives or dies on it.
Layer count runs 0 to 254. More layers mean smoother, deeper results at the cost of longer runtime; fewer layers rough out faster but coarser.Layer Preview shows what each layer will actually engrave, which is how you avoid blind-guessing a multi-hour job. If the first or last layer is fully black or fully white, it’s doing nothing for you. Trim it and pocket the time.
In LDS, the Effects menu offers 3D Grayscale for the depth-mapped workflow or Dither as the alternative route worth knowing; select the image, pick the effect, set layers and parameters.LightBurn and ImagR have equivalents for other machines. For photo-based work, the ImagR and LightBurn tutorials are the go-deeper signpost, because photo engraving on wood is its own rabbit hole and this section isn’t pretending to cover it.
Multi-pass engraving: why four fast passes beat one slow pass
On a Trotec Speedy 400 with a 2-inch lens, four passes at 4x speed removed 25% more material from solid cherry than a single slow pass, with less char, at similar total processing time. The demos came from Trotec Laser Canada’s Don and Global’s Laser Dave, with credit also to Dave Stevens and Trotec Laser USA, and the cherry stock came from Creative Cut Supplies.
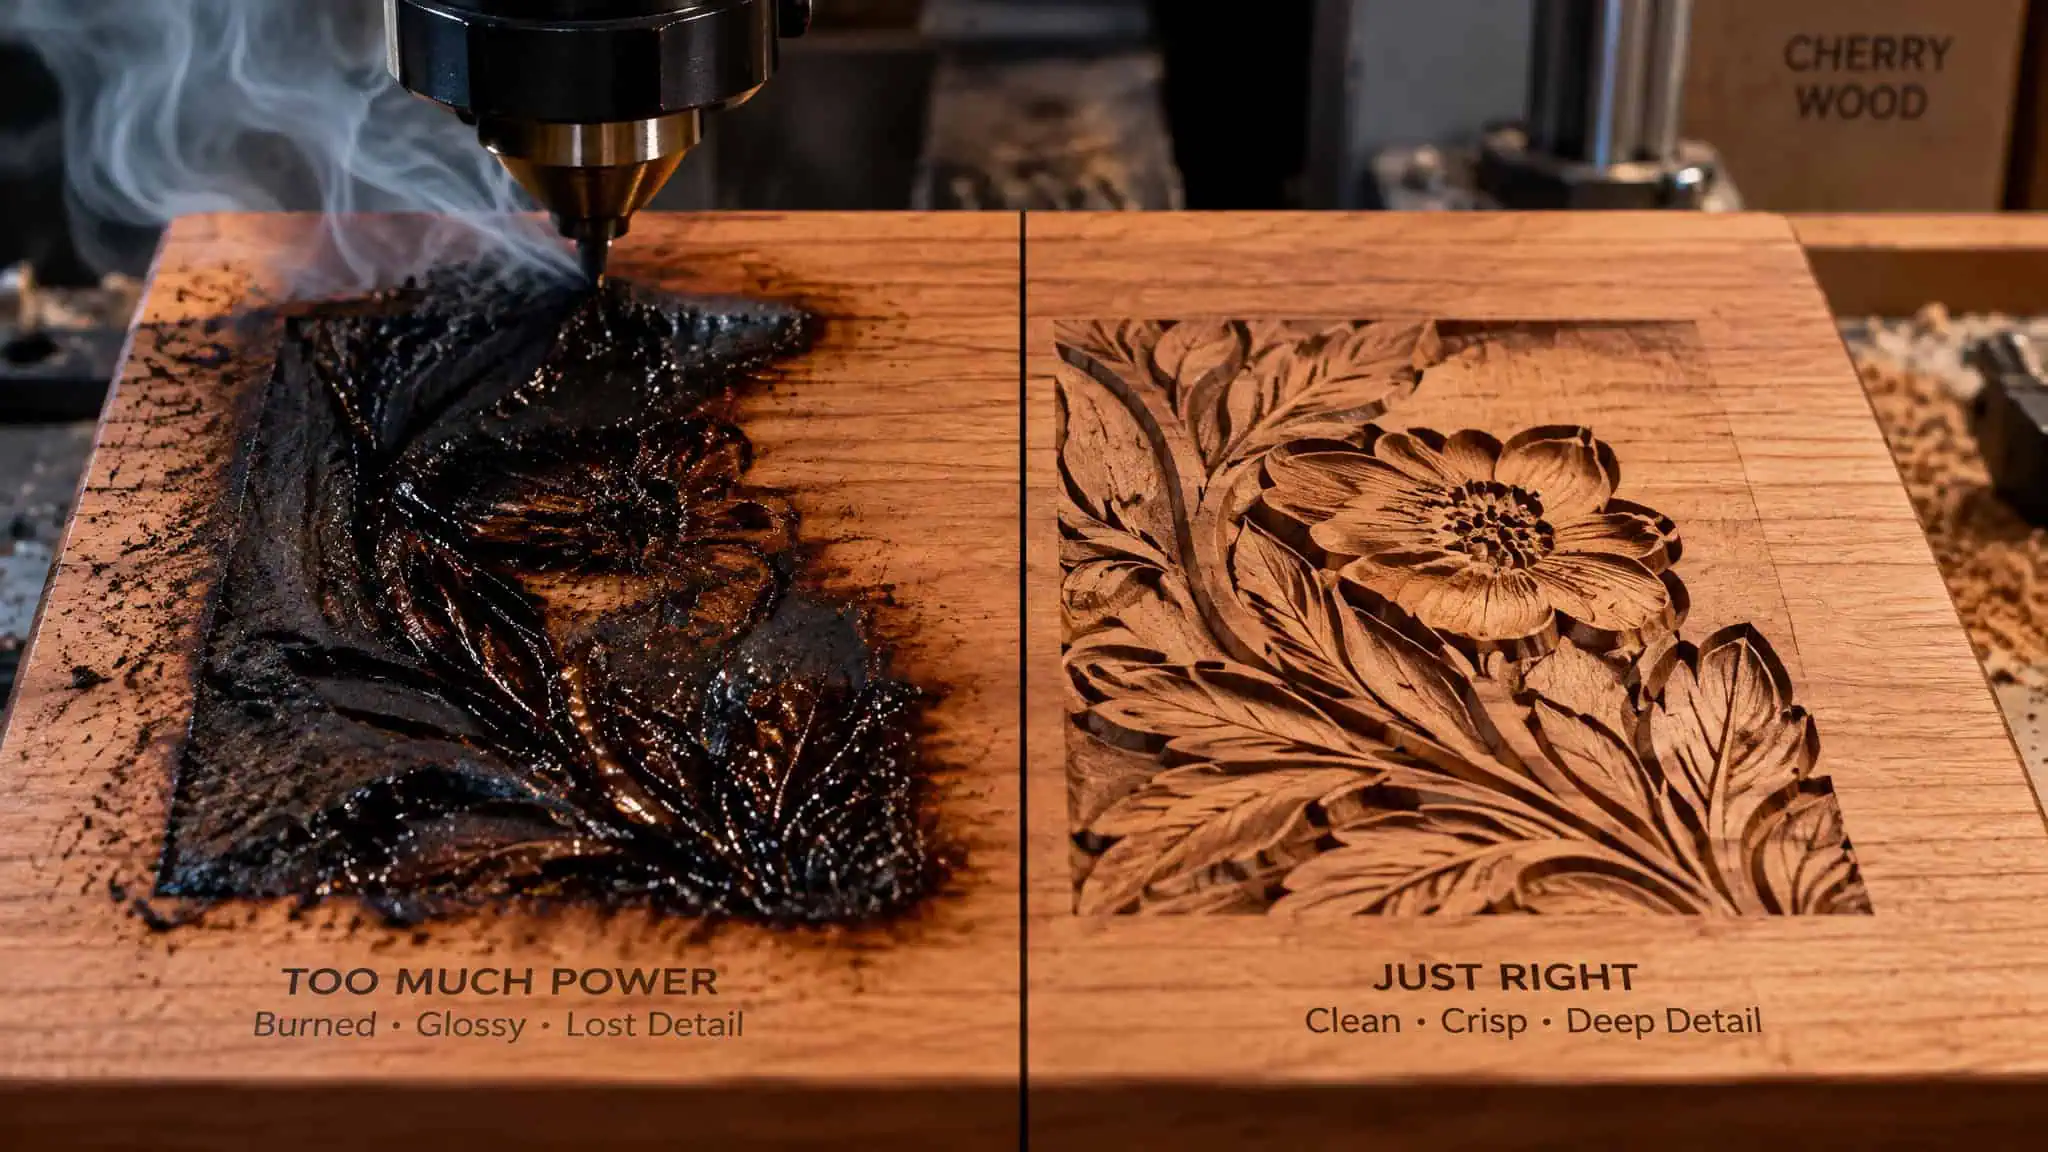
The instinctive approach is one heroic slow pass at full power: 100 power, 10 speed, 1 kHz, 500 DPI. It achieves extreme depth, and it cooks the wood, because all that energy in one pass builds heat faster than the material can shed it. Four passes at 100 power, 40 speed, same frequency and DPI, spread the same energy over four visits, so heat dissipates between passes instead of soaking in.
In relief mode the payoff gets bigger, because excess heat is exactly what destroys fine 3D detail. Four passes produced less burning and more defined detail, and the difference was even more evident after cleaning with water.Laser Engraving 911 engraved the same 3D image twice, baseline versus the multi-pass settings, and posted both the uncleaned and water-scrubbed versions. One point every source agrees on: the job isn’t finished until you clean, because soot and residue hide what you actually cut, and the cleaned surface sometimes tells you another pass is needed.
The self-diagnosis tool: a dark, glossy channel floor with soft edges is the tell of heat soak. The fix is more passes at higher speed.Treat 100 power / 4x speed / 4 passes as a template to adapt, not a recipe, the transferable rule is that several fast passes remove more material than one slow, high-power pass while keeping heat buildup in check.
Deep engraving settings: power, speed, and passes by machine
Start with the diode baseline. LaserPecker’s deep-engraving parameters for the LP5 are 450nm, 2K resolution, 30% power, 30% depth, 3 passes, where more passes means a deeper cut. Its embossing parameters flip the logic: 70% power, 1% depth, layer height 0.02.
The diode-versus-CO2 question has a conditional answer. CO2 moves faster, with a 300-350 mm/s sweet spot for clean, sharp results, while a 20W diode handles dimensional relief in soft and medium-density woods. So yes, a 20W diode can do deep relief work, but expect more passes and more time than a 60W CO2 on dense stock. Project scale decides, not wattage bragging rights, and that’s the honest answer if you’re picking your first laser engraver for wood.
The published baselines conflict on paper and both are correct. The OMTech 60W Pronto baseline is Fill mode, 300 mm/s, 18-22% max power, never dropping below the ~10-12% tube firing threshold or the tube won’t fire, with a 0.08mm line interval (~318 DPI), with bi-directional scanning enabled. The Polar Lite baseline is 250-300 mm/s, 22-26% power, starting low to avoid gouging, with headroom to 500 mm/s and one-tap autofocus. Both are right: the optics and air assist setups differ between the two machines.
The bridge is LightBurn’s Material Test: Laser Tools > Material Test, speed 200-400 mm/s, power 15-35%, always on scrap of the actual piece, because wood density and grain vary. Hunt the grid for a dark chocolate-brown or charcoal block without a deep ugly trench. Translate, don’t copy.
Setup and safety for deep engraving indoors
Yes, with conditions: deep engraving is safe indoors when dust, fumes, and enclosure requirements are handled, and those requirements depend on your machine and region.The underappreciated part is that settling dust isn’t just a health issue. It actively degrades a long multi-pass job, drifting into fresh channels while you’re mid-run. A high-speed fan positioned at the material is a quality tool, not just a safety accessory. For fumes, the LaserPecker Desktop Air Purifier handles emissions filtering for indoor shops.
Setup discipline is short: place the material, preview the engraving, adjust focus, then fine-tune position so the area is centered and the image size matches the wood size.
Enclosure requirements break down by model and region. LP2 Plus, LP2, and LP4 pair with the LaserPecker Standard Enclosure in Europe under Class 4 laser safety. The LP5 Safety Enclosure is required for UK compliance.The LX2 is Class 1 and needs no additional enclosure.
Getting darker laser engraving on wood
Darkness comes from controlled char management, and the right method depends on your air assist setup. If your air assist is adjustable, turn it down on dark wood. Too much air clears soot and cools the wood, which produces a lighter mark, and some smoke settling actually helps create dark char.Watch the machine closely while you do this; the trick only applies to machines with a manual regulator. If air assist is fixed, like the OMTech Polar Lite’s built-in 18.8 CFM pump that runs automatically and can’t be adjusted, the soot trick is off the table and chemistry or defocus has to do the work.
Method one is a baking soda or borax pre-treatment, which OMTech frames as their best-overall method for dark-wood contrast. Dissolve 1 tablespoon in 1 cup of warm water, brush or spray it on the engraving area only without soaking, dry completely, then engrave slightly slower with higher power. The reaction is instant at beam contact, which is why it works even with strong air assist, and it produces a rich dark brown to nearly black mark.Wipe soot and seal afterward. The full borax walkthrough runs 26:10 if you want the bench-level version.
Method two is line-after-fill defocus. After the fill pass, raise the Z-axis 2-5mm (in LightBurn, Z Offset +2.5 to +3.0mm in the Cut Settings Editor, where positive numbers lower the bed) and run a second lower-power, faster line pass, widening the line interval from 0.08mm to 0.1-0.12mm so the broader defocused beam overlaps.The wider dot makes a thicker, darker burn instead of a deep thin cut. It requires a motorized Z bed like the Pronto’s or autofocus override like the Polar Lite’s. The community shorthand for the same idea is the penny trick, and viewer @fruitloops68 called the defocus tip a standout.
Cleaning and finishing deep engraved wood
Finishing splits into two paths matched to two techniques, and applying the wrong path undoes the engraving work: bleach on a piece where you wanted dark grooves erases the contrast you just engineered.For embossed and relief pieces, the path is a bleach wash. Equal parts water and bleach, 5-10 minute soak, then rinse thoroughly with clean water to stop the bleaching. Air-dry completely in a dry, ventilated spot, because trapped moisture messes with the final finish. Then a light coat of wood varnish or oil, applied with a soft brush or cloth, enhances the grain, adds depth, and protects from wear and moisture; beeswax or mineral oil if you want a natural matte look.
For darkening engraved grooves, the path is rattle-can fogging or the stain trick. Fogging: mask the unengraved wood with transfer tape, then spray the engraved area black or espresso-brown so paint fills the deep engraving while the mask protects the surface. Stain trick: if the wood was stained before engraving, wipe another coat of the same stain over afterward, and it settles into the etched grooves and darkens them. For soot cleanup, Methanol Technical Grade is the community-recommended cleaner.
Project ideas and workshop tips for deep engraved wood
Personalised cutting boards, wall art, and wedding decor are what deep 3D engraving produces without manual carving skill, and the workflow scales down fine to jewelry boxes. Two design-phase tips save real pain: one-piece designs avoid assembly alignment problems, and kerf understanding is what makes interlocked pieces and slotted sign construction actually fit, which @BigBlueLaserDesigns’ kerf-adjustment tutorials cover. Bookmark the Laser Engraving 911 channel: 126K subscribers, 21 videos spanning techniques, business advice, color fill, wood inlay, and material tips, plus a $225 one-hour consultation and the ID5-4NB code for 15% off at Johnson Plastics Plus. The comments deliver too: 81-year-old viewer @myrlinlesikar404 ordered an xTool F1 after watching, the F2 Ultra appears in the related metal-tips video, Corvus Moon Studio’s Norton White Tile Technique is the Etsy-monetization rabbit hole, and sonomalaserengraving.com shows what a working shop site looks like.
Frequently Asked Questions
What is the maximum depth that laser engraving can reach?
No fixed maximum exists because depth is a function of heat management, optics, material, and laser class rather than a machine setting. Heat is solved with multi-pass engraving, optics with refocusing the bed as the channel deepens, and power ceilings are set by laser class — which is why a 60W CO2 finishes dense stock faster than a 20W diode.
Which laser is best for deep engraving?
It’s conditional: CO2 moves faster, with a 300-350 mm/s sweet spot for clean, sharp results, while a 20W diode can handle dimensional relief in soft and medium-density woods — just expect more passes and more time than a 60W CO2 on dense stock. Project scale decides, not wattage bragging rights.
What is deep laser engraving on wood and how does it differ from surface engraving?
Deep engraving is variable-depth cutting driven by per-pixel grayscale values, not a special machine setting — each pixel’s 0-255 value sets how deep the burn goes, with dark pixels carving low and light ones staying proud. Uniform-depth engraving marks the surface at a single depth; deep work is concave (cutting down into the pattern) or convex (removing material around the pattern so the design sits raised, i.e. embossing).
Why is my laser engraving on wood shallow or light, and how do I fix it?
Common causes are inconsistent focus, low image contrast, and heat mismanagement. Keep the piece flat and weighted so focus stays consistent across the whole job, engrave against the grain, and run a Material Test on scrap whenever marks come out light. If the channel floor is dark and glossy with soft edges, that’s heat soak — switch to more passes at higher speed.
