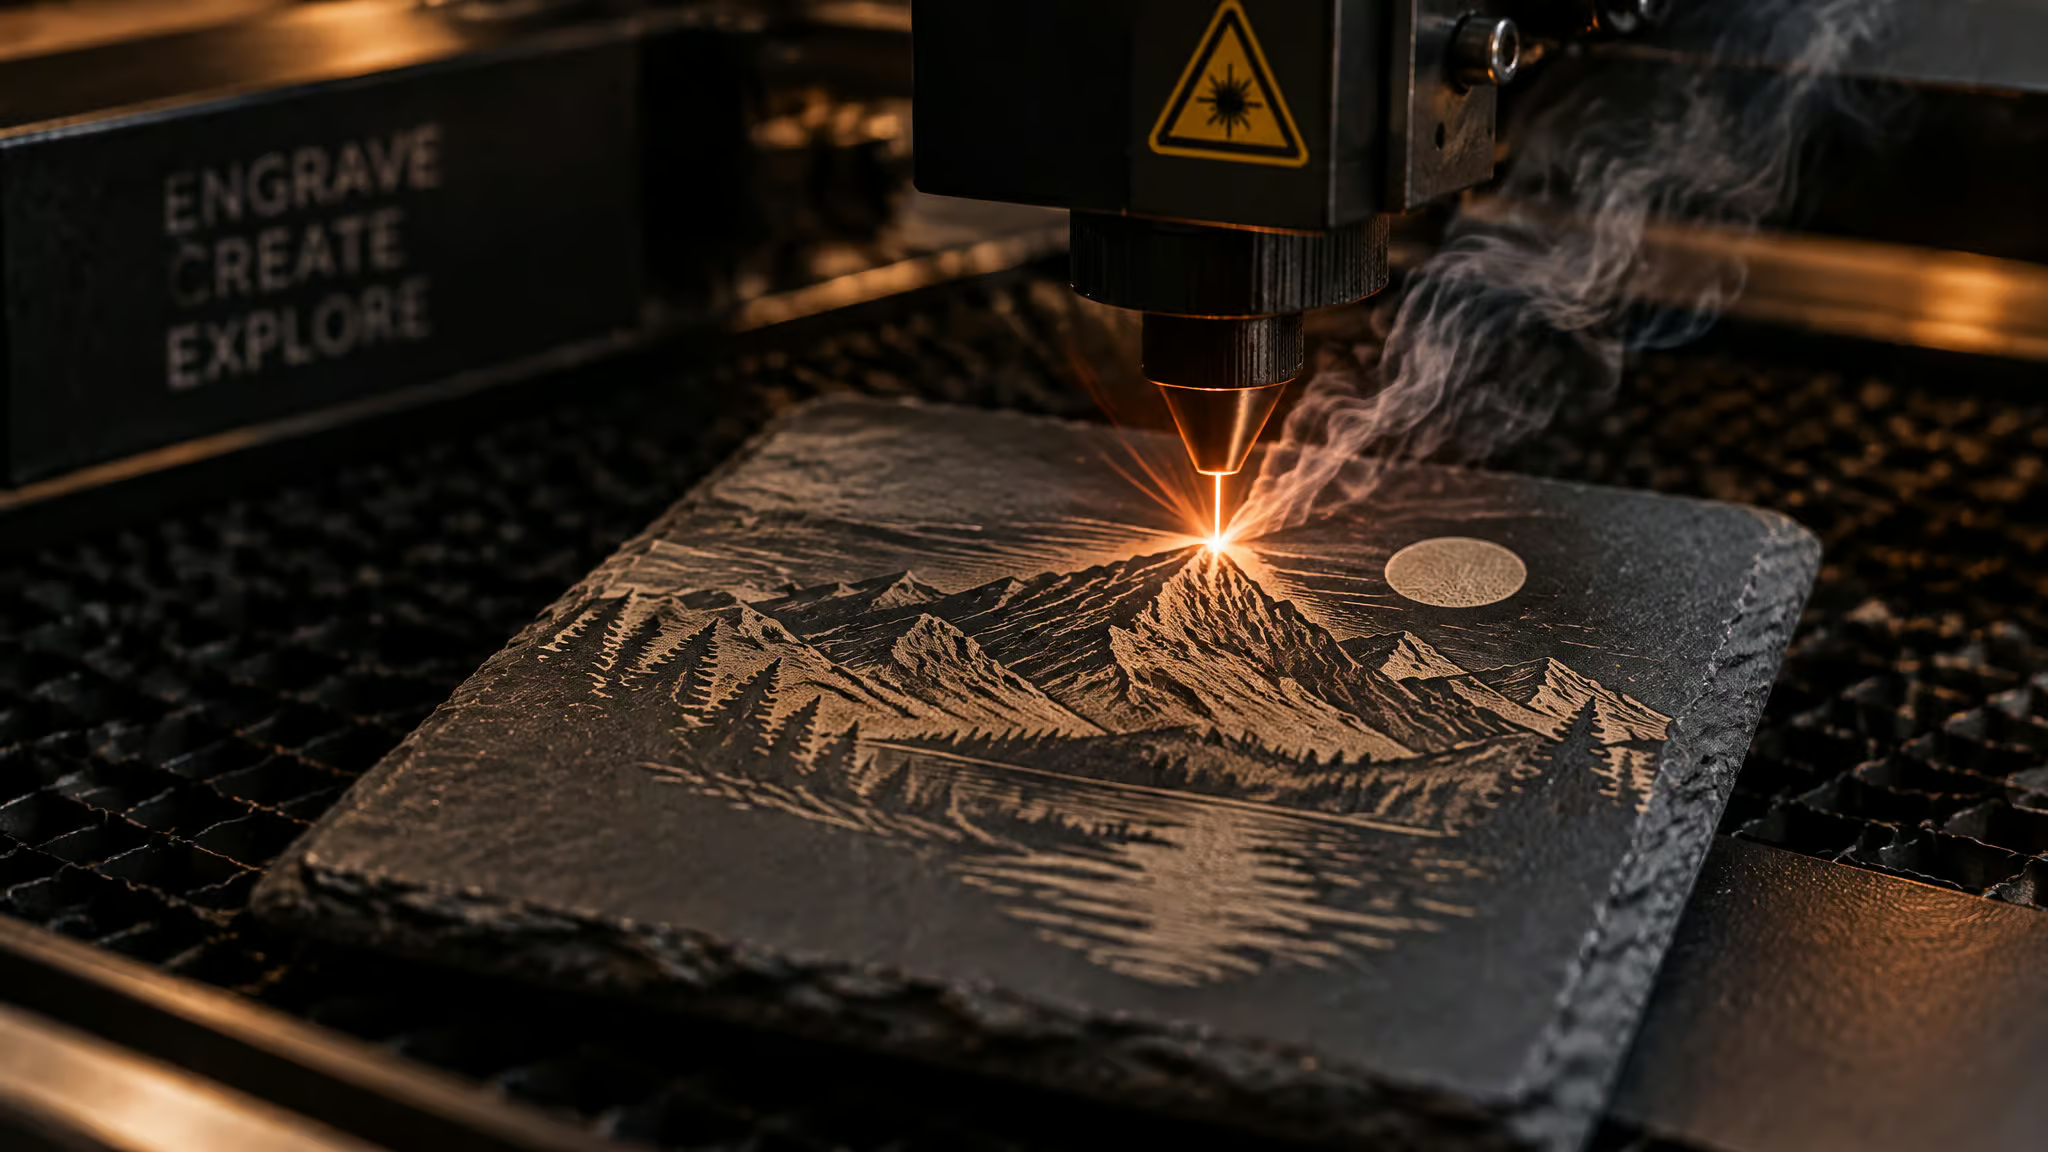
Turning a raw coaster blank into a sellable product covers selecting across 15+ substrates, matching the laser, prepping, designing, dialing in settings, finishing, and pricing, yet makers waste the most blanks by picking the wrong substrate for the artwork or starting with power settings that run too hot. The entire workflow runs on exact bench math: slate engravings swing from 1 minute on simple graphics to 14 minutes on intricate line art, painted cork demands roughly twice the laser power of bare cork, and 80-cent bulk slate blanks regularly turn into $30 to $40 custom four-packs.
Key Takeaways
Painted cork coasters require roughly twice the laser power of unpainted cork after applying two coats of art acrylic with cheap foam brushes and drying for two hours between coats.
Simple designs on a 4 x 4 inch slate blank take about 1 minute on an xTool F1 auto-routed to its 5W IR laser, while intricate line drawings take 10 to 14 minutes per coaster.
Bulk slate blanks cost about $0.80 each and sell for $7 apiece (or 4 for $25) at craft shows, $30 to $40 for customized retail four-packs, and around $60 for custom B2B sets.
Table of Contents
Source your coaster blanks and read the cork grain
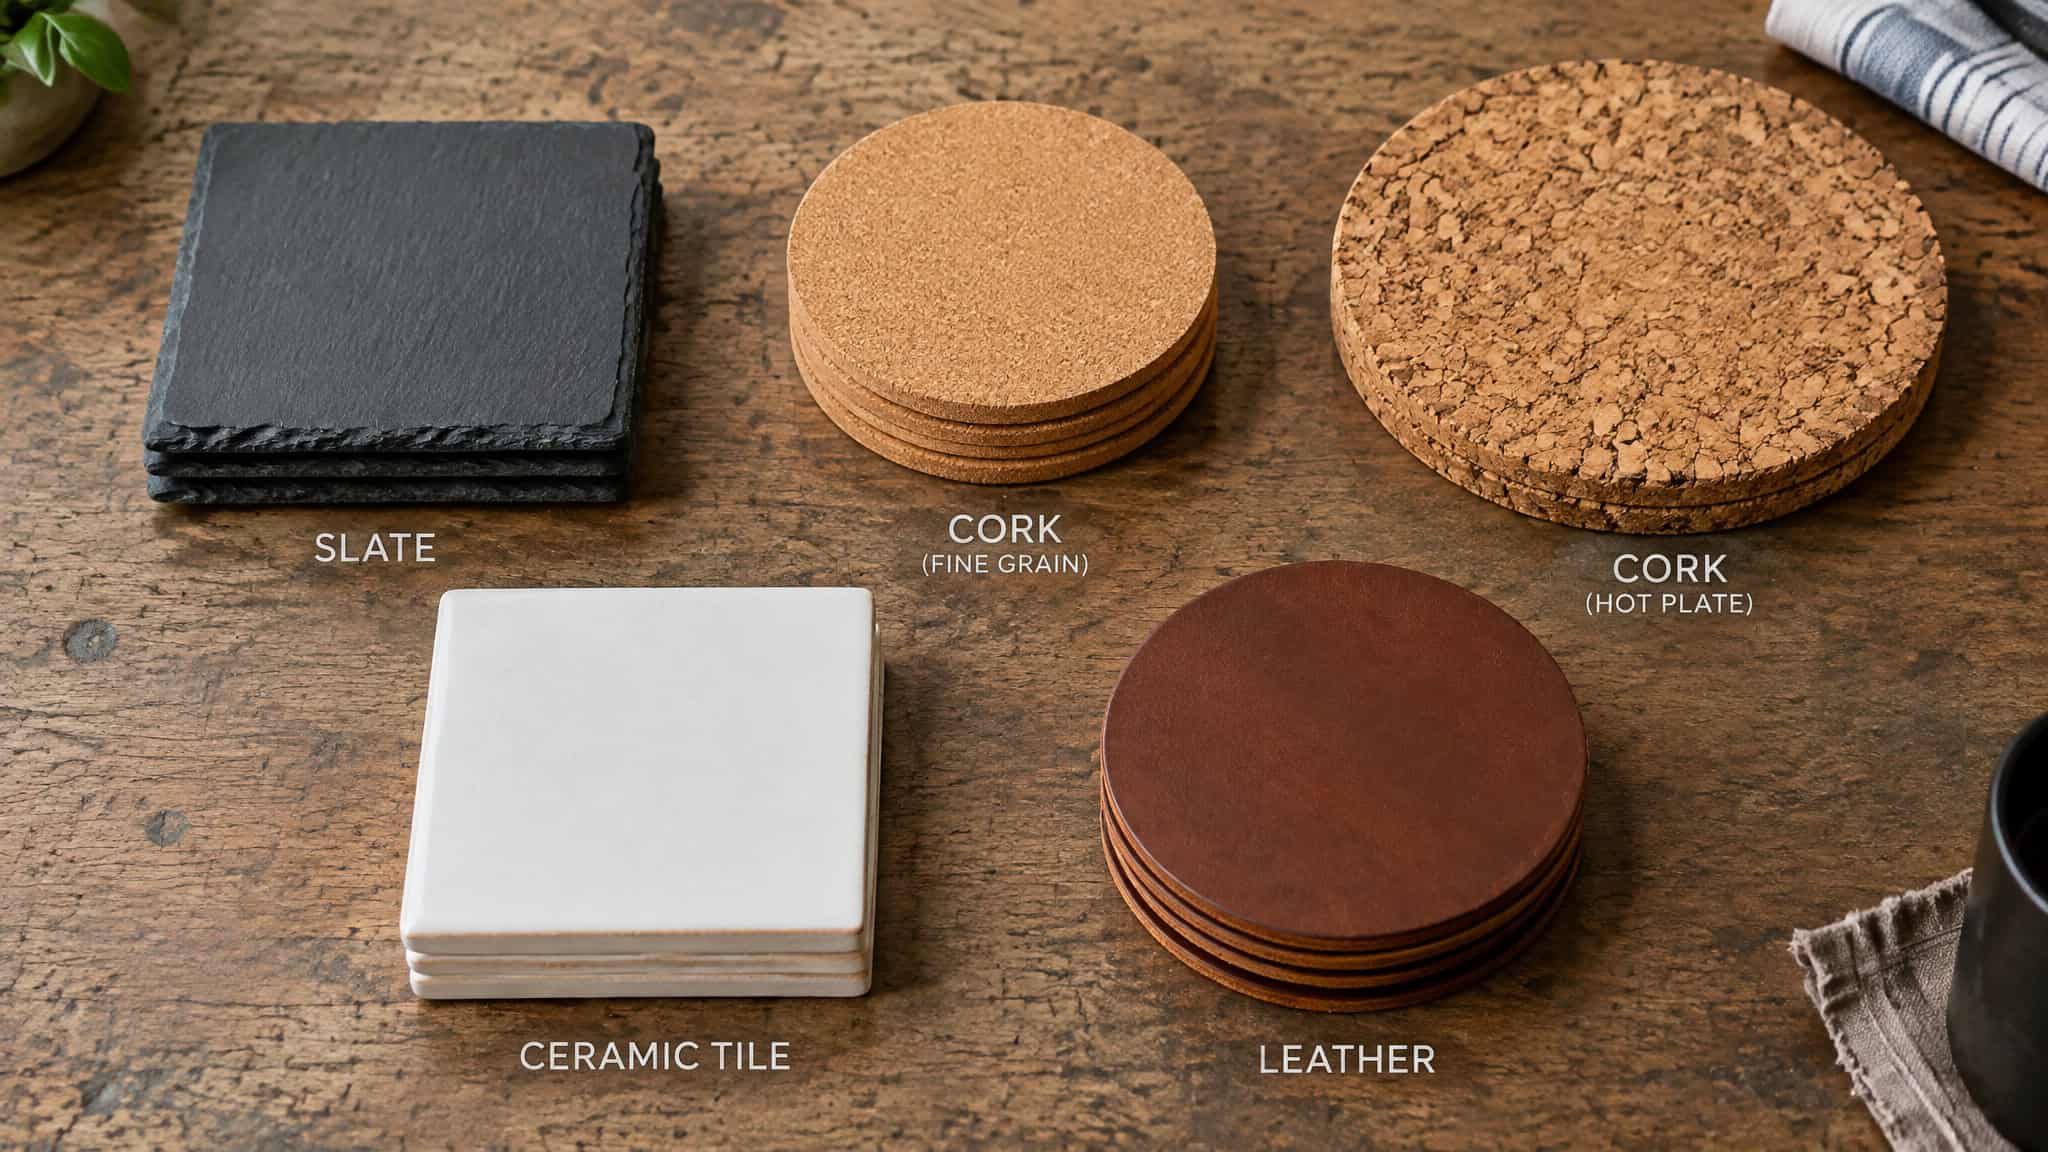
Blurry engravings on cork coasters happen when you buy chunky-grain blanks or start with your laser power set too high, so pulling sharp detail requires fine-grain cork and a low starting power that you walk upward across test burns. MakeTech’s workflow shows that blank cork coasters are cheap and easy to grab at dollar stores, Amazon, and eBay in rounded, hexagonal, and classic square shapes. Before you toss a pack into your cart, check the physical size category, because size maps directly to grain structure. Blanks are sold in smaller drink-coaster dimensions and larger hot-plate styles.
The smaller drink coasters are typically pressed from fine-grain cork, while the larger hot-plate blanks use chunkier cork particles. Because chunky cork has wide grain variation across the surface, the beam hits uneven pockets and loses fine line definition. If your artwork has intricate details, stick to the smaller fine-grain drink blanks and work your power settings up slowly so you don’t scorch the edges.
Every coaster material and the failure mode it carries
Coaster materials are best chosen by deciding which specific failure mode you want to manage across wood, stone, cork, metal, and synthetics, starting with slate as the most forgiving high-contrast option. Standard 4 x 4 inch slate blanks work on entry-level lasers right out of the box and produce crisp, high-contrast engravings against the dark stone whether you burn them raw or pre-spray them with clear coat, as demonstrated by Six Eight Woodworks. Comparing substrate compatibility across stone, wood, acrylic, and metal comes down to pairing each blank’s best trait against its physical catch.
Slate
Very popular, beginner-friendly 4 x 4 inch stone that engraves raw or pre-sprayed with clear coat on entry-level machines.
Cork
Inexpensive, absorbent, and sold in many shapes; leave it unsprayed to preserve moisture absorption, or grab adhesive-backed cork for low-cost, high-volume runs.
Granite and marble
Along with diatomaceous earth stone and marble-and-wood hybrids, these yield high-contrast, premium results and photo engravings that command higher prices once settings are dialed in.
Basswood and plywood
The cheapest bulk corporate workhorse; even an underpowered diode can engrave plywood and cut custom shapes.
Solid hardwood
Hardwoods like acacia give deeper results, and the xTool F2 Ultra UV pulls extreme detail, but they require an oil-wax finish like Walrus Oil or beeswax to stop warping. Avoid large orders of wood cookies with center pith, as distributors sell them wet and they’ll split.
Leather
Both genuine top-grain and PU leather engrave cleanly, Often finishing with a slightly darker look.
Metal
Stick to rust-resistant 304 or 420 stainless steel, titanium, aluminum, or brass so blanks don’t rust; UV lasers create vibrant color on stainless, though deep black takes hours.
Tile
Spraying ceramic tile with white paint before burning unlocks the high-contrast “white tile effect.”
Glass
Glass engraving is completely invisible unless you apply a marking agent before firing the laser, so coat the surface with black tempera paint first to make the mark show up.
Acrylic
Works well in black and holographic variants, such as pairing a Seattle skyline with a Kraken creature graphic.
Felt and denim
Textile blanks slot neatly into low-cost, high-volume product runs.
Silicone
A flexible synthetic blank that rounds out low-cost custom runs alongside textiles and acrylic.
Which laser type fits which coaster material
UV lasers are the most versatile machines across coaster materials, whereas CO2 lasers fit wood and certain composites and diode or 5W infrared (IR) lasers cover entry-level material subsets. Material suitability swings hard by wavelength, so matching your hardware to the blank determines whether a job finishes cleanly or stalls your workbench. While UV lasers, galvo systems, and MOPA lasers can produce vibrant color markings on stainless steel, burning a deep, dark black engraving into metal can take hours compared to a one-minute slate burn.
At GeekExtreme, we look past hardware marketing hype to the actual clock time and wattage math at the workbench. You don’t need an industrial rig to turn out sellable products. A basic 2.5W diode laser handles painted cork without issue, and an entry-level diode and 5W IR combo like the xTool F1 runs safely inside the house when paired with an air purifier. Stepping up to an xTool S1 40W diode gives you fast throughput on traced slate artwork, while the xTool F2 Ultra UV pulls deep detail out of solid hardwood and marks color on metal.
| Laser Type | Primary Coaster Fit | Key Bench Tradeoff or Capability |
|---|---|---|
| UV Laser (e.g., xTool F2 Ultra UV) | Most versatile across materials; hardwood, stainless steel | Pulls deep detail on hardwood and vibrant color on stainless, but deep black on metal takes hours |
| CO2 Laser (e.g., xTool P3, P2S) | Wood, basswood, plywood, and certain composites | Built for high-speed batch runs on organic and composite blanks |
| Diode Laser (e.g., 2.5W diode, xTool S1 40W, F1G 10W) | Plywood, cork, painted cork, slate | Even an underpowered diode cuts plywood Shapes; painted cork needs ~2x power |
| 5W Infrared (IR) Laser (e.g., xTool F1) | Slate and stone | Auto-routes stock stone settings on the F1 for ~1-minute simple burns |
| Galvo / MOPA Laser | Specialized metal marking | Handles color marking on rust-resistant metals, though deep black remains slow |
Those same coaster parameters scale up directly to larger pieces like hot-plate trivets, though standard drink coasters remain the real volume play. With careful tuning, you can also dial in parameters for edge cases like blanks with a thin plastic coating, easily scuffed surfaces, or custom-cut acrylic shapes.
Mask, paint, and pre-treat the blank before the laser fires
Achieving crisp contrast on painted coasters requires masking the outer edges with quality painter’s tape before brushing on at least two coats of standard art acrylic paint and doubling your laser power. Surface prep before the blank ever hits the laser bed dictates both your edge sharpness and how hard the beam has to work.
Masking and the painted-cork power rule
Wrap good-quality painter’s tape around the coaster’s rim before picking up a brush so paint can’t overflow onto the sides (if you’re leaving the blank raw, skip the tape). Use cheap foam brushes to apply a minimum of two coats of standard art acrylic paint, which covers evenly and lasers cleanly. Let the blank dry for about two hours between coats, then wait another couple of hours after the final coat before engraving, as demonstrated on a painted cork Boba Fett build. Because cured acrylic resists the beam, painted coasters are harder to burn through and need roughly twice the laser power of unpainted cork on a 2.5W diode setup.
Pre-spraying slate and the white tile trick
On slate, applying a light spray of gloss or satin clear coat or spray lacquer before engraving makes the finished mark pop, whereas a light clear coat on cork is just optional protection. Pre-spraying slate does sacrifice its natural moisture absorption, though the raw stone exposed where the laser removes material retains some absorbency. On ceramic blanks, spraying the surface with white paint before firing creates the high-contrast “white tile effect.”
Design and software: presets, tracing, and where art comes from
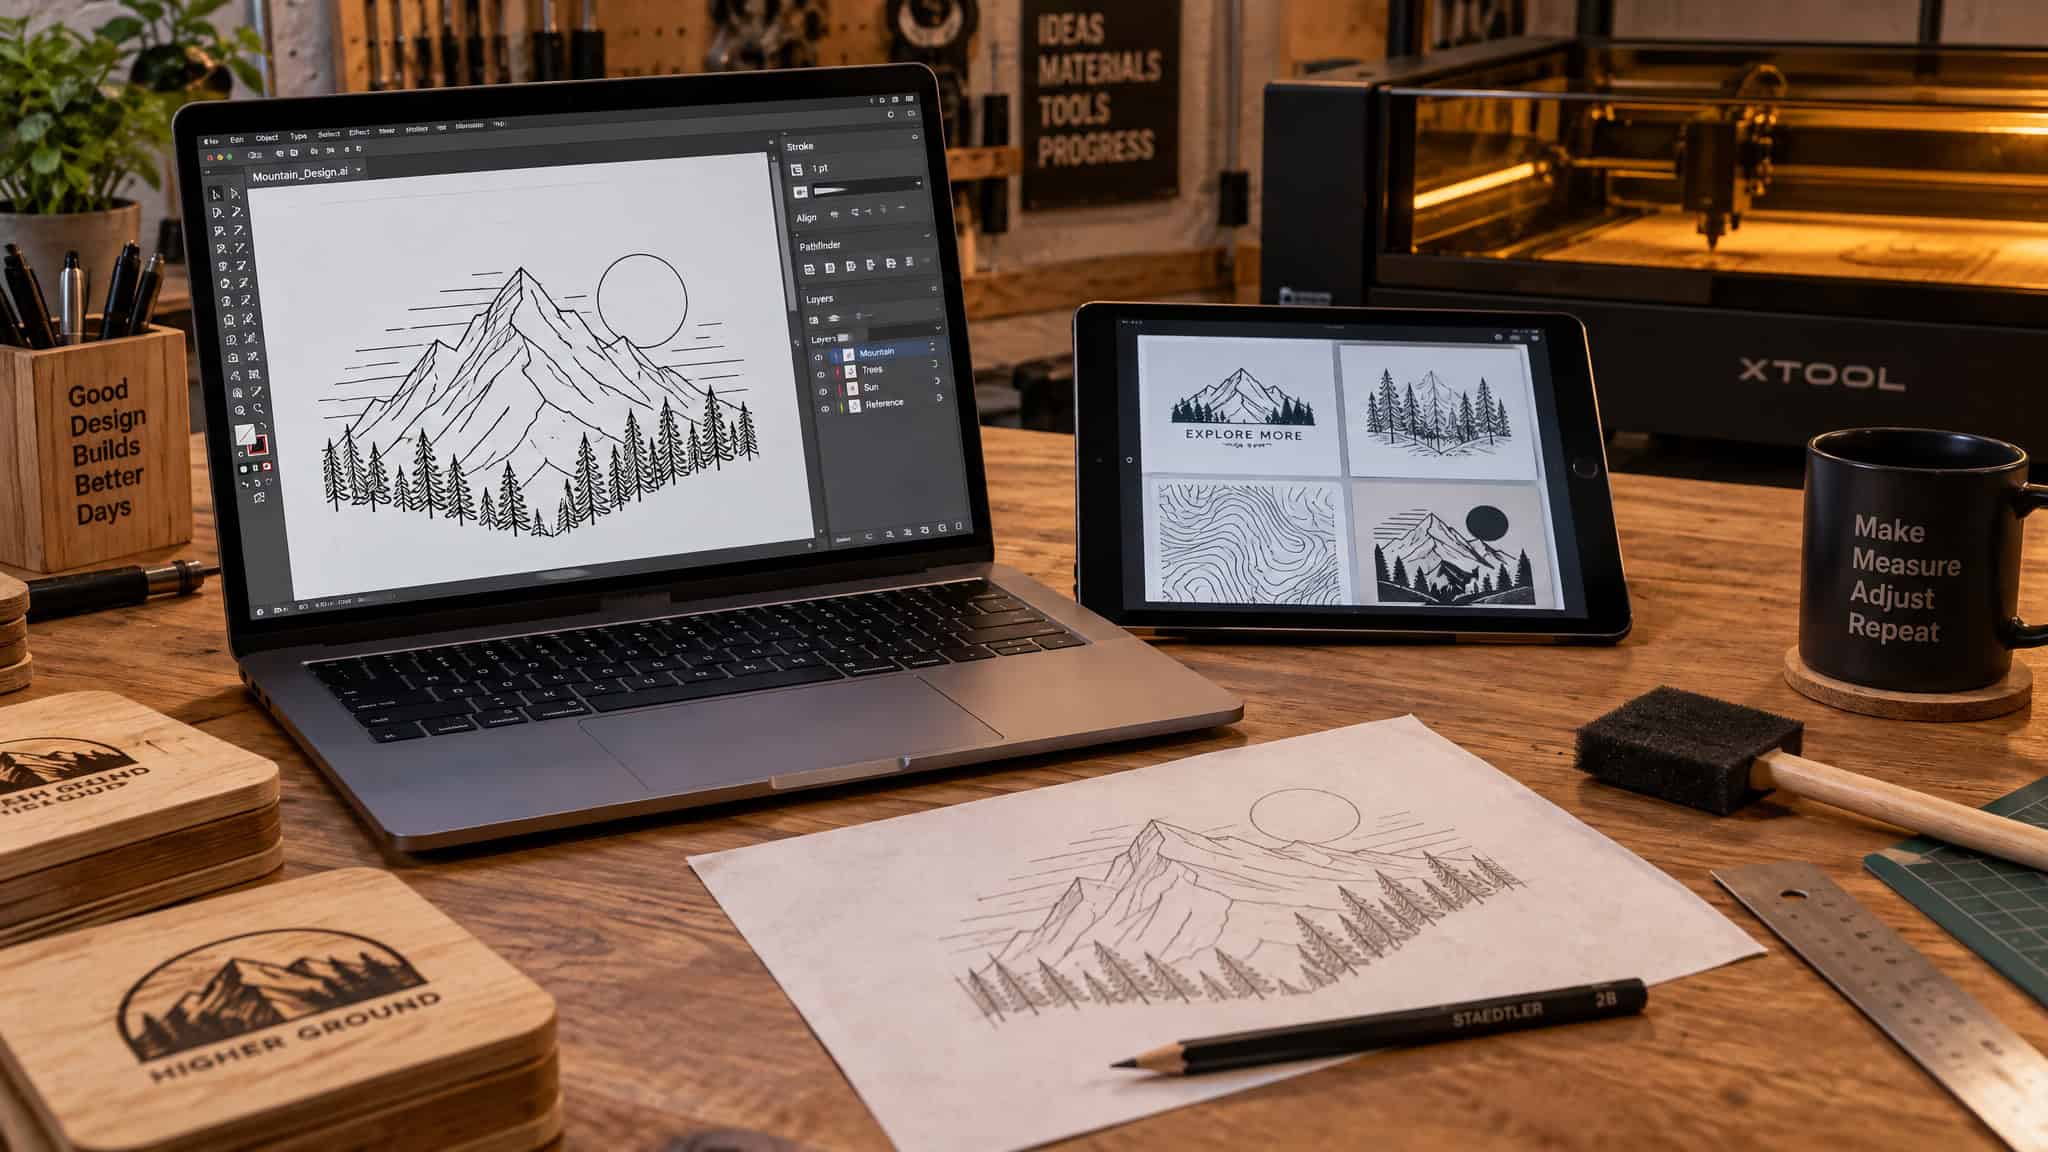
Creating or sourcing coaster design files comes down to choosing between xTool Studio’s built-in material presets and xArt AI generator, tracing pixelated art manually in LightBurn, or grabbing ready-made vectors from Etsy, Creative Fabrica, and Bing Image Creator. Preparing your digital blueprint and vector files for coaster engraving splits into two distinct software philosophies depending on whether you want plug-and-play automation or granular layer control.
Preset-driven Studio vs manual LightBurn tracing
xTool Studio streamlines setup by letting you select your material type, machine model, and wattage to load recommended settings, alongside its built-in xArt AI image generator, though subscription or per-file costs apply. LightBurn puts you in manual control: search for “clip art” to find clean source graphics, paste the pixelated image into your workspace, and press Alt+T to trace and vectorize it, as shown when burning traced Viking art onto slate with an xTool S1 40W.
From there, draw a 4-inch circle template, set the engrave fill layer to speed 300 and power 35, and set the cut line to speed 15 and power 70. Use the waffle/grid array tool to duplicate the file into a 2×2 set, and verify your laser, power strip, and air filter are all switched on before sending the job.
Sourcing art and inverting for dark blanks
If you’d rather buy proven files, Etsy and Creative Fabrica sell vector bundles: one Etsy shop stocks 150+ sets at roughly $2 per file (prices vary by seller), and purchased line drawings look especially sharp on slate. Bing Image Creator is free with a Microsoft account and generates clean line drawings for Pacific Northwest, Sasquatch, San Juan Islands, and Space Needle themes. AI generators consistently botch text, so generate the artwork clean and add lettering afterward in your laser software. Always invert your image file to a negative when prepping dark materials like slate, and consider engraving secondary art on the underside of a coaster set or pairing coasters with matching engraved whiskey glasses.
Settings, centering, and tonal control at the laser
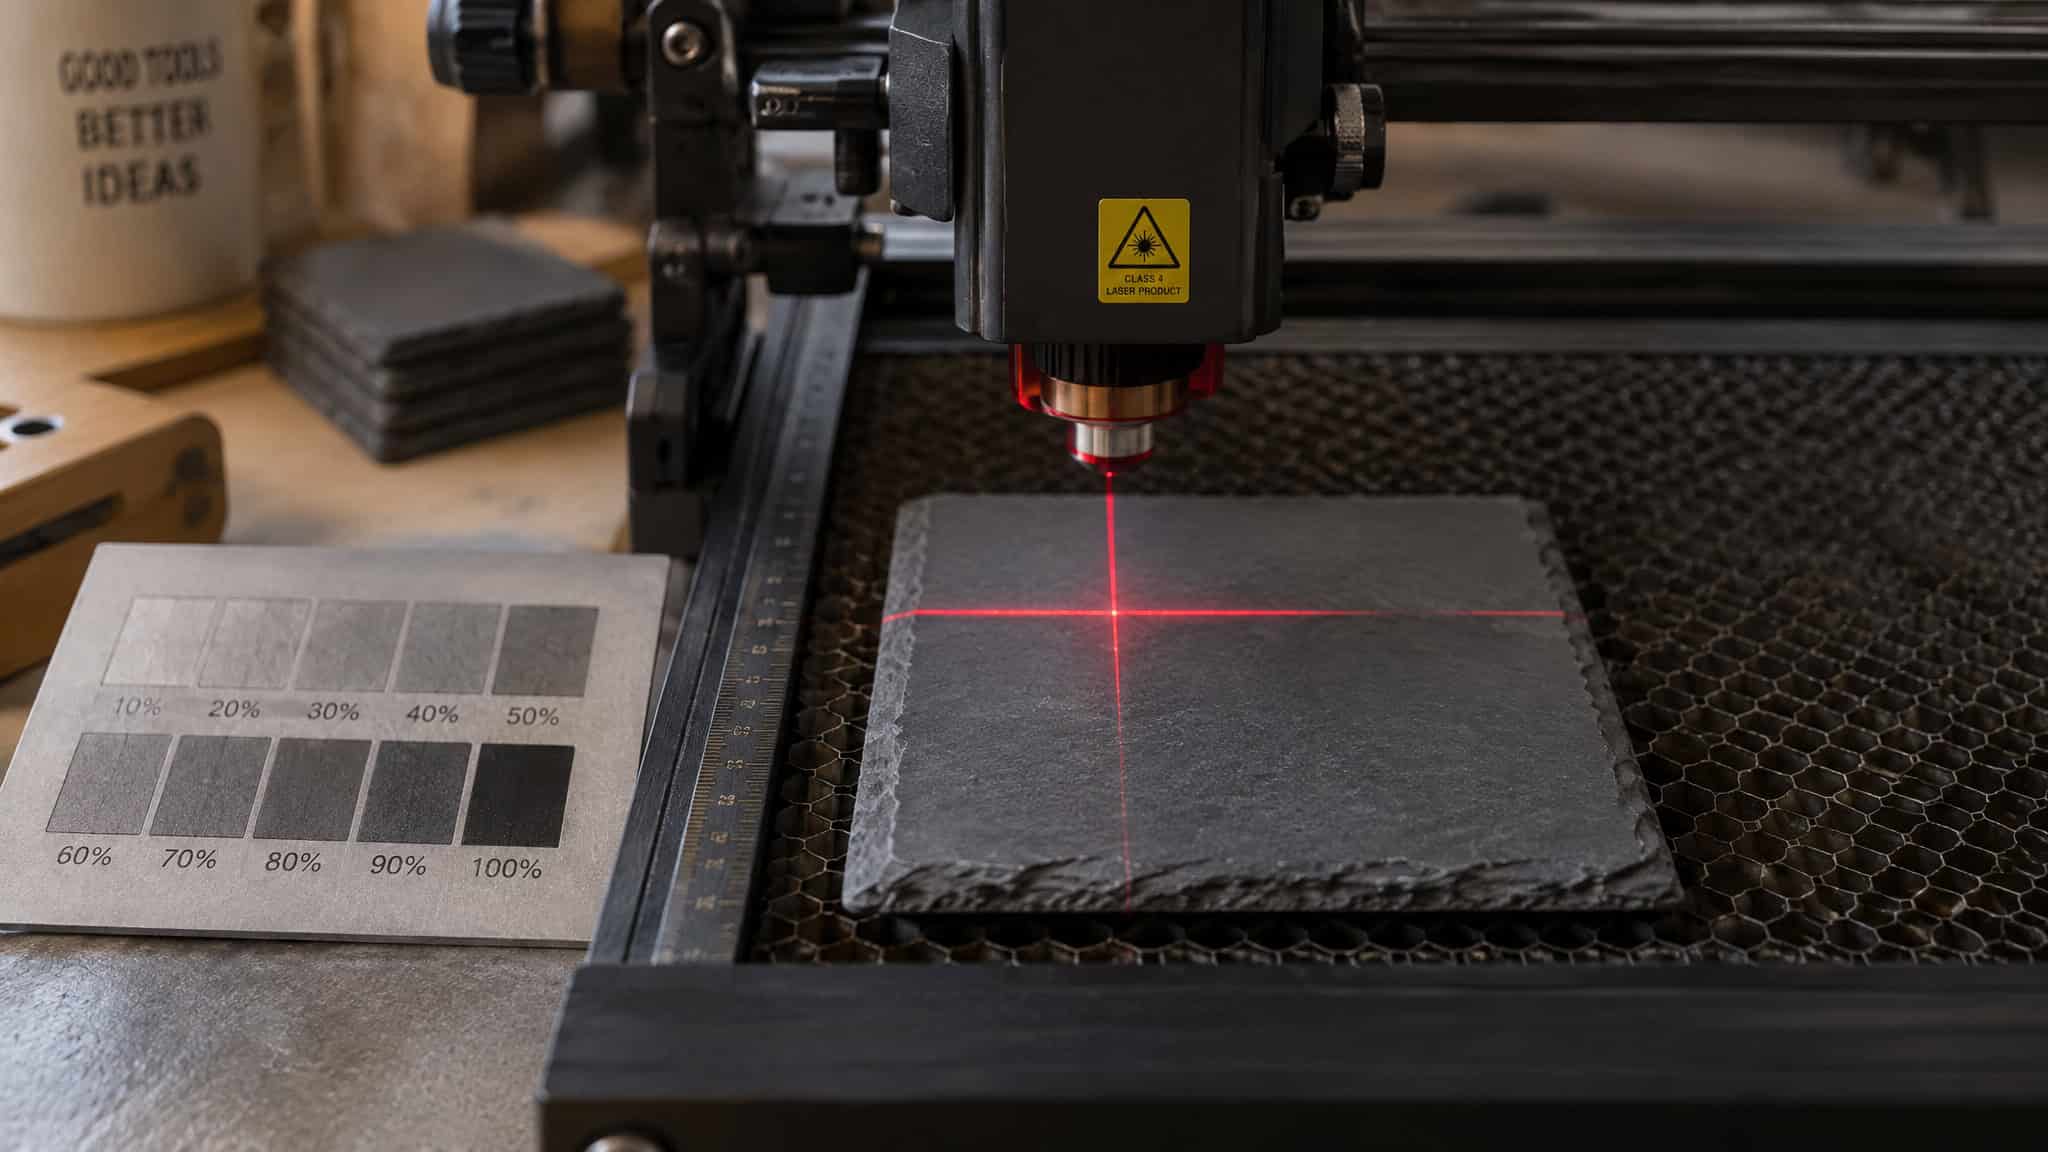
- Laser power and speed settings are governed by your specific machine wattage and surface prep, requiring low starting power on cork and stock IR or tuned diode settings on slate. Because settings shift drastically by model, makers rely on xTool’s online recommended-settings library and test grids, starting low on bare cork while doubling power for painted cork on a 2.5W diode, or jumping from xTool’s baseline S1 40W slate settings (power 10, speed 140, 120 lines/cm) to custom grayscale bitmap numbers (power 30, speed 250, 160 lines/cm).
Dialing in power, speed, and focus parameters for coasters starts with physical alignment on the bed before you ever touch a speed slider.
Centering on a 4 x 4 inch blank
Standard slate coasters measure 4 x 4 inches (framed with a 4-inch circle tool in software), and you can align your design in the dead center using a 3D-printed plastic jig from Thingiverse, online circle-center-finding geometry, or corner-marking on the bed. If you align manually, measure the bed distance, mark the top-left and bottom-right corners, frame the job, and center the artwork. Letting the design run slightly edge-to-edge past the rim produces a cleaner look.
Starting settings that don’t scorch
Cork burns easily, so start at low power and work upward; in T2 Laser software with a 2.5W diode, painted cork required roughly twice the power of raw cork. On slate, the xTool F1 automatically routes jobs to its 5W IR laser using stock stone settings, just load the image, select auto settings, frame, and press start.
Speed and power as a color tool
Varying speed and power on slate unlocks distinct gold, silvery, or gray tones across diode, CO2, and IR lasers, including the xTool F1 and xTool F1G 10W diode. Because slower speeds give the gold effect (while multi-tone jobs take more time), running a test grid on slate, tile, or glass first reveals the different color results a single laser can produce.
Slate: the beginner workhorse and its real time economics
Engraving a slate coaster takes anywhere from 1 minute to 14 minutes because design complexity drives a tenfold spread in laser run time. On an xTool F1 using stock stone settings auto-routed to the 5W IR laser, a simple graphic on a 4 x 4 inch slate coaster finishes in about a minute. Load an intricate line drawing onto that same stone, and the burn stretches to 10 to 14 minutes per coaster, turning a quick batch into TV-watching multitasking territory.
Even with longer run times on detailed art, slate dominates beginner setups because it’s forgiving, needs minimal design work, runs on low-cost entry-level lasers, and carries high profit margins. The one trap that catches first-time slate makers is forgetting that lasers lighten dark stone where the beam hits. You have to flip the graphic to a negative first using the “invert image” toggle in xTool software. Skip that click, and your coaster comes off the bed in reverse with the background burned light around a dark subject. Once inverted, even family photos engrave cleanly onto stone coasters using stock settings.
Wash, dry, and finish by material
Making laser-engraved wood and slate coasters last requires scrubbing off fresh soot under cold water with dish soap and a brush, air-drying, and applying a material-matched finish: an oil-wax blend on solid hardwood to prevent warping, or spray lacquer on slate and tile to seal out moisture. Whether you should add a clear coat after washing depends entirely on how the coaster will be used: a light clear coat spray is optional protection rather than a mandatory step, and you should skip it on cork or slate whenever you want the coaster to actually soak up drink condensation.
Once the washed blanks air-dry at the sink, choosing the right protective coating or sealant comes down to durability versus function. Solid hardwood coasters must be conditioned like a cutting board with Walrus Oil or beeswax so moisture swings don’t warp the wood. On slate and ceramic tile, polyurethane or spray lacquer locks out water and deepens surface contrast, but sealing slate kills its ability to absorb sweat from a cold glass.
Scaling production: conveyor batches vs one-at-a-time
Choosing between a conveyor batch setup and one-at-a-time loading comes down to raw machine throughput versus operator multitasking: conveyor systems maximize automated volume, while single-piece loading lets you get more done around the house between burns. For bulk runs, CO2 conveyor setups like the xTool P3 and P2S or the xTool F2 Ultra with a conveyor belt blast through batches at high speed, especially when paired with low-cost, high-volume blanks like felt and adhesive-backed cork.
What coasters sell for: craft shows and B2B
Pricing laser-engraved coasters starts at $7 each or 4 for $25 for loose impulse buys at craft shows, steps up to $30 to $40 for customized retail four-packs, and reaches roughly $60 per set for custom B2B orders sold to real estate agents and mortgage companies (though exact blank and retail prices vary by supplier and market).
The unit math makes coasters one of the highest-margin projects on a maker bench. Bulk 4 x 4 inch slate blanks cost about $0.80 apiece, just $3.20 in raw stone for a four-pack, and slide right into standard 4 x 4 inch shipping boxes. Even after factoring in roughly $2 for an Etsy vector file, turning $3.20 worth of slate into a $30 to $40 customized gift set keeps your cost of entry tiny.
If you want to push into higher retail tiers, granite, marble, and solid hardwood blanks command a premium over standard slate. On the corporate side, realtors and mortgage brokers regularly buy $60 custom sets as closing gifts, and pairing those coasters with corporate-logo engraved whiskey tumblers creates an easy promotional bundle.
What you can legally sell: the logo line and the design workaround
No, selling laser-engraved coasters with Disney or sports team logos is not legal without a commercial license, except when your inventory uses original, public-domain, or commercially licensed artwork. Putting trademarked characters or professional sports emblems onto items on a craft-fair table or online shop carries serious legal risk, and licensing is mandatory for any commercial use of copyrighted material.
When makers show painted Boba Fett cork coasters or sports graphics in tutorials and machine demos, those builds are strictly personal-use examples, never inventory you can legally sell. If you’re building a side business, treat this as a practical workshop boundary rather than formal legal advice: keep unlicensed fandom experiments at home and build your commercial catalog around art you have the rights to sell.
You can still capture local pride and regional demand without touching protected sports trademarks by leaning into the “design, not logo” workaround. Instead of burning a pro team’s trademarked crest, combine a local landmark with thematic creature art. A proven example on holographic acrylic pairs the Seattle skyline with a mythological sea kraken graphic, giving local fans the exact vibe they want as an original design rather than a league logo.
Regional and outdoor themes sell just as briskly without any IP headaches. Makers regularly use Bing Image Creator or xArt to generate original line drawings around Pacific Northwest themes, Sasquatch, the Space Needle, and the San Juan Islands, adding clean custom typography afterward in LightBurn or xTool Studio. Pair those regional line drawings with ~$2 commercial-use vector bundles from Etsy or Creative Fabrica, and your shop can run high-margin slate and hardwood sets all year with zero trademark friction.
Frequently Asked Questions
What materials work best for laser engraved coasters: wood, slate, cork, stone, or acrylic?
Standard 4 x 4 inch slate is the easiest starting point because it handles entry-level lasers right out of the box and delivers high contrast whether left raw or pre-sprayed with clear coat. For budget bulk runs, basswood, plywood, and fine-grain drink cork are cheap and effective, while black or holographic acrylic works great for graphic designs. If you want premium pricing, step up to granite, marble, diatomaceous earth stone, or solid hardwoods like acacia—just avoid wet wood cookies with center pith, which inevitably split.
How do you paint and mask coasters before laser engraving for clean contrast?
Wrap quality painter’s tape around the outer rim of the blank so paint cannot bleed onto the edges. Brush on at least two coats of standard art acrylic using cheap foam brushes, waiting roughly two hours between coats and another two hours after the final layer before engraving. Because cured acrylic resists the beam, plan on doubling your laser power compared to bare cork, or try pre-spraying slate with clear lacquer and ceramic tile with white paint to boost surface contrast.
What laser power and speed settings should I use to engrave slate and cork coasters?
Because cork scorches easily, always start at low power and walk your settings up across a test grid, doubling your wattage if the cork is painted with acrylic. On a 4 x 4 inch slate blank, an xTool F1 can simply run auto-routed stock stone settings on its 5W IR laser. If you are running an xTool S1 40W diode on slate, baseline parameters sit at 10% power and 140 mm/s speed (120 lines/cm), while custom grayscale bitmaps can jump to 30% power and 250 mm/s (160 lines/cm), or 35% power and 300 speed for traced vector fills in LightBurn.
How long does it take to laser engrave a coaster?
Run times swing wildly based on your artwork and material. A simple graphic on a 4 x 4 inch slate blank takes about 1 minute on an xTool F1 using its 5W IR laser, whereas an intricate line drawing on that exact same stone takes 10 to 14 minutes. If you are engraving deep, dark black markings into stainless steel or slowing down your speed to coax gold tones out of slate, expect the job to take considerably longer.
How do you seal and finish laser engraved wood and slate coasters so they last?
Start by scrubbing away fresh soot under cold water with dish soap and a brush, then let the blanks air-dry completely. Solid hardwood coasters need to be conditioned like a cutting board using an oil-wax blend such as Walrus Oil or beeswax so moisture changes don’t warp the grain. For slate and ceramic tile, a coat of polyurethane or spray lacquer locks out water and deepens contrast.
Do you need to clear coat laser engraved coasters after washing off the soot?
No, applying a clear coat after washing is completely optional and depends on whether you want the coaster to stay absorbent. Sealing slate or cork with spray lacquer or polyurethane protects the finish and boosts contrast, but it blocks the material from soaking up condensation from a cold glass. If you want a functional coaster that actually catches drink sweat, leave the cork or raw engraved stone unsealed.
How do you engrave designs on glass coasters so the marking is visible?
Firing a laser directly onto bare glass leaves an invisible result unless you prep the surface with a marking agent first. Coat the glass blank with black tempera paint before running the job so the beam has a target to react against and leave a visible mark. Because glass reacts differently across power levels, always burn a test grid first to dial in your exact settings.
