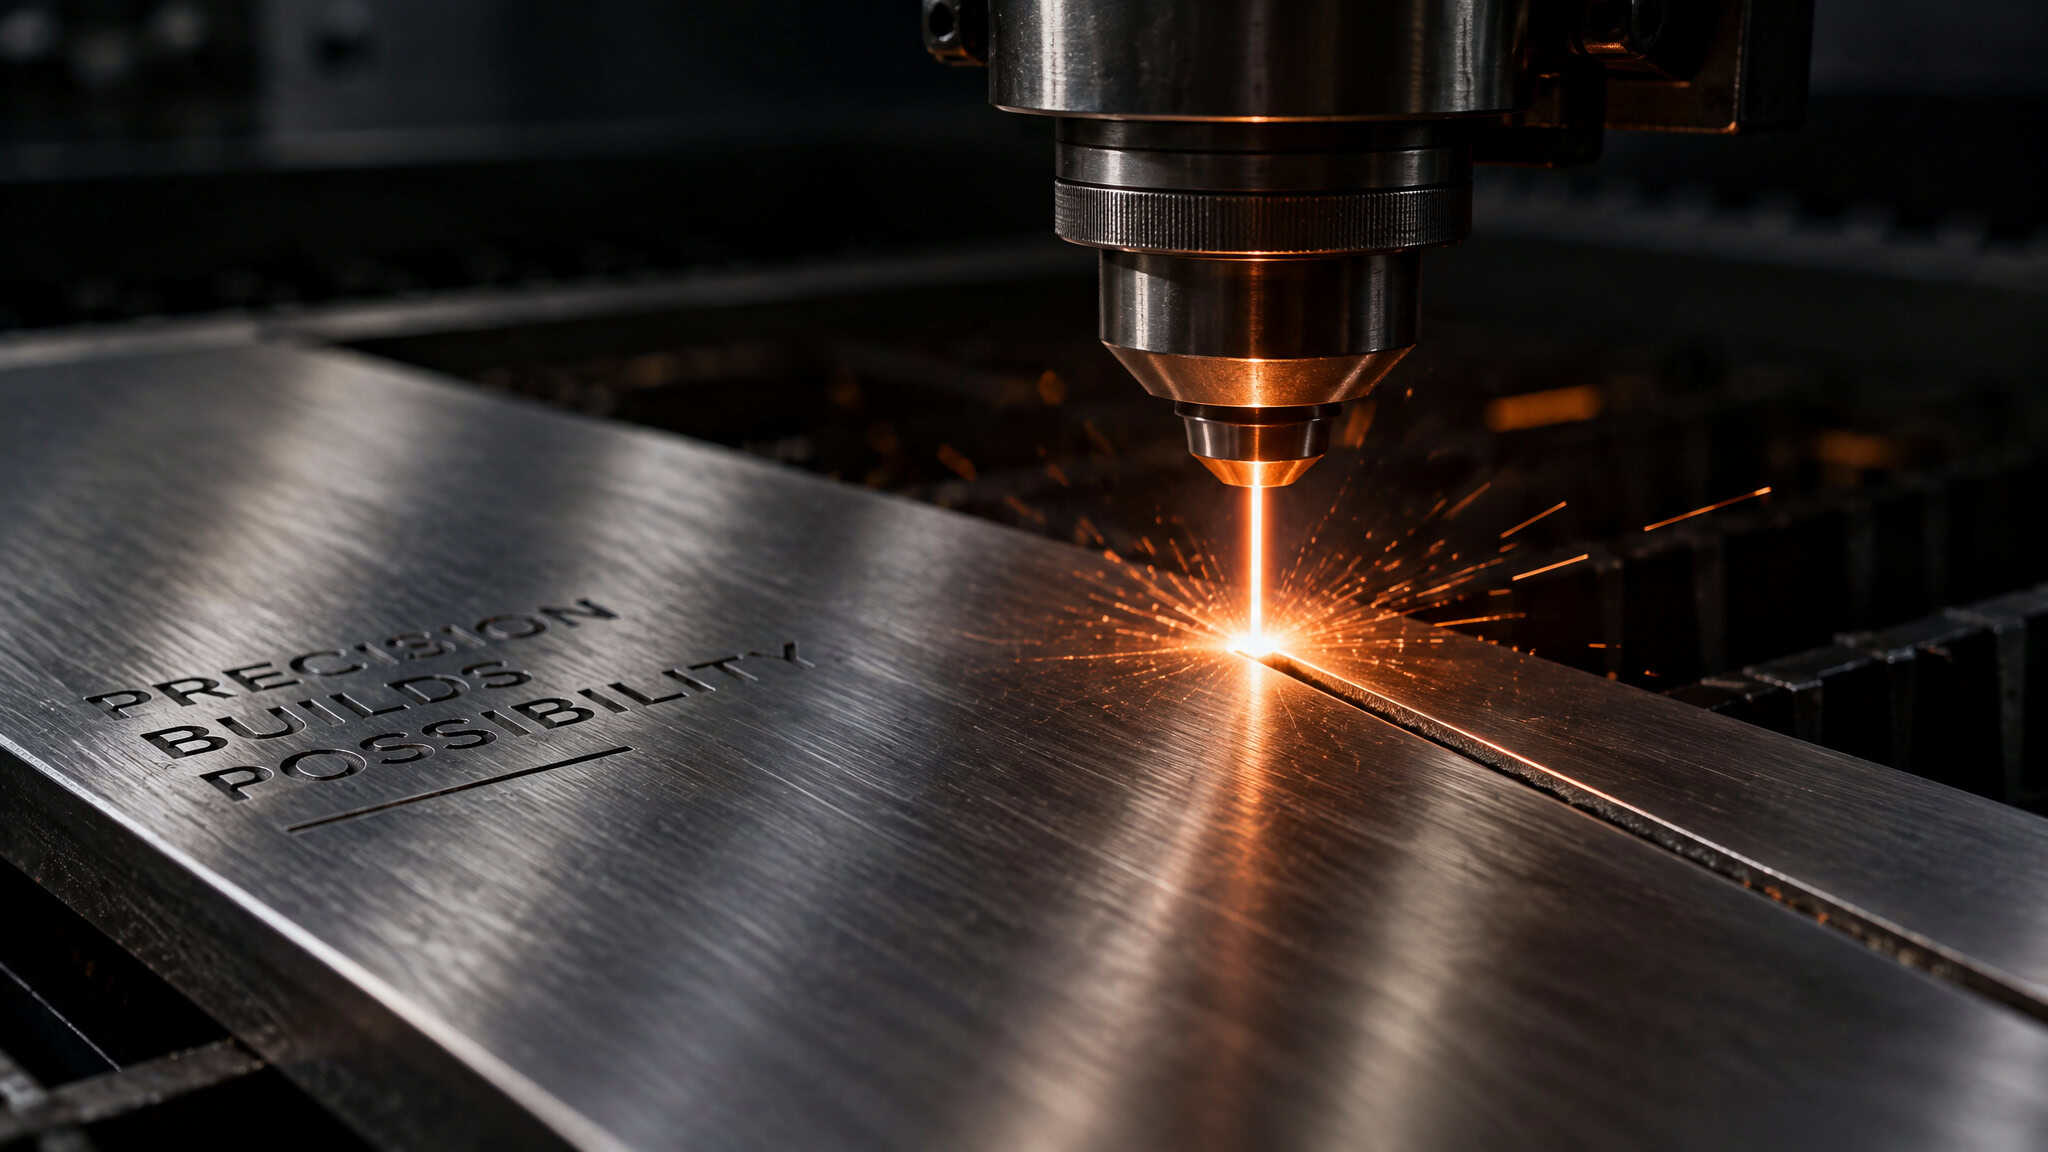
Ask three shops to “engrave” a metal part and you may get three physically different processes back. One will use a micron-thin color change, one will melt the surface into slightly raised ridges, and one will actually vaporize material into a real, touchable trough. All three will call it engraving on the quote. This isn’t shops being shady, exactly.
The industry genuinely uses engraving, etching, and marking interchangeably, there’s even a steady stream of people searching “laser etch engraving” every month, which is a bit like searching for “hiking swimming.” The thing that finally made this click for me: only one of those three processes does what the word engraving actually promises. The rest of this article explains the mechanism, not the machines, because once you understand what’s physically happening where the beam meets the material, you can read any quote and know exactly which depth and process you’re buying.
Key Takeaways
Engraving is the deep one: vaporization, solid straight to gas, 0.010?, 0.020? deep. Etching melts ridges at 0.001?, 0.005?. Marking doesn’t remove anything at all, the color change happens in microns.
The depth ceiling around 0.020?, 0.025? is optical, not electrical: the beam drifts off focus as the trough deepens and trapped vapor fouls the walls, so more wattage doesn’t fix it.
Timing scales with depth: a text block takes about 2 seconds to stain mark versus roughly 25 seconds to engrave 0.015? deep, and engraving scans at 5-10 in/s versus 30-40 in/s for stain marking.
Table of Contents
What happens when a laser engraves a material
The beam heats material faster than it can melt, so it jumps straight from solid to gas. That’s sublimation, and what’s left behind is a visible, tactile cavity carved into the part.
The common explanation you’ve probably seen, that a laser concentrates light into heat and the heat removes material, is true. It’s just missing the interesting part. What’s happening is photothermal ablation: rapid heating that vaporizes the material outright. And depending on the settings, that same beam produces three completely different physical outcomes.
It can oxidize the surface into a new color (marking), melt it so it swells into raised ridging (etching), or blow it clean through the vaporization threshold (engraving). Sublimation versus melting versus oxidation, that’s the whole taxonomy.
Quick context on the tool itself: a laser is coherent light, meaning all the waves are lined up and the same wavelength, generated and amplified inside a resonator. That coherence is what lets the optics focus enormous power into a spot that can be as narrow as 0.0254 mm. For scale, that’s tighter than the pixel pitch on a decent phone screen, and unlike a drill bit, it never touches the part. This is how you get readable characters under 1 mm wide with zero mechanical stress on the workpiece.
Here is what a single job actually looks like, step by step.
- The laser source generates the beam (diodes or a CO2 chamber, depending on the machine).
- Mirrors steered by galvanometers sweep it across the design path.
- Each pass heats the surface past the vaporization point, removing a thin slice.
- Repeated passes build depth until the target is reached.
- Fume extraction pulls the vapor away from the lens and the workspace.
That last step isn’t optional, by the way. The vapor has to go somewhere, and we’ll come back to why it matters twice before this article ends.
The depth ladder: engraving vs etching vs marking
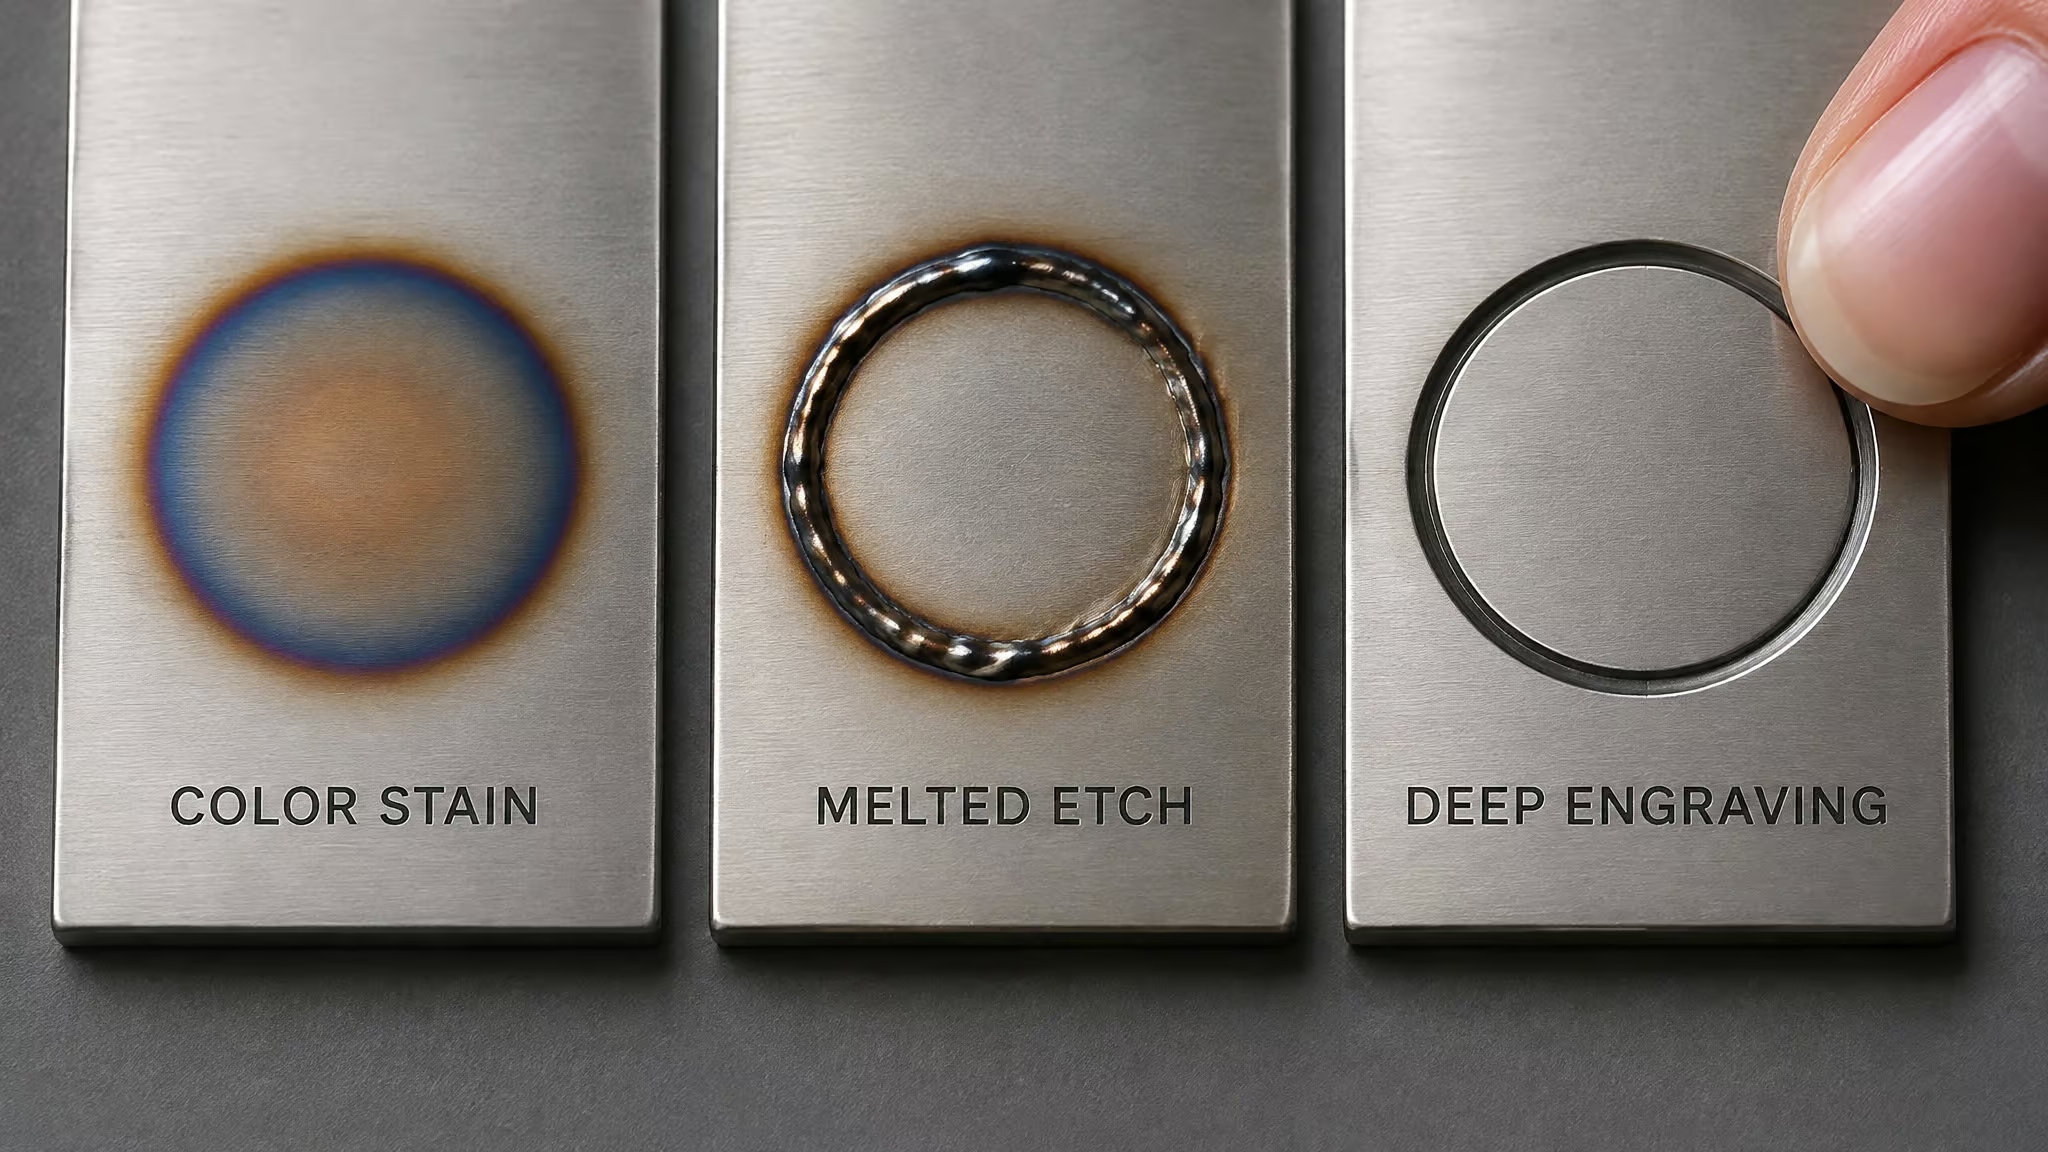
The difference between the three processes is depth and physical mechanism: laser marking alters surface color in microns without removing material, laser etching removes roughly 0.001?, 0.005?, and laser engraving vaporizes material to 0.010?, 0.020?. Same beam, three different depths, three different physical results.
Run up the ladder one rung at a time.
Rung 1: stain marking changes color, not geometry
Stain marking doesn’t remove anything, it heats the surface just enough to trigger oxidation or annealing, a chemical change that turns the metal a different color. Four sub-types exist: annealing, carbon migration, foaming, coloration. Annealing is the interesting one: it drives oxidation below the surface, which is why annealed marks turn black.
Stainless steel, titanium, and hard chrome all take the process cleanly, and medical device manufacturers love it because the surface stays smooth. No crevices, nothing for contaminants to hide in when the instrument goes through sterilization.
Rung 2: etching melts first, removes second
Laser etching removes about 0.001?, 0.005? of material, enough that you can feel it with a fingernail, but not enough to change the part’s dimensions. The mechanism, as KEYENCE describes it, is a phase change: the heat melts the surface, and the melted material expands into slightly raised ridges. That’s physically different from engraving, not just a shallower version of it. (And yes, the industry uses “ablation” and “etching” interchangeably for this rung. I’ve stopped fighting it.)
One honest wrinkle: TYKMA caps etching at 0.001?, while another source gives the full 0.001?, 0.005? range. The likely explanation is accounting, single pass versus total removal after multiple passes. Either way, the fingernail test holds: if you can feel it but a caliper says the part is still in spec, it’s an etch.
The color of an etched mark (black, white, or gray) depends on the absorption/reflection ratio of the material. On anodized aluminum, the etch strips the coating and textures the base metal underneath, which is where the bright-white mark comes from. A typical etched text block takes 3 to 8 seconds per cycle.
Rung 3: engraving actually digs
Laser engraving vaporizes material through the solid-to-gas jump, reaching 0.010?, 0.020? on standard jobs, with graphite tolerating depths up to 0.125?. This is the only rung that produces a genuine trough, the thing the word “engraving” has meant since before lasers existed.
The tactile boundary between rungs is delightfully low-tech: drag a fingernail across the mark. If it glides, it’s marking. If it catches slightly, it’s an etch. If it drops into a groove, it’s engraving.
Which leads to the practitioner tell worth memorizing: if a quote doesn’t specify a depth figure, it usually isn’t engraving. Vendors blur the terms because blur sells, but depth is the one number they can’t fake.
Quick test: Glide a fingernail across the mark — smooth means marking, a slight catch means etching, and a groove means engraving.
Why engraving takes 25 seconds and marking takes 2
Multiple passes produce cleaner engraving because each pass removes a thin slice; one over-deep pass leaves slag ridges along the edges and a rough trough floor, and trapped vapor makes both worse. That’s the causal chain: depth per pass determines quality, and quality per pass determines cycle time.
Jim Earman of Jimani teaches a specific craft detail here: rotate the fill angle between passes. Cross-hatching the pass direction clears the debris and produces a noticeably cleaner trough. It’s the laser equivalent of sanding with the grain, then across it.
And the single-pass slag failure isn’t operator error, it’s predictable physics. A first-run operator tries to hit full depth in one pass, the material doesn’t vaporize cleanly, and molten residue freezes along the trough walls. The physics was always going to do that.
The timing data makes the trade-off concrete:
- Engraving scans at 5-10 in/s at max power; stain marking runs 30-40 in/s.
- A simple text block takes about 2 seconds to stain mark versus roughly 25 seconds to engrave 0.015? deep.
- Ablating a serial number and logo off anodized aluminum takes 2 seconds; stain marking the same on stainless takes 8-10 seconds.
The power/speed/DPI triangle people talk about reduces to two physical quantities: spot size and per-pass depth. Smaller spot means more power density in the same area, which means the beam can cut deeper or move faster. (DPI presets aren’t in the sources I dug through, so I won’t invent numbers, but the lever is power density, and spot size is where it comes from.) Power, speed, pulse frequency, and pass count are the four settings that actually control depth, speed, and quality, and every one of them trades against the others.
Why depth hits a ceiling at 0.020 inches
The standard engraving range is 0.010?, 0.020?, and quality degrades past 0.020?, 0.025?, because the ceiling is optical, not electrical. This is the part I find genuinely elegant.
Here’s the mechanism. The focal point is fixed. As the trough gets deeper, the bottom of the trough sinks below where the beam converges, so the beam is no longer focused where the material is. Meanwhile, the vaporized material has a narrower and narrower channel to escape through, so it lingers in the cut and fouls the walls.
Adding wattage doesn’t fix either problem. You can’t out-power bad geometry.
You can reposition the lens to pull the focal point deeper, and shops doing deeper work do exactly that. But past a certain point, mechanical engraving tools often win, and any honest laser shop will tell you so. There’s something refreshing about a technology with a well-understood failure mode that everyone admits to.
Material-qualified exceptions exist. Graphite, being soft and happy to sublimate, goes to 0.125?. Larger figures like 0.075? are achievable with refocusing or on softer materials. But there’s no universal max-depth number, and anyone quoting one is selling something.
Inside the machine: galvos, spot size, and extraction
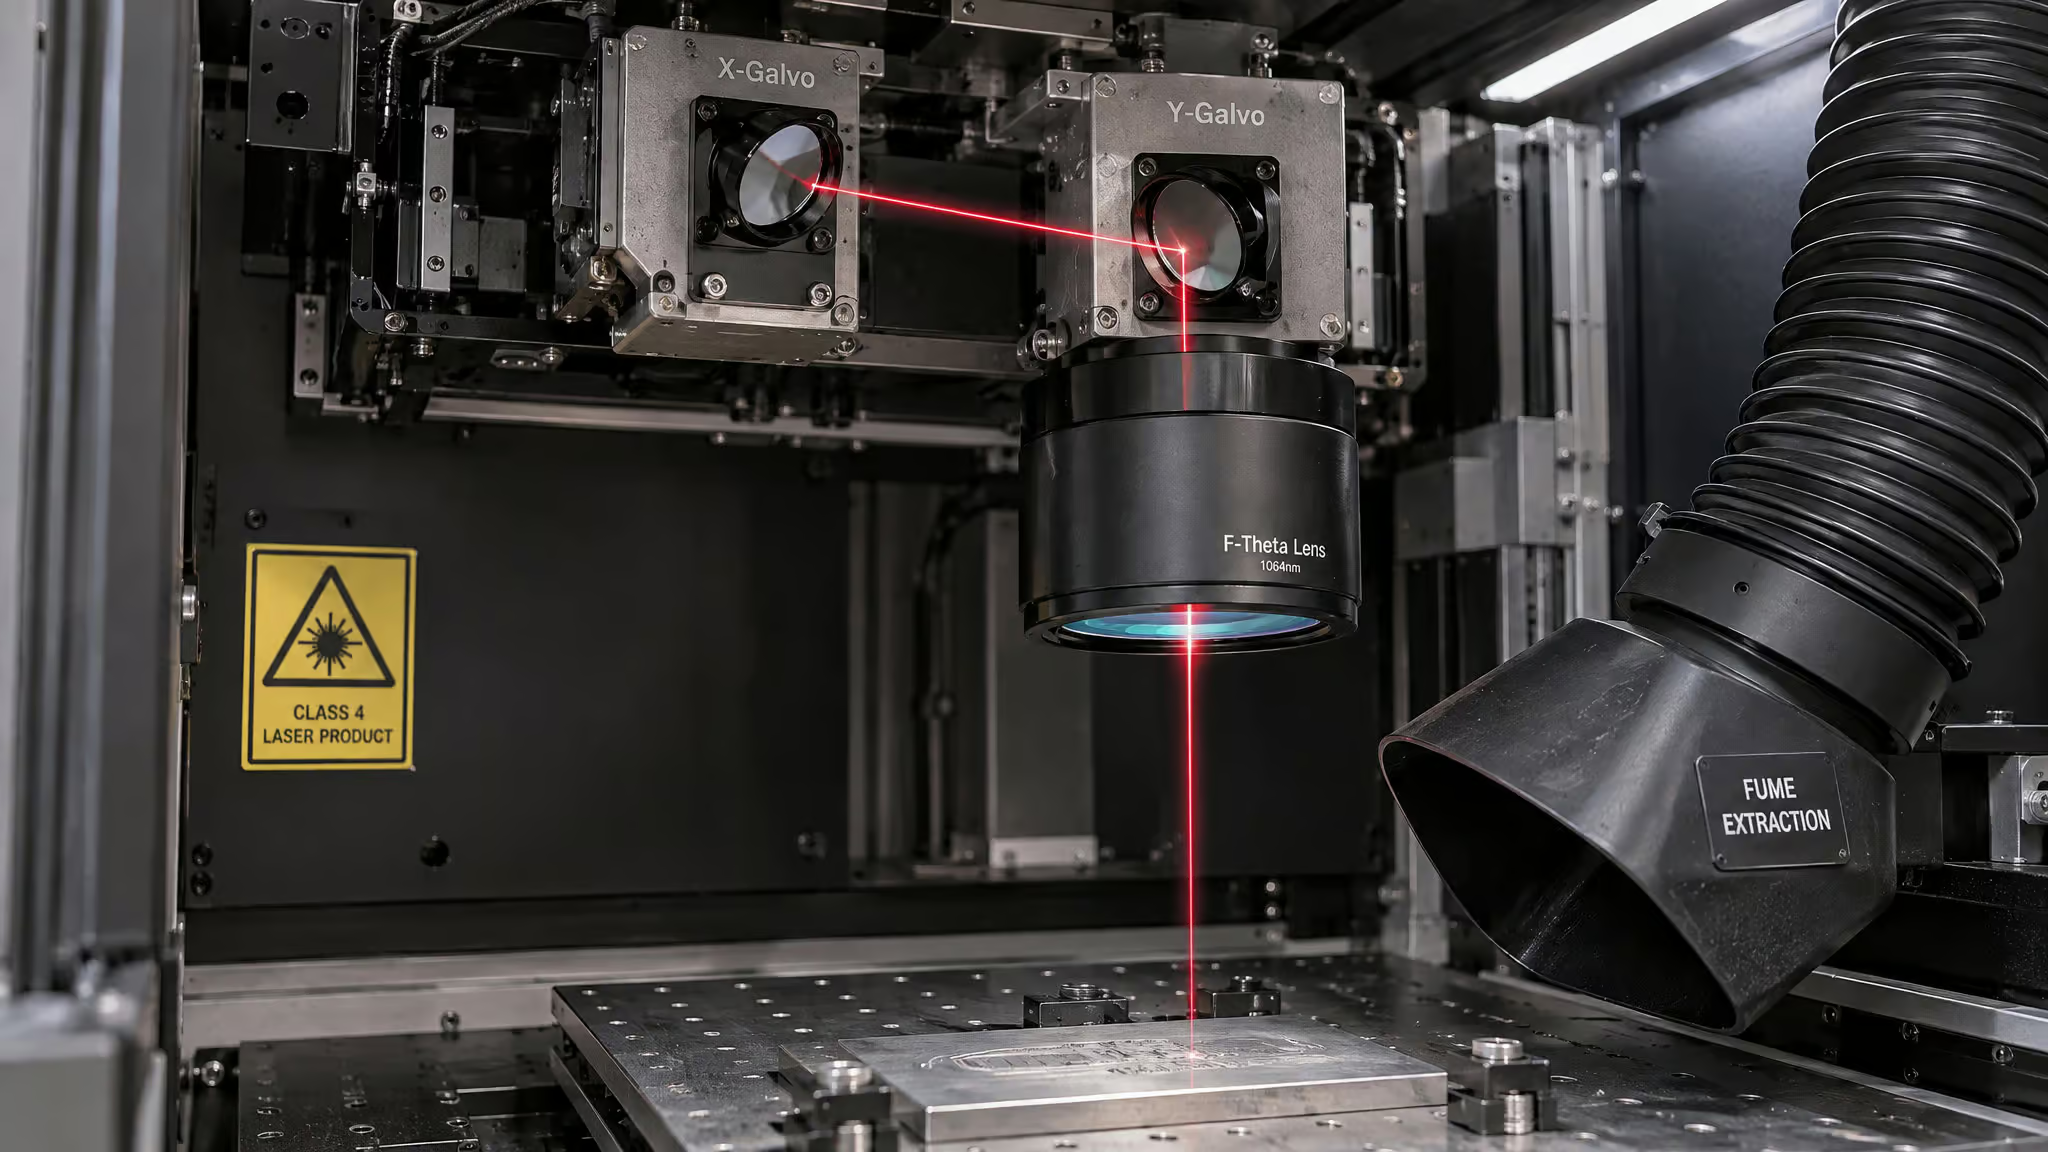
Galvo machines steer the beam with fast-moving galvanometer mirrors rather than moving the laser head on a gantry, and that’s the whole reason they’re fast. The mirrors swing the beam across the field far quicker than any motorized gantry can shuttle a head.
Steering and the basic stack
Every system has the same core architecture: the laser source (diodes or a CO2 chamber), a controller that holds the design and drives everything, and the material platform. The galvanometer mirrors do the steering, sweeping the beam at high speed with microscopic precision, which is how you get thousands of identical parts that all read the same under magnification.
Spot size and field size, the hidden lever
Here’s the design trade-off almost nobody talks about: smaller marking fields yield tighter spot sizes. A tighter spot concentrates more power density, which is exactly what deep engraving wants. Enlarge the field to cover more area per setup, and you trade power density for coverage. Beam widths down to 0.0254 mm are achievable in small fields, fine enough for characters under 1 mm.
If you’re speccing a machine for deep engraving, field size is a genuinely hidden lever. Smaller field, tighter spot, deeper clean cuts.
And then there’s extraction. Fume extraction and an air knife aren’t accessories bolted on for comfort; they’re mechanism-required. Sublimation produces vapor, and that vapor condenses on optics and drifts into lungs. So the system pulls it away from the lens and the workspace. It’s the same physics as the vapor-entrapment depth ceiling, just at workspace scale instead of trough scale.
What the beam does to each material
Stainless steel, aluminum, titanium, brass, hardwoods, acrylic, many plastics, the beam works on all of them, but each responds differently, and those differences matter just as much when choosing the best laser machine for jewelry engraving as they do for deciding what settings you run. Not everything plays nice, though: PVC and Teflon release toxic fumes when engraved, so they’re on the avoid list unless you’ve got serious extraction, and shiny metals may need a different laser type entirely.
Metals behave predictably once you know the mechanism. Stainless steel marks through oxide formation, which is why annealing leaves that black color. Anodized aluminum needs at least a light etch to strip the coating and texture the base metal, which produces the bright-white mark. Bare aluminum can be stain marked or etched for contrast.
Plastics split into two camps: some take a color change, some need light etching. Many melt if you engrave too deep, which is the sublimation threshold arriving later than the melt threshold. Acrylic is the fun one: it engraves to a frost-like white that looks genuinely good. Glass- and carbon-filled plastics are the challenging ones.
Wood splits by density. Hardwoods like maple, cherry, and walnut cut clean lines with minimal burning. Softwoods need different settings because the resin and looser grain behave differently under the same energy. CO2 wavelengths suit wood, leather, and glass; fiber wavelengths are for bare metals.
One safety note tied directly to the mechanism, not to a regulation list: PVC, Teflon, and certain plastics release toxic fumes when sublimated. Avoid them or run proper extraction. The sublimation that makes engraving work is the same process that aerosolizes whatever the material is made of, so know what you’re vaporizing.
Red flag: If you can’t say what a plastic releases when vaporized, don’t put it under the beam — sublimation aerosolizes the material itself.
The practical payoff of this whole behavior map: settings can’t be copied between jobs. The parameters that frost acrylic beautifully will melt a different plastic and barely scratch stainless. Every new material is a new tuning problem.
One machine, four processes: parameters vs wavelength
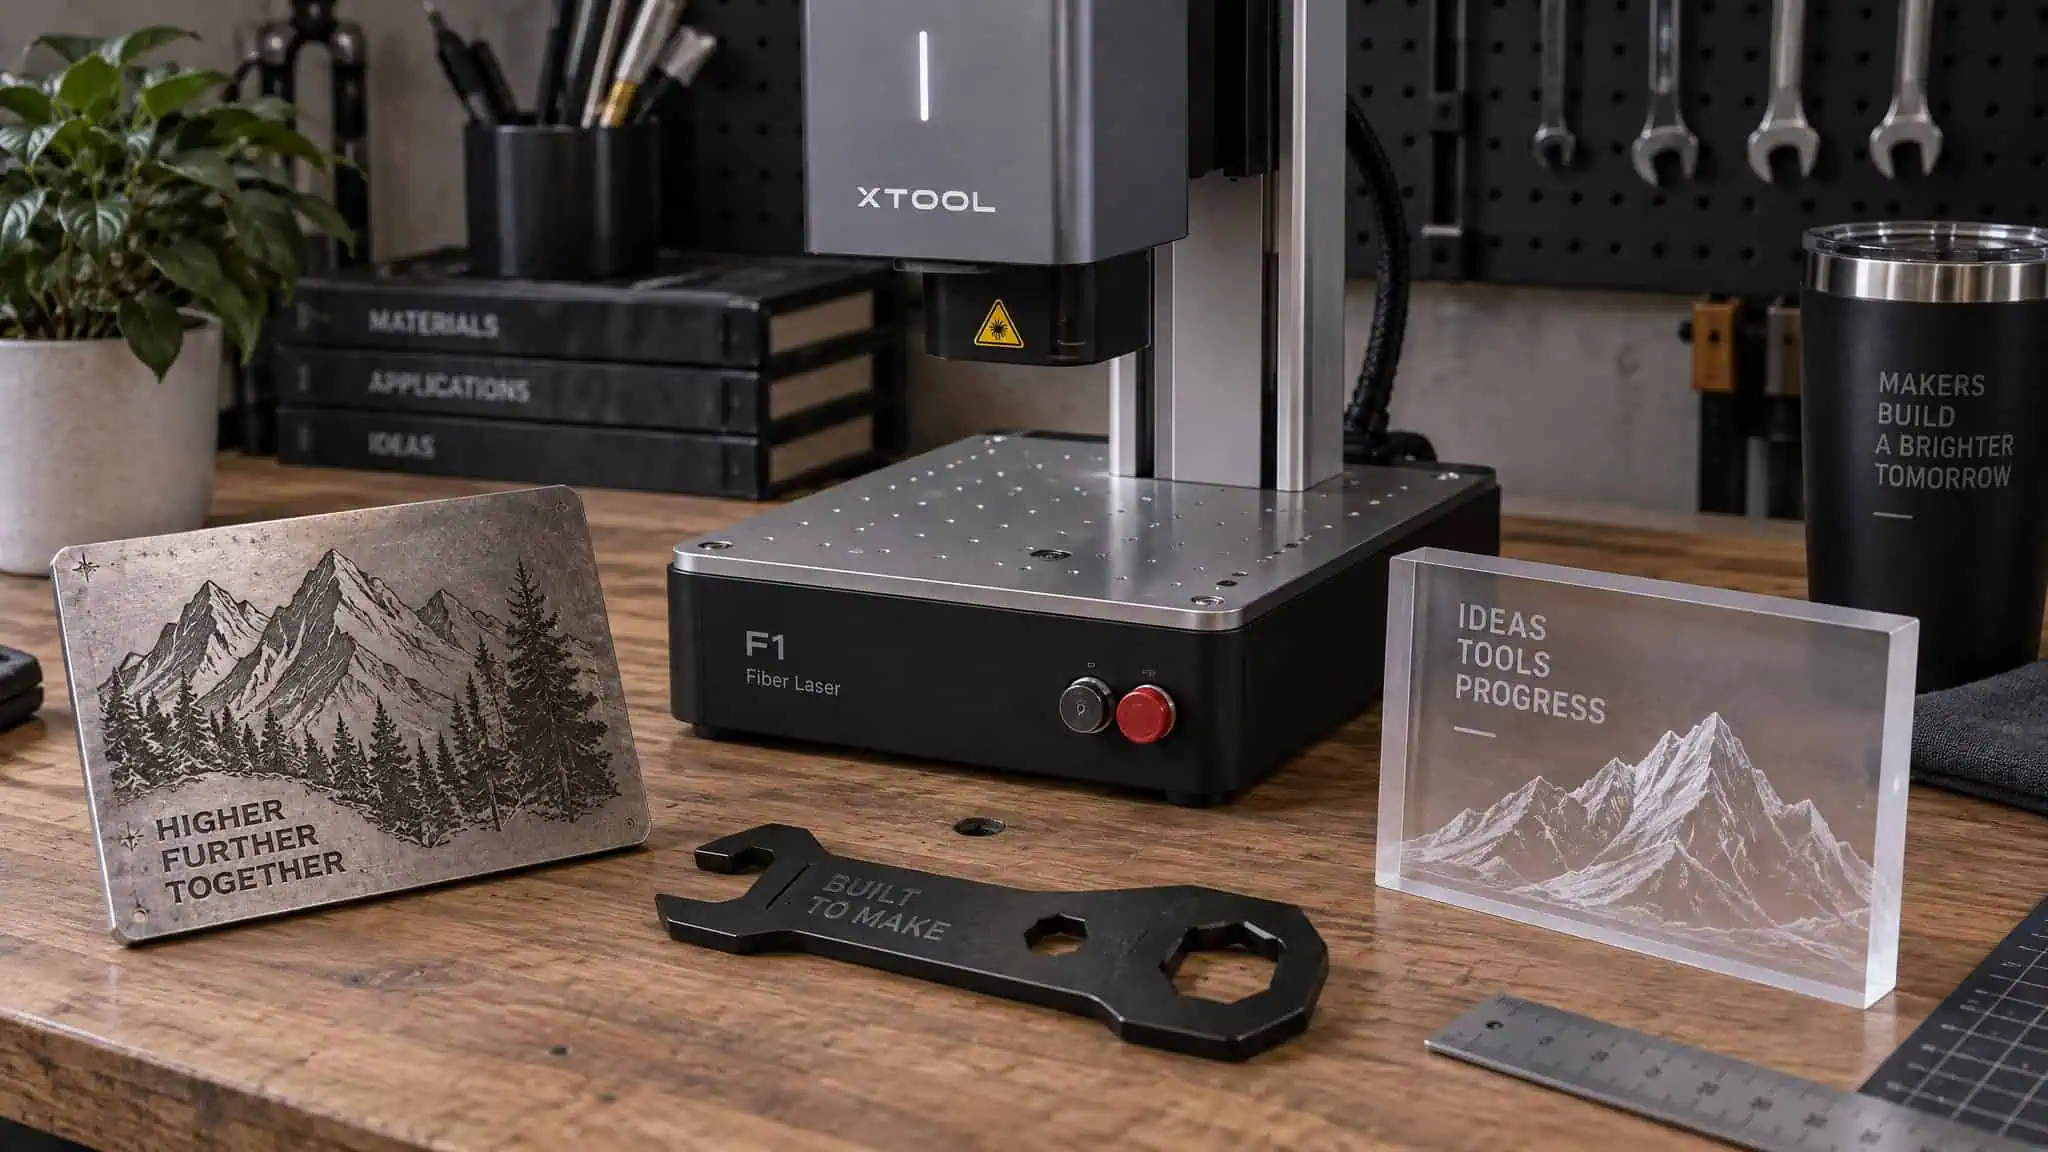
The hardware list is short: a laser source, a controller, focusing optics with galvos, a material platform, plus fume extraction. The reframe that matters: the process (marking, etching, or engraving) is chosen by parameters, not by machine category. Two independent axes are in play. Wavelength decides which materials you can affect; parameters (power, speed, pulse frequency, passes) decide which process you perform. A properly configured fiber laser spans marking, ablation, etching, and engraving just by adjusting settings.
Laser types by material
- Fiber lasers for bare metals.
- CO2 lasers for wood, leather, glass, and coated metals.
- Diode lasers for hobbyists and small business.
- UV lasers for heat-sensitive materials.
If you want to see the wavelength trade-offs laid out with real numbers, that’s exactly what our diode vs CO2 vs fiber comparison covers at the spec level.
How much power
A 20 W fiber laser handles most marking and etching. 50 W and up engraves faster and deeper. MOPA lasers, which let you vary the pulse width, add control and are notably good at color marking on stainless and titanium via oxide colors. Fixed-pulse-width machines suit most applications and cost less.
An honest limitation: most of the guidance here is industrial-grade, and hobbyist/small-shop setup economics are thinly covered by the industrial sources. Don’t over-conclude that one machine does everything either; a 20 W unit struggles to cut deep into hard metals. And on vendor performance claims, TYKMA claims its machines are 10 times more efficient than YAG systems with up to 100,000-hour lifespans; that’s the vendor talking, not a measured fact. For the economics angle, whether laser engraving is actually profitable is its own rabbit hole.
Is laser engraving permanent? Depth versus the wear interface
Yes, laser engraving is permanent when the depth is matched to the wear the part will see. Engraved marks survive shotblasting, e-coating, heat treatment, paint stripping, and deliberate tampering attempts. That’s the condition doing the work, though: matched to the wear. A 2-micron stain mark survives sterilization; it does not survive sanding.
The spectrum runs like this. Etched marks survive normal handling, cleaning, and environmental exposure, but they fail under deliberate removal, which makes them good for serialization and wrong for anti-counterfeiting. Engraved marks, with real depth, survive actual post-processing. An engraved 2D code stays readable even after the part gets blasted, coated, and heat-treated downstream.
Why regulations demand specific depths
The compliance numbers make the durability logic concrete. The FDA‘s 2013 UDI rule requires device identifiers plus production identifiers on medical devices, with visible dates required as of September 2018. The FAA has fireproof dataplate requirements for engines, propellers, and replacement parts. In practice that shakes out to roughly a 0.003? etch for medical instrument serialization and 0.015? engraving for firearm compliance.
The traceability payoff is the chain: marked IDs mean that when a part fails in the field, you can find out when and where it was made. Medical and aerospace care because the marks survive sterilization without crevices for contamination, and survive paint stripping without disappearing.
Finding the minimum depth that survives
Don’t guess the depth. Test it: mark samples at several depths, then bead blast them, expose them to your actual production chemicals, and have operators handle the samples for a week. Whatever survives that abuse is your minimum depth. Too shallow and the mark fails downstream and needs rework. Too deep and you’ve quietly taxed your cycle time, and that 2-second mark becomes a 25-second engrave multiplied across thousands of parts a day.
A pattern that shows up in the field: teams copy a depth spec from a previous part, and it either wears out on a part that sees abrasion the old part never did, or it’s over-deep and burns cycle time in volume. For a fuller breakdown of what the technology genuinely does well, see the advantages of laser engraving.
Where lasers beat dot-peen, chemical etch, and inkjet
The comparison most lists get wrong is collapsing two independent questions into one: where does the design live, and does the part deform? Laser markers read CAD data directly, while chemical etching requires a physical stencil. Laser marking is contactless, while dot-peen and hand-scribing hammer mechanical stress into the part.
Those two axes produce the capability edges that matter. Rough or curved surfaces are fine for a laser because the beam doesn’t care about the geometry the way a stencil does. Sub-1-mm characters work because the beam is finer than any pin. Thin parts don’t warp because nothing touches them.
The precision niches get genuinely wild. PCB traceability marks smaller than a grain of rice survive assembly, reflow, cleaning, and field service. Wafer marking happens at micron scale, contactless, on surfaces you can’t breathe on. And laser marks outlast industrial inkjet, which fades, peels, and needs a steady diet of consumables. No surprise the technology shows up everywhere traceability matters: automotive, medical, aerospace, electronics, oil and gas.
Dark marks prove nothing: appearance, forgeries, and the diamond frontier
Laser engraving’s main limits are its depth ceiling (0.020?, 0.025?), slower cycle times than marking (25 seconds versus 2), melt risk on plastics, and a fume load that demands extraction. But the bigger trap is assuming the mark’s appearance tells you anything about the process.
Each process produces a distinct look through a distinct mechanism. Deep engraved marks look darker because light gets trapped in the crevices, which is perceptual physics, not material change. Oxide blackening on stainless is a chemical change. The bright-white anodize etch is the coating stripped away.
Frosted acrylic is micro-textured glass. MOPA annealing produces actual colors on titanium by controlling oxide thickness. Darkness is not a depth gauge, and it’s definitely not verification.
That verification problem gets extreme in the diamond world, where the same physics runs at its limits. Girdle inscription works by converting diamond to graphite or amorphous carbon under the beam. Hot lasers, meaning anything above 220 nm into the infrared, cause stress and micro-fractures, while 193 nm deep-UV cold ablation (the PhotoScribe Technologies approach) inscribes safely. Opsydia‘s D4000 Surface ID creates transparent features under 50 nm deep that don’t affect clarity grades. Systems like LMS SurfaceScribe and Nano ID push the same idea further, inscribing identifiers at the surface without cutting measurable depth.
De Beers uses a proprietary non-laser method that removes microns without measurable weight loss, and Chow Tai Fook launched its T-Mark nano-marking collection in 2017. All of this is industrial and gemological equipment, not something a benchtop machine touches.
And here’s the closing loop that ties the whole appearance section together: fraudulent laser inscriptions on diamonds exist, which is why the International Gemological Institute (IGI) pairs its inscriptions with tamper-proof seals. A convincing dark mark proves nothing.
Matching depth to the job
So the decision rule is simpler than the terminology wars suggest. Decide what physical outcome your part needs: a color change, a shallow etch, or a real trough. Then name the depth in the spec, and verify it with the bead-blast-and-handle test protocol rather than with darkness or vendor vocabulary. The physics only rewards people who ask for it by name. And the tell that separates the shops who know this from the ones who don’t: a quote without a depth figure usually isn’t engraving.
People Also Ask
What are the disadvantages of laser engraving?
The main disadvantages are a depth ceiling around 0.020?–0.025? caused by beam defocus and trapped vapor, slower cycle times than marking (roughly 25 seconds versus 2 for a text block), melt risk on many plastics, and a fume load that makes extraction mandatory. It’s also worth remembering that appearance doesn’t verify the process — darkness proves nothing about depth.
Is laser engraving permanent?
Yes, when the depth is matched to the wear the part will see. Engraved marks survive shotblasting, e-coating, heat treatment, paint stripping, and tampering attempts because they carve a real trough into the material. A shallow stain mark, by contrast, survives sterilization but not sanding — durability depends on depth versus the wear interface.
How difficult is it to use a laser engraver?
The machine itself is conceptually simple — a laser source, controller, galvo mirrors, and extraction — and one properly configured fiber laser can do marking, etching, and engraving just by changing settings. The hard part is tuning: power, speed, pulse frequency, and pass count all trade against each other, and settings can’t be copied between materials. Every new material is a new tuning problem.
Do you have to have a computer to use a laser engraver?
Industrial systems include a controller that holds the design and drives the laser source, galvos, and platform, and that controller typically reads CAD data directly. In practice, some computing device is needed to load the design onto the system, whether it’s a dedicated controller or a connected computer running the job file.
What is the difference between laser engraving, etching, and marking?
They differ by depth and physical mechanism. Marking changes surface color through oxidation or annealing in microns without removing material; etching melts the surface so it swells into ridges about 0.001?–0.005? deep; engraving vaporizes material straight from solid to gas, reaching 0.010?–0.020? on standard jobs. The fingernail test tells them apart: smooth means marking, a slight catch means etching, a groove means engraving.
How deep can a laser engrave into metal before quality degrades?
On standard jobs, quality holds to roughly 0.020?–0.025?, and the limit is optical, not electrical. As the trough deepens, the bottom sinks below the fixed focal point so the beam goes out of focus, and vapor has a narrower channel to escape, fouling the walls. Adding wattage doesn’t fix it — though graphite tolerates up to 0.125? and refocusing helps on softer materials.
How does laser engraving work step by step from laser to finished mark?
The laser source generates a coherent beam, galvanometer mirrors sweep it across the design path, and each pass heats the surface past its vaporization point so material jumps straight from solid to gas — sublimation — leaving a cavity. Repeated passes build depth until the target is reached, while fume extraction pulls vapor away from the lens and workspace throughout.
How does a galvo laser engraving machine steer the beam?
Instead of shuttling a laser head along a gantry, a galvo machine uses fast-moving galvanometer mirrors to swing the beam across the marking field. That’s why galvo systems are fast — the mirrors reposition the beam far quicker than any motorized gantry can move a head, with enough precision to produce thousands of identical marks that read the same under magnification.
What laser settings control engraving depth, speed, and quality?
Four settings do the real work: power, speed, pulse frequency, and pass count, and each trades against the others. Physically, they reduce to two quantities — spot size and per-pass depth. A smaller spot concentrates more power density, which lets the beam cut deeper or move faster, and smaller marking fields yield the tightest spots.
