I’ve spent over 25,000 hours testing security systems. Not in a paranoid way — more in that particular flavor of geek obsession where you start by asking “can I install this myself?” and end up timing response calls with a stopwatch while your neighbor gives you the side-eye.
The short answer: yes, you can install your own security system. I did it with five different systems (SimpliSafe, Ring Alarm Pro, ADT Blu, Cove, and Abode), and none of them took more than 55 minutes. The long answer is the rest of this article — because there are real trade-offs between these systems, and you’ll want to know which one matches your particular flavor of laziness, smart-home obsession, or budget constraint.
Here’s what I found: I installed SimpliSafe in 30 minutes flat. ADT Blu took 35 minutes, Cove squeaked in at 30, Abode needed 45, and Frontpoint ate up nearly an hour — partly because one of its door sensors arrived broken and I had to work through customer service. More on that later.
Key Takeaways
SimpliSafe (9.8/10) installed in 30 minutes with no contract required; monitoring starts at $22.99/mo, and RapidSOS response hit exactly 44 seconds in every test — but smart-home integration is limited to voice arming only, with no third-party camera support.
Ring Alarm Pro packs a built-in Eero Wi-Fi 6 router (tested at 900 Mbps over 1,500 sq ft) and a 104 dB siren that sent smartphone alerts within 4 seconds; mandatory 2FA is enabled by default, and the base station battery lasts 24 hours with room for up to three extra power packs.
ADT Blu requires 2.4 GHz Wi-Fi only — that tripped me up at first, but app-guided setup took 35 minutes total, and its 2K HDR cameras ($69 indoor, $89 outdoor) benefit from ADT’s monitoring center averaging ~10-second response times with video verification cutting false alarms by over 50%.
Table of Contents
Why Install a DIY Security System?
Let’s talk money first. A professional install runs $200 and up — and that’s before you pay for the equipment. DIY systems cost $0 to $250 for the hardware, depending on how many sensors you want. The five systems I tested all landed between $109 (Cove‘s cheapest bundle) and about $250 for a fully kitted SimpliSafe setup.
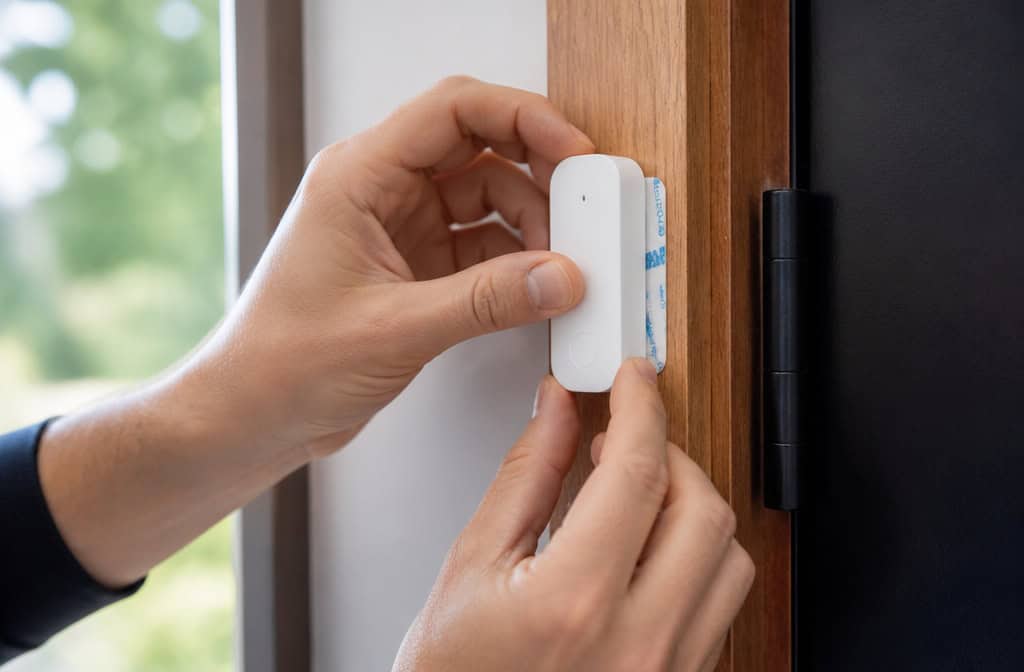
But cost isn’t the only reason to go DIY. It’s also about time. I’m impatient, and the idea of waiting a week for a technician appointment feels absurd when I can have a fully functional alarm system running before dinner. Every system I tested was installed and operational within 30 to 55 minutes — including the time it took to download apps, pair sensors, and test the alarms.
Renters, this one’s for you. These systems use adhesive tape for most sensors, meaning you can take everything with you when you move. Uninstalling takes about as long as installing, and you don’t leave holes in the walls. I’ll note though that adhesive tape loses grip after a few months in humid or temperature-fluctuating environments — I learned this the hard way when a sensor fell off my back door. More on that in the maintenance section.
Professional monitoring is optional but worth considering. My insurance company offered a 5% discount just for having a monitored system — some companies go up to 20%. And there’s real value in knowing someone will call the police even if you’re asleep or on vacation. I tested SimpliSafe‘s RapidSOS response, and it called exactly 44 seconds after the alarm triggered. Every single time.
The downsides? You can mess up the installation. Incorrect placement or weak mounting is the main reason DIY systems generate false alarms or fail to detect real events. Equipment selection is also narrower than what a professional installer can offer, and warranties are more limited. But for most people, the trade-off is worth it.
Choose Your DIY Security System
I tested five systems side by side, and they’re not interchangeable. Each has distinct trade-offs. Here’s how they break down.
SimpliSafe is the easiest to recommend for most people. It scored 9.8/10 in our testing. The 30-minute install is genuinely straightforward — voice prompts walk you through everything. No contract required.
Monitoring runs $22.99 to $80 per month depending on video storage and cellular backup. The trade-off: limited smart-home integration. You can arm with Alexa or Google voice commands, but you can’t disarm that way, and there’s no support for third-party cameras. If you want a simple, reliable system that just works, this is it.
Ring Alarm Pro is the wild card. The base station includes an integrated Eero Wi-Fi 6 router covering about 1,500 square feet and supporting up to 75 devices. I tested it at 900 Mbps — which is impressive for a security hub. The 104 dB siren will wake anyone nearby, and alerts hit my phone in about 4 seconds.
Monitoring is $20/month and includes 180-day video history, cellular backup, and 24/7 internet backup. The downside: mandatory 2FA (which I actually consider a feature, not a bug), and no Google Home or Apple HomeKit support. But Ring has more camera options than any other system — indoor, outdoor, doorbell, you name it.
ADT Blu benefits from ADT’s 150-year reputation. The app-guided setup took about 35 minutes, and the 2K HDR cameras ($69 indoor, $89 outdoor) are sharp. The catch: the hub exclusively uses 2.4 GHz Wi-Fi. If your router broadcasts both bands, you might need to tweak settings to keep the hub in range.
Monitoring starts at $24.99/month with cameras, $14.99 without. ADT’s monitoring center responds in about 10 seconds on average, and their video verification feature cuts false dispatches by more than 50%.
Cove is the cheapest option at $109.95 for the base system. I timed the install at just under 30 minutes. But the equipment feels lightweight — plasticky in a way that makes the Ring base station look like a tank. Professional monitoring only, starting at $22.99/month. The app also froze on us during testing, requiring a power cycle to recover.
Abode is for the smart-home enthusiast. It scored 8.0/10, but that’s mostly because the install took 45 minutes and there’s no dedicated smoke alarm. On the compatibility front, though, it’s unmatched: Alexa, Google Home, Apple HomeKit, Z-Wave, Zigbee, IFTTT — you can tie it into basically everything. The basic hub costs $65, or you can get the Iota hub with a built-in camera for $399. Monitoring runs from free (self-monitor) to $20.50/month (annual pro plan).
Frontpoint deserves a mention, but not a glowing one. Installation took about 55 minutes, partly because one of the door sensors was broken out of the box and I had to get it replaced through customer service. On top of that, Frontpoint requires a 3-year contract and a credit check. Monitoring starts at $44.99/month. It works fine, but the hassles aren’t worth it for most people.
Other systems exist — Vivint (pro-install, skip it for DIY), Deep Sentinel (expensive), Arlo Home (fine for camera-focused setups), Eufy 5-Piece (good for local storage), and Ooma (not available in 9 states plus DC). I’d only consider these if one of the top five doesn’t fit a very specific need.
Step 1: Gather Tools and Plan Sensor Placement
Before you open any boxes, figure out where everything goes. This is where most installation mistakes happen.
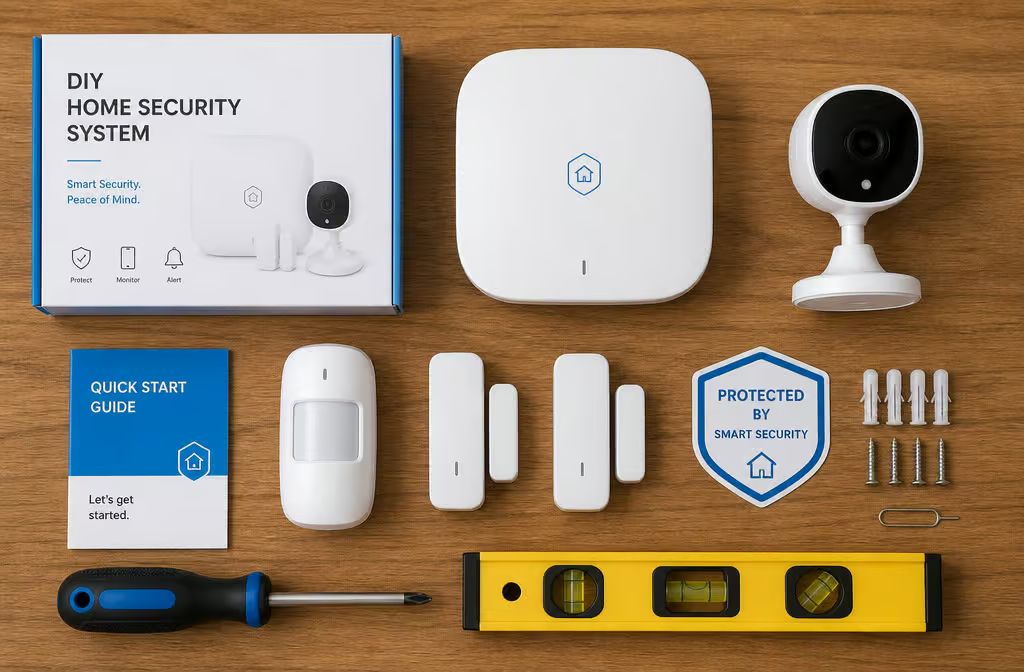
Tools you’ll actually need: a drill, a screwdriver, a small level, and the adhesive tape that comes with most sensors. If you’re installing a wired video doorbell, add wire strippers to that list. That’s it. You don’t need a multimeter or a crimping tool or anything exotic.
Sensor placement matters more than you’d think. Here are the rules I landed on after testing:
Place door and window sensors on the frame edge, hinge side — not near the deadbolt. The magnetic gap is more consistent there. For windows, ground-floor windows are the priority. Second-floor windows matter if there’s a balcony or accessible roof, otherwise they’re optional.
Mount cameras at least 8 feet high, aimed at entry points. You want them out of arm’s reach (people will try to knock them down or cover them), and you want the angle to capture faces, not the top of someone’s head. Avoid pointing cameras at windows — the IR reflection at night will wash everything out.
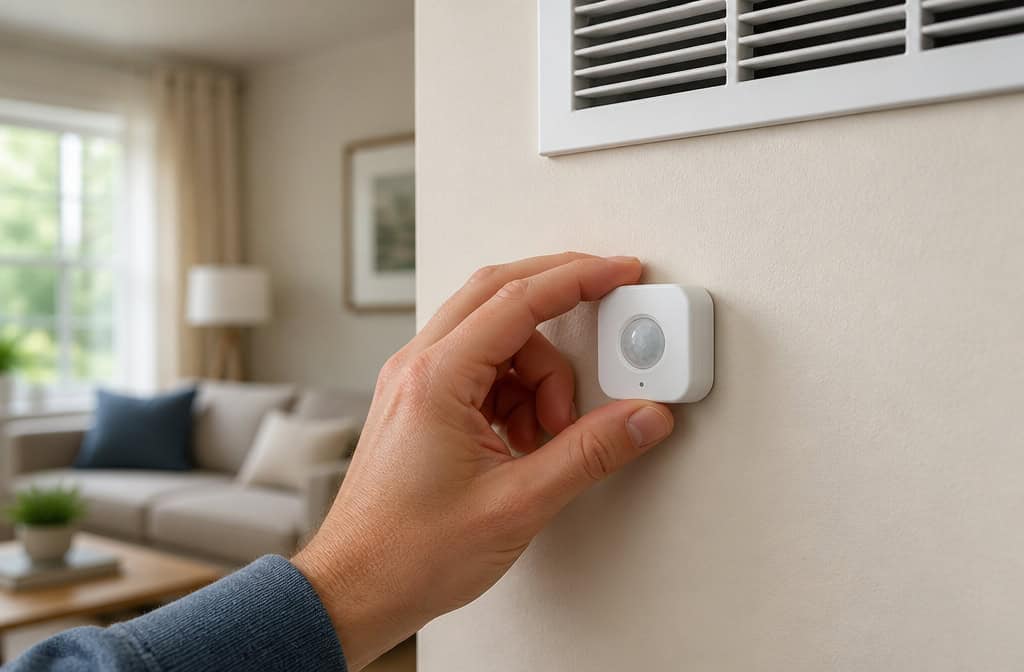
Motion sensors are the most finicky. Don’t put them near HVAC vents (moving air triggers false alarms), windows with curtains that move, or anywhere a pet roams. Pet-friendly sensors handle up to about 85 pounds — ADT’s are good for this, but a 90-pound dog will still set them off. I also saw a false alarm triggered by a balloon that a fan blew into a motion sensor’s path during testing. Yes, a balloon. Check your motion sensor sensitivity settings after install.
Do not install cameras in bathrooms, bedrooms, or shared indoor areas without explicit consent. This isn’t just good manners — it’s legally dicey in many places. Use privacy zones (black boxes in the camera’s field of view) to obscure neighboring properties or public sidewalks. Use detection zones to limit what areas actually trigger recording.
One last thing: some cities require permits for monitored security systems. Los Angeles and Salt Lake City are examples. The logic is to reduce false alarms that waste police resources. Check your local ordinances before signing up for monitoring.
Step 2: Install the Hub and Base Station
The hub is the brain of your system. Everything pairs to it. Placement matters — you want it centrally located, within about 30 feet of your router, away from large metal objects that could block the signal.
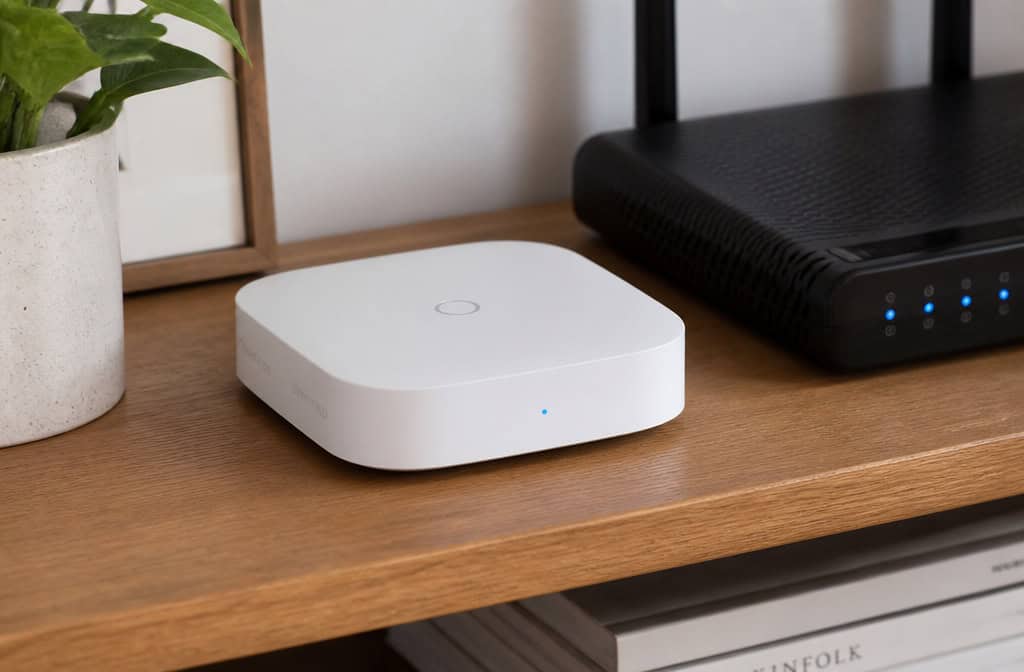
SimpliSafe’s base station is dead simple. Plug it in, wait for the blue LED, pull the battery tab so the backup battery activates, and follow the voice prompts. The voice actually talks you through the whole process — “sensor detected”, which is surprisingly reassuring.
Ring Alarm Pro is a different beast. The base station also functions as an Eero Wi-Fi 6 router, so you need to download two apps: Ring and Eero. You’ll set up the router first, then add the base station to your Ring account. The built-in battery lasts 24 hours, and you can add up to three extra power packs if you want longer backup. In testing, the Eero covered 1,500 square feet and handled 75 devices at 900 Mbps.
ADT Blu has a gotcha: it functions solely on 2.4 GHz Wi-Fi. If your router broadcasts both 2.4 and 5 GHz bands under the same SSID, the hub might get confused. I had to temporarily separate the bands in my router settings to get it paired. Once connected, the ADT+ app walks you through the rest step by step.
Total install time: about 35 minutes. If you choose a wired system like the Ring Floodlight Cam Wired Pro or a traditional hardwired ADT Blu camera, expect to run cables through walls or use cable clips. You’ll need a drill and fish tape, and installation time may double to 60–90 minutes.
Cove’s hub is plug-and-play, but it felt flimsy in hand compared to the others. It took under 30 minutes to set up, and the app guided me through sensor pairing.
Abode gives you two hub options: the basic hub ($65) or the Iota with a built-in camera ($399). The basic hub is fine if you’re building a sensor-only system. The Iota adds a 1080p camera and a siren, which is handy for all-in-one setups. Install took about 45 minutes, partly because I was pairing Z-Wave and Zigbee devices alongside the native sensors.
The wireless protocols matter here. Most sensors communicate with the hub over proprietary radio, Z-Wave, or Zigbee. Z-Wave and Zigbee are mesh protocols — each device can relay signals to extend range. Not all hubs support both. Abode supports both, which is why it’s the best choice for integrating non-native devices.
Step 3: Install Sensors
Sensors are the backbone of the system. Door, window, motion, smoke, CO, water — they all follow a similar pattern.
Door and window sensors use adhesive tape to stick to the frame and the door or window. The pairing process is simple: press a button on the sensor, confirm in the app. Place them on main entry points first — front door, back door, garage door, then ground-floor windows. I used the included 3M-style tape during testing, but I’ll be honest: the tape loses stickiness after a few months, especially in humid environments or rooms that fluctuate in temperature.
If you’re in a rental and can’t drill, re-tape every six months. Otherwise, use the screw mounts. It’s worth the extra two minutes per sensor.
Field note: Adhesive tape on door sensors typically fails within 3–6 months in humid climates. If you own the property, screw-mount everything from day one.
Motion sensors need careful placement. Pet-friendly models (ADT’s handles up to 85 pounds) help, but they’re not foolproof. Avoid spots near HVAC vents, windows with moving curtains, and direct sunlight. Test sensitivity after installation — walk through the room at different distances and angles to confirm it catches you.
Smoke and CO detectors vary by system. SimpliSafe uses a listener that clips to your existing smoke alarm — it listens for the alarm sound, then notifies the monitoring center. There’s a built-in delay: the listener waits for a few beep cycles to confirm it’s a real alarm, which can be alarming if you’re standing there wondering why your phone hasn’t buzzed yet. It’s intentional, but I wish they’d warned me.
Ring works with Kidde smart smoke and CO detectors. I tested this with fake smoke and got an alert on my phone about 2 seconds after the alarm triggered. That’s fast.
Water leak detectors are an underrated addition. Flo by Moen pairs with a smart water shutoff valve that can automatically stop the water supply if a leak is detected. D-Link offers a simpler sensor kit that just alerts via app. Place these near water heaters, washing machines, under sinks, and anywhere plumbing is exposed.
Kangaroo sensors exist, but they only work with Kangaroo’s own monitoring service. I wouldn’t recommend building a system around them unless you’re already locked into that ecosystem, so you are better off looking at a best DIY home security system with monitoring from the start.
Step 4: Install Security Cameras and Doorbells
Cameras are where the variety really shows. Let’s group by type.
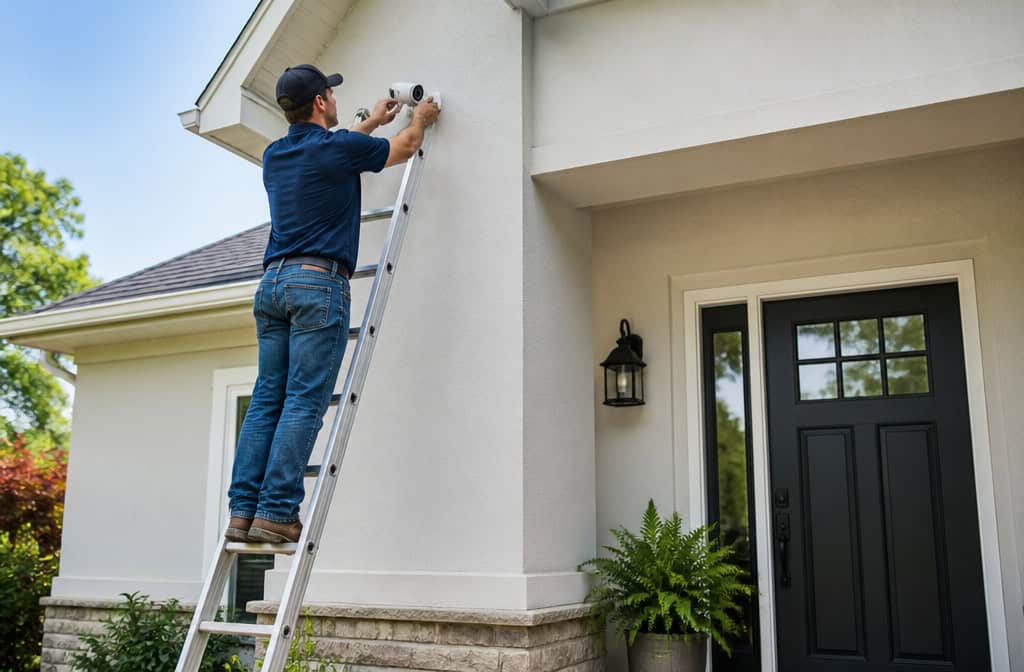
Indoor cameras. SimpliSafe‘s Wireless Indoor camera does 1536p for $149.99 — it’s fine but expensive for what it is. ADT Blu‘s Indoor camera ($69) shoots 2K HDR and is a better value. Ring‘s Indoor Cam is the standard 1080p option, and Wyze Cam V3 ($35.98) is the affordability champion — it’s our Editors’ Choice for good reason. Most indoor cameras use a magnetic mount or screw bracket; just plug them into an outlet and pair via the app.
Outdoor cameras. SimpliSafe‘s Outdoor camera ($199.99) is wireless and 1080p. The battery lasted well in testing, but the initial install took about 30 minutes because the battery needed to charge overnight before first use. ADT Blu‘s Outdoor camera ($89) is weather-resistant with 2K resolution and is a steal at that price.
Ring‘s Outdoor Stick Up Cam runs on battery or wired power. Mount these at least 8 feet high, and keep them away from window ledges — reflected light creates IR glare that washes out the night vision.
Video doorbells. The SimpliSafe Video Doorbell ($169) is wired and took a chunk of the install time — wiring always takes longer than you expect. ADT Blu‘s doorbell costs $109. Ring has the widest selection across price points.
Hardwiring provides continuous power, which I prefer over battery-operated models that you’ll need to recharge every few months. If you do go battery, expect to pull the unit down and charge it every 60 to 90 days depending on traffic.
Setup for all cameras follows the same pattern: scan the QR code with the app, name the camera, choose detection zones (where you want motion alerts) and privacy zones (areas to black out permanently). Ring’s doorbell, for example, can use privacy zones to avoid recording your neighbor’s property next door.
One legal note: if your camera records beyond your property — sidewalks, streets, neighbor’s yards, post a visible sign. It’s good practice and in some jurisdictions, it’s required.
Step 5: Install Smart Locks
Smart locks are optional but popular. They replace the interior thumb turn of your existing deadbolt while leaving the exterior key cylinder in place. Most are compatible with standard deadbolt holes, which means renters can swap them in and swap them back later.
The August Smart Lock, Ultraloq U-Bolt Pro Wi-Fi, and Kwikset Halo Touch cover the range from about $100 to $250. They connect via Bluetooth or Wi-Fi to the app, and you can test lock and unlock from your phone.
Integration with your security system varies. SimpliSafe has its own smart lock that integrates natively. Ring works with August locks. Abode supports Z-Wave and Zigbee smart locks, giving you the widest compatibility. If you’re adding a lock, check compatibility with your chosen hub before buying.
Step 6: Set Up the App and Configure Alerts
This step is the most user-facing, and it’s where the differences between systems really show.
SimpliSafe’s app walks you through creating an account, scanning the hub’s QR code, and pairing each sensor with voice prompts. Mandatory 2FA is enabled by default — you’ll get a code via text or authenticator app whenever you log in from a new device, but if you’d rather avoid monthly fees altogether, our guide on how to make your own home security system covers sensor selection, hub choices, and integration from scratch.
Ring’s app requires you to add the base station first, then add each device individually. For the Alarm Pro, you also need the Eero app to manage the router features. 2FA is mandatory here too. One gotcha: without a subscription (even the $10/month Ring Solo plan), you cannot arm or disarm via the app. The keypad still works, but your phone becomes a paperweight for system control.
ADT+ app provides a step-by-step walkthrough that guides you through adding the hub, sensors, and cameras. Total setup time was about 35 minutes, which aligns with the company’s claims.
Cove’s app is simple — maybe too simple. The system froze during our testing, requiring a power cycle to recover. The app also locked us out at one point, which is concerning for a security system.
Abode’s app is robust and handles Z-Wave and Zigbee device pairing alongside native sensors. It’s the most flexible but also the busiest interface.
Regardless of which system you choose, you’ll want to configure these settings:
- Entry and exit delays. I set mine to 30 seconds — enough time to get in, disarm the system, and not trigger the alarm.
- Name sensors by location. “Front door” is more useful than “Sensor 3” when you get a notification.
- Turn on push notifications. Obvious, but easy to skip in the setup rush.
- Set siren delay. Ring allows 0 to 180 seconds. I kept it at 30 seconds — if the alarm isn’t dismissed within that window, the monitoring service gets called.
- Enable Critical Alarm Notifications. This bypasses Do Not Disturb mode on your phone, which is exactly what you want at 3 AM.
If you’re new to this: “Arm” means the system is active. Away mode triggers all sensors — doors, windows, motion. Home mode disables interior motion sensors so you can walk around without setting off the alarm. Stay mode is similar but keeps perimeter sensors active.
Step 7: Integrate with Smart Home Voice Assistants and IFTTT
Smart-home integration varies wildly between systems.
SimpliSafe works with Alexa and Google Home — for arming only. You can say “Alexa, arm SimpliSafe to away mode,” but you can’t disarm by voice. No third-party camera integration. I did set up an automation where Alexa turns on my Hue and Tapo lights when SimpliSafe‘s contact sensors open, which is handy for nighttime arrivals.
Ring only works with Alexa. No Google Home, no Apple HomeKit. But Ring does allow you to connect Ring lights directly to the Alarm Pro base station without an extra hub, which simplifies the setup if you’re all-in on Ring gear.
Abode is the compatibility king. Alexa, Google Home, Apple HomeKit, Z-Wave, Zigbee, IFTTT — it speaks everything. I tested voice arming and disarming with Google Assistant, and it required a 4-digit passcode to disarm, which is a nice security touch. IFTTT lets you build custom applets, like turning on living room lights when the motion sensor triggers.
Z-Wave and Zigbee are worth understanding briefly. They’re wireless mesh protocols — each device relays signals to extend the network range. Z-Wave is more common in professionally-installed gear, while Zigbee is more prevalent in consumer smart-home devices. Abode supports both, which is why it’s the best choice if you already have a bunch of smart-home gadgets.
Step 8: Test Your System
Testing is the most satisfying part. Here’s what I did with each system.
Use the app’s test mode, if available. Walk by each sensor and watch for notification. For motion sensors, walk through the full range of the room. For entry sensors, open the door or window and confirm the alert.
The response times I measured:
- Ring Alarm: smartphone alert in 4 seconds, siren at 104 dB.
- SimpliSafe: RapidSOS called exactly 44 seconds after alarm — every single test. The smoke and CO detector sent alerts in 2 to 5 seconds.
- ADT Blu: monitoring center responded in about 10 seconds on average. Video verification cuts false alarms by more than 50%, which is significant.
- Ring with Kidde smoke alarm: alert received about 2 seconds after triggering with fake smoke.
These aren’t guaranteed times — they’re what I consistently measured in testing. Real-world performance can vary based on network conditions and monitoring center load.
Siren delay matters. Ring allows 0 to 180 seconds. If you set a delay and the alarm is dismissed within that window, the monitoring service won’t be called. This prevents false dispatches from accidental triggers.
Speaking of false alarms: adjust motion sensor sensitivity, use pet-friendly sensors, and avoid placing sensors near drafts or objects that move. I watched a fan blow a balloon into a motion sensor during testing, and yes, it set off the alarm. It’s the kind of thing you don’t think about until it happens at 2 AM.
SimpliSafe‘s Video Verification (available on Core and Pro plans) sends video clips to the monitoring center when an alarm triggers. This helps the operator determine if it’s a real emergency or a false alarm, reducing unnecessary police dispatches.
Understand Monitoring Plans and Costs
Here’s where the long-term costs live. Let’s break down what you’re actually paying for.
Self-monitoring is usually free or very cheap. SimpliSafe offers a $10/month plan that includes 30-day video storage but no cellular backup. You get push alerts on your phone, and you call 911 yourself if something happens. The catch: if your internet goes out, your system goes silent. No alerts, no recording, nothing.
Professional monitoring includes 24/7 call center coverage, cellular backup (LTE 4G), and police and fire dispatch. The price range is wide:
- SimpliSafe: Standard $23/month (no video), Core $33/month (30-day video), Pro $50/month, Pro Plus $80/month
- Ring Alarm Pro: $20/month includes 180-day video history, cellular backup, and 24/7 internet backup
- ADT Blu: camera-only self-monitor $9.99, full system self-monitor $14.99, pro monitoring without cameras $24.99, with cameras $34.99
- Cove: Basic $22.99, Plus $32.99 (7-day storage), Premium $42.99 (30-day storage)
- Abode: free self-monitor, premium self $8.49/month, pro monitoring month-to-month $26.99, annual $245.99 ($20.50/month)
- Frontpoint: starts at $44.99/month, 1 to 36-month contract required, with a credit check
Insurance discounts for professional monitoring range from 5% to 20%. Check with your provider — but don’t assume you’ll get the maximum.
Contract vs. no-contract: SimpliSafe, ADT Blu, Cove, and Abode have no contract. You can cancel anytime. Frontpoint requires 1 to 36 months and a credit check. I’d avoid contracts for a DIY system — the whole point is flexibility.
Privacy, Data Security, and Legal Considerations
This section is important, but I’ll keep it concise.
Ring requires 2FA by default. Some camera models support end-to-end encryption (not first-gen devices). You can set privacy zones to black out neighbor’s properties, and you can opt out of the Neighbors app entirely. Ring does allow law enforcement to submit video requests within a 0.5-mile radius, but you choose whether to respond. Ring says it won’t share information without a legally valid order, with exceptions for imminent danger.
They briefly partnered with Flock Safety for license plate recognition but ended that relationship. They also launched Search Party, a lost-pet feature.
SimpliSafe also requires 2FA. The company shares data with Google Firebase and Heap for analytics, and camera video is encrypted at rest and in transit. You can find data collection opt-in/out settings in the app.
For legal placement: no cameras in bathrooms, bedrooms, or shared areas without consent. If your camera records public spaces — sidewalks, streets, post a visible sign. Under UK law, the camera owner is responsible for footage storage and deletion. These are general guidelines, not legal advice; check your local regulations.
Troubleshooting Common Installation Issues
Here’s what went wrong during my testing, so you can avoid the same headaches.
Sensor not pairing. Check battery polarity, move the device closer to the hub, and press the reset button. For ADT Blu, make sure the hub is on 2.4 GHz Wi-Fi — this was my most common pairing issue.
False alarms. Adjust motion sensitivity. Move the sensor away from HVAC vents, windows, and areas where pets roam. I also set a schedule to disable daytime recording in rooms I don’t need to monitor.
Broken hardware. Frontpoint replaced a door sensor after a troubleshooting call, which took about 20 minutes. Their customer service was good, but it was frustrating to open a brand-new system and find a dead sensor.
Adhesive tape failure. SimpliSafe‘s tape lost grip after a few months. Replace it with fresh tape or switch to screws. This is the single most common DIY installation failure.
Connectivity drops. If your hub keeps disconnecting, it’s probably too far from your router or positioned inside a metal cabinet. Ring Alarm Pro’s Eero app shows signal strength for each device, which helped me re-position a sensor that kept dropping.
App freezing. Cove’s app froze repeatedly during testing, requiring power cycles. Abode’s Iota had false alarms and internal camera glitches. These aren’t dealbreakers, but they’re annoying.
Monitoring not active. Without at least a Ring Solo subscription, you cannot arm or disarm the Ring system via the app. The alarm still sounds if triggered, but you can’t control it from your phone. This caught me off guard during testing.
Maintenance, Upgrades, and Moving
A security system isn’t a set-it-and-forget-it device. Here’s what you need to know for the long haul.
Battery life. Most sensors run 1 to 2 years on a set of batteries. The app will alert you when they’re low. Replace promptly — a dead sensor is worse than no sensor.
Adhesive tape. The included tape degrades over time. Replace it every few months, or switch to screws for a permanent setup.
Moving. Unplug the hub, remove the sensors (same effort as install), and re-install at your new address. Update your monitoring service address so dispatch knows where to send help. Renters, this is a major advantage over professionally installed systems.
Adding sensors later. Most systems allow expansion. Ring has the most camera options — indoor, outdoor, doorbell, floodlight, you name it. SimpliSafe offers one type of each camera, which limits your choices. Abode is the most flexible for third-party devices thanks to Z-Wave and Zigbee support.
Ring has a unique option: add-on sensors can work without the base station via Amazon Sidewalk. But if you go that route, the sensors can’t support professional monitoring — you’ll only get phone alerts.
Power backup. Ring’s base station has a built-in battery that lasts 24 hours, with up to three extra power packs available. SimpliSafe ran for four hours during a neighborhood power outage, which is adequate for most situations. ADT Blu and Cove also have backup batteries, but I didn’t test their full runtime.
Final Thoughts: Make Your System Work for You
Here’s the truth: there’s no perfect system. Your choice depends on your priorities.
If you want the easiest install and don’t care about smart-home integration, get SimpliSafe. If you’re building an Alexa household and want the most camera options, get Ring Alarm Pro. If you want ADT’s reputation with modern DIY features, get ADT Blu. If you’re on a tight budget, Cove works fine despite the plasticky feel. If you’re a smart-home enthusiast with HomeKit, Z-Wave, and Zigbee devices, get Abode.
Security consultant Bob Dolph put it well: A security system can remain inactive for a decade without incident. Its sole purpose is to function when a real threat occurs. Professional monitoring is worth the monthly cost for that one time — plus the insurance discount helps offset it.
None of these companies paid for placement in this article. We’ve spent over 25,000 hours testing security systems, and these recommendations come from that work.
You can start for as little as $65 (Abode basic hub) plus $109 (Cove system) and choose free self-monitoring. Professional monitoring adds $10 to $50 per month. For the price of a dinner out, you can protect your home with a system that took less than an hour to install.
Now you have the knowledge. Pick a system, set aside an hour, and protect your home.
