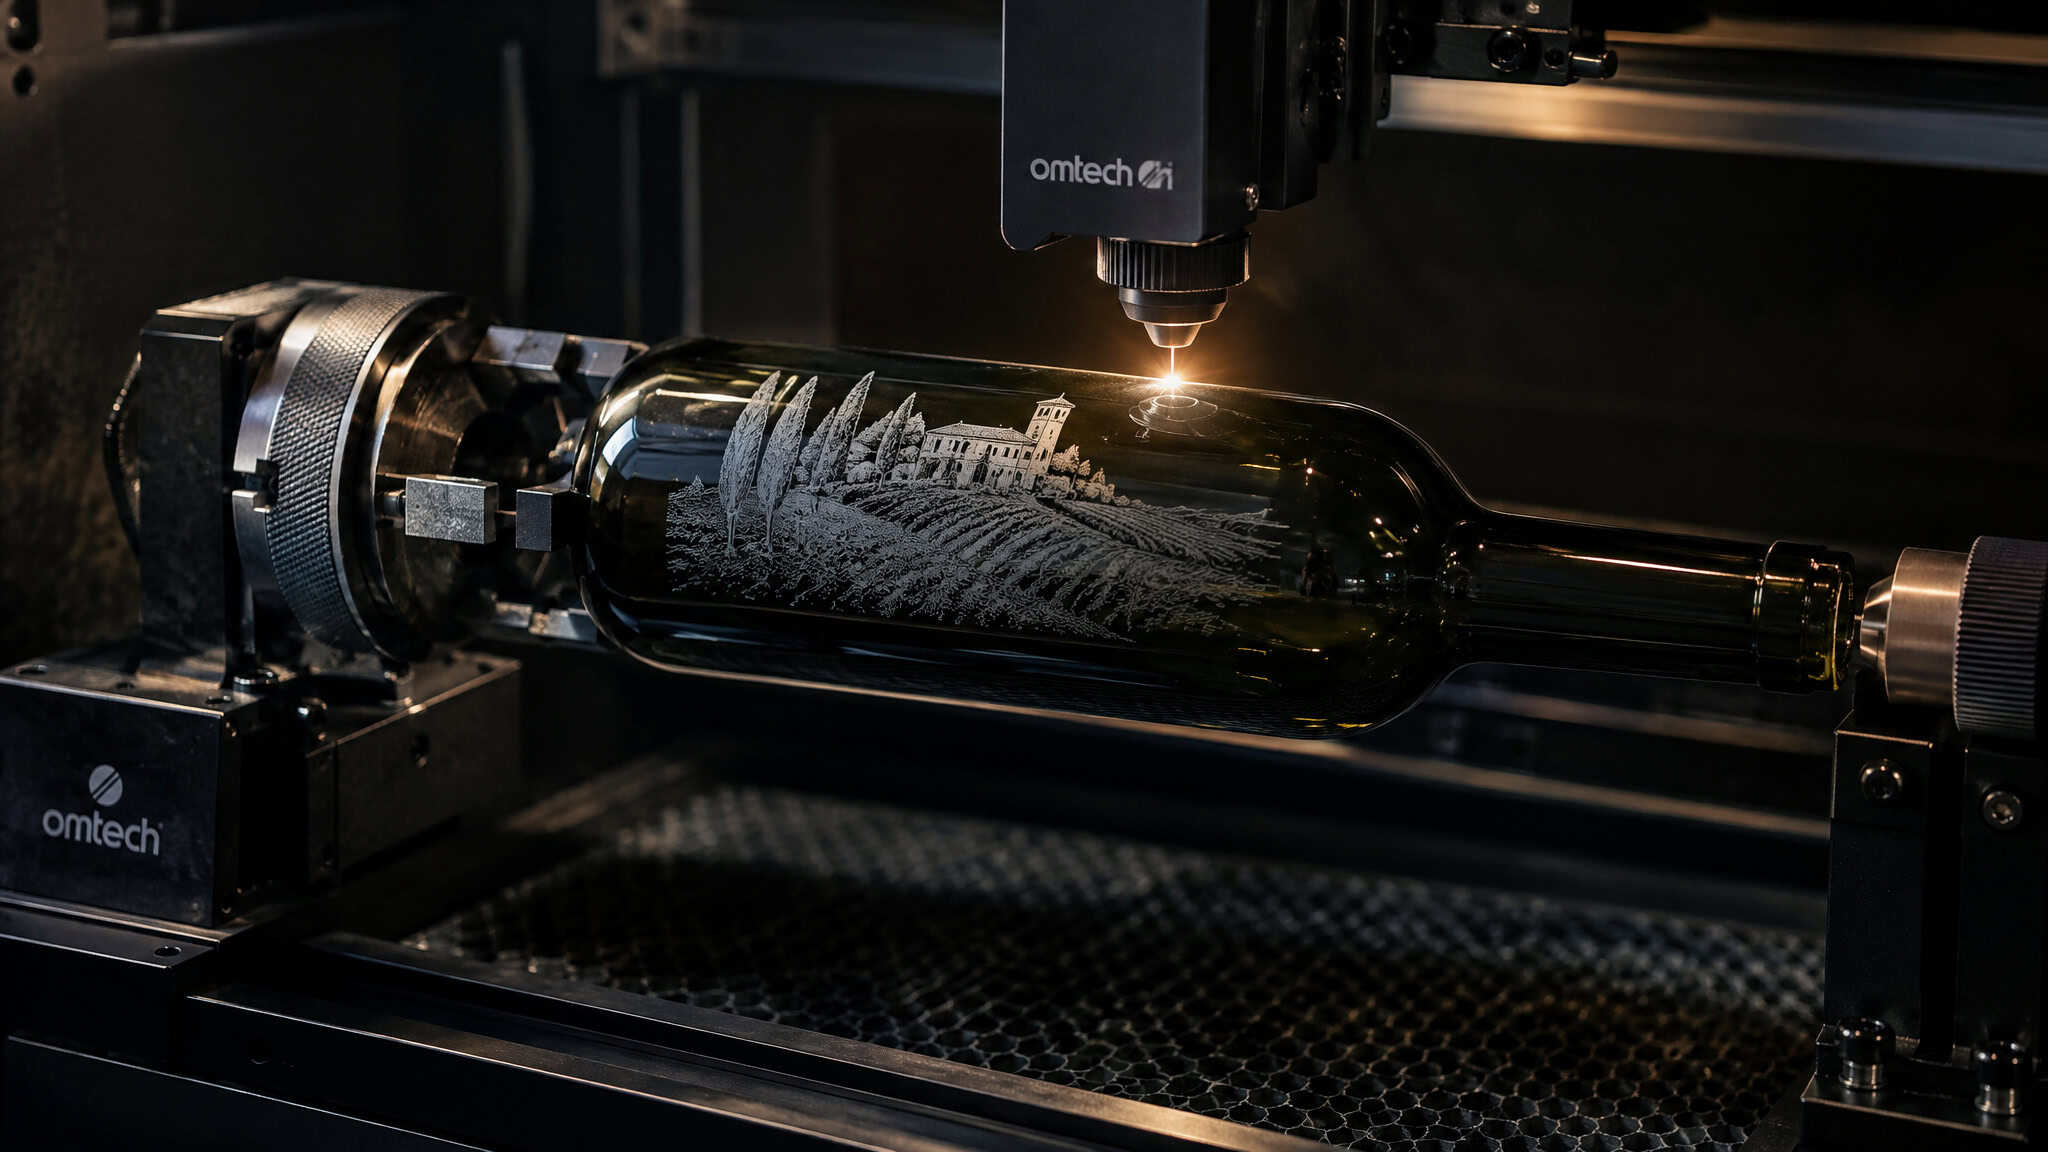
My first attempt at laser engraving on glass bottles produced a wine bottle that looked like the design had been stretched on a rack: crisp in the middle, smeared toward the shoulder, doubled where the glass curved away from the beam. Flat glass had never done that to me, so I spent an evening blaming power settings. Wrong suspect. The machine was innocent; the cylinder was guilty. A ~0.1mm beam with a shallow depth of focus can’t follow a curve, which is exactly why a rotary attachment spins the bottle to keep the surface being hit inside the focal point.
Key Takeaways
A failed bottle engraving is almost always a geometry problem: distortion that worsens toward the taper points to diameter measurement, rotary alignment, or design placement, not the laser itself.
Cheap dollar-store cast/soda glass outperforms lead crystal, which absorbs heat faster, needs more power, and can shatter under the beam.
On a 60W CO2 machine, start at 100mm/s with 25% max / 20% min power on line layers and 20% on fill, at a 0.1mm interval (254 LPI); higher line density means more heat and more cracking risk.
Table of Contents
Why laser engraving works on glass at all
Yes, a consumer laser engraver can engrave glass, and the mechanism is not burning. It’s controlled micro-fracturing, and once you see why, every weird rule about glass engraving starts making sense.
Glass doesn’t behave like wood or acrylic. Wood vaporizes; glass has nowhere to go. The beam at the workpiece is only about 0.1mm across, and it dumps energy into that tiny point faster than the glass can conduct the heat away. The hit point expands rapidly, the surrounding glass can’t tolerate the stress, and it fractures.
Do that millions of times across a design and you get the frosted image you’re after. The fun bonus nobody mentions up front: those fractures leave sharp micro-particles sitting on the surface. Hold that thought, because it comes back with a vengeance in the cleanup section.
Here’s the second piece of the puzzle: nearly all glass is silicon dioxide, but almost nothing you’ll engrave is pure silicon dioxide. Soda glass, Pyrex, lead crystal, the additives change how the material fractures when the beam smacks it. That single fact drives most of the practical decisions in this hobby:
- It’s why cheap glass works so well: a more homogeneous structure fractures cleanly and predictably.
- It’s why lead crystal can shatter outright instead of frosting.
- It’s why line density matters: pack too many passes close together and you’re injecting heat faster than the piece can shed it, and cracks follow.
- It’s why cleanup means physically removing sharp particles rather than giving the piece a wipe.
I’ve got a separate breakdown of which laser classes actually engrave glass if you want the wavelength-level version of this story. For bottles, the short version: CO2 and diode machines both work, and the physics is fracturing all the way down.
Why bottles are different from flat glass engraving
A flat sheet of glass sits in one plane, and your laser’s focus holds across the whole job. A bottle is a curved surface wrapped around an axis, and that breaks three assumptions your flat-glass workflow quietly relied on.
You need a rotary attachment
Fixed X/Y rails plus a very shallow depth of focus can only hold focus on flat surfaces. A rotary rotates the bottle under the beam so the cylindrical workpiece stays within the focal point. To the laser, the curve becomes flat.
The ramp test defines your focus window
A ramp test, engraving a test pattern on a tilted surface, tells you the range of nozzle-to-workpiece distances that stays in focus. That number tells you how much curvature you can successfully engrave before you commit glass to the job.
Ridges fall out of focus
A rotary has one rotation axis and no height adjustment, so anything ridged, shoulders, the moulding seam, drops out of focus as it rotates past. Your design placement has to respect that.
In my experience, the classic beginner failure looks exactly like this: the first bottle comes out skewed or doubled near the shoulder, and the tell is distortion that worsens toward the taper. That’s a measurement and geometry problem, not a laser problem.
Choosing the right bottle: cheap glass beats premium
Dollar-store cast/soda glass beats lead crystal as an engraving substrate, and that’s physics, not a budget compromise. Cheap glass has lower lead and metal content and a more homogeneous structure, so it fractures cleanly under the beam. Goblets, wine glasses, vases, mason jar tumblers: grab these and try it. The stuff that costs a dollar engraves like it costs ten.
Lead crystal is the failure case, and the causal chain is worth walking: the lead softens the glass, softened glass absorbs heat faster, absorbing heat means it needs higher power, and higher power plus heat-soaked glass can overheat and shatter. Hand-blown crystal adds a second risk: internal stresses left over from the forming process, which laser heat can aggravate into cracks.
Additives also vary batch to batch, so keep at least one spare piece dedicated to testing. Run a test grid of speed and power variations on it, record the winners in LightBurn‘s materials library, and inspect them with a magnifying glass. The fine frost detail only shows up close, and the notes you take now save you from re-buying the test piece later.
One more rule that saves whole pieces: start with a perfectly cylindrical object. Same circumference across the entire engraved area means zero distortion while you’re learning.
Rotary attachment selection: which one your bottle actually needs
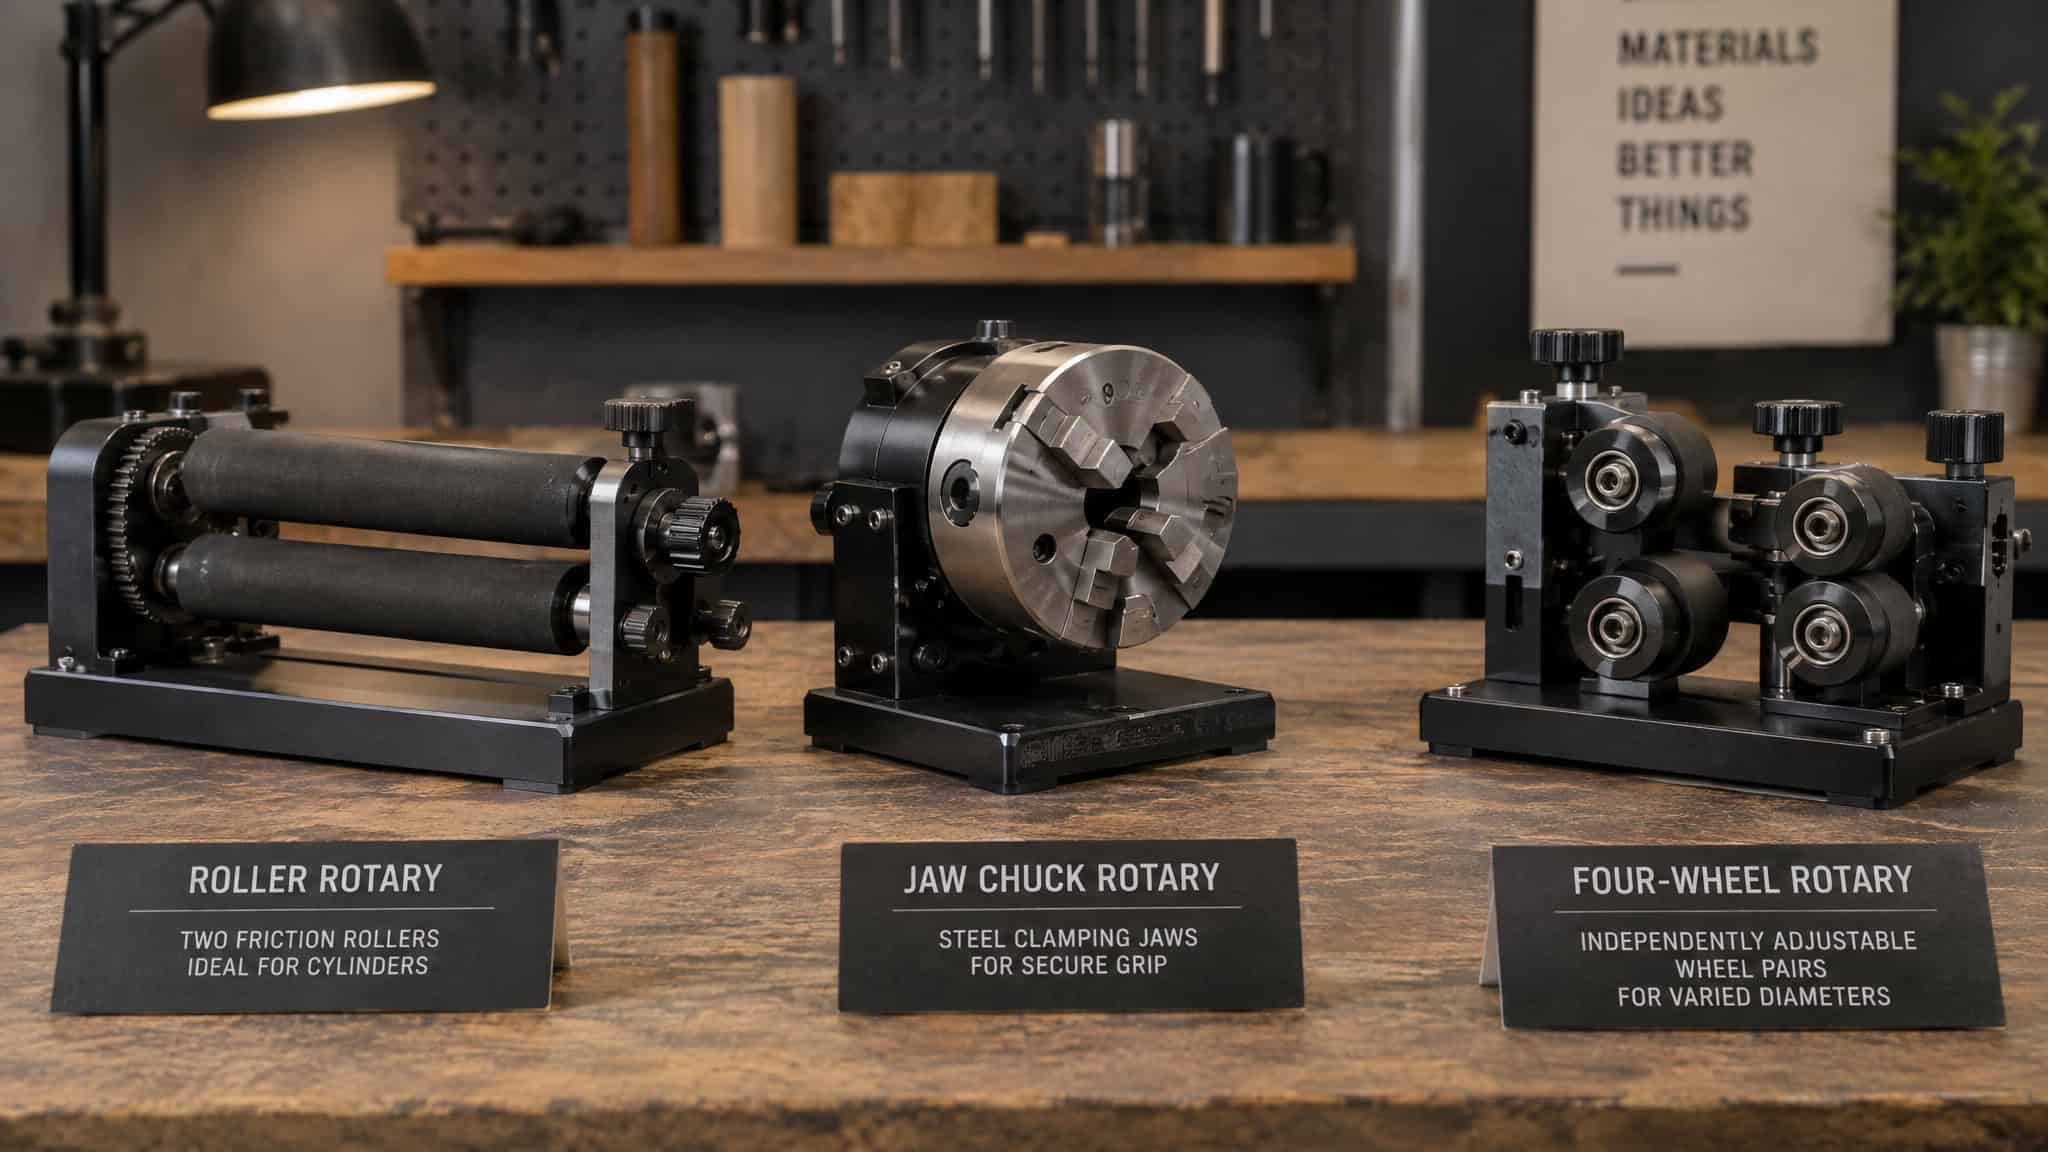
The right rotary depends on your bottle’s shape, not on some universal ranking. There are three main types, and each one exists because a different kind of glassware annoyed its manufacturer.
Roller rotary: fastest to first engraving
A roller rotary is two long friction-driven rollers the bottle rests on, the quickest setup of the three, and the natural first pick for simple cylinders like wine bottles and straight tumblers. The tradeoffs are honest ones: it relies on friction between rollers and glass, so if it slips, the entire design misaligns, which also means second passes are not recommended. And anything with a handle is genuinely hard to position on rollers.
Jaw chuck: the precision grip
A jaw chuck grips the workpiece directly with key-tightened jaws. Internal jaws expand inside hollow items; external jaws grip the outside. It’s the most accurate and secure option and much less prone to slippage, which is what you’re paying for in setup time. Pro tip from the maker community that saved me a heartbreak: steel jaws can scratch glass, so slide some heat shrink tubing over the jaw ends before clamping anything you care about. The PiBurn Grip is a well-liked chuck example: it assembles in under a minute, and being a chuck, you enter the object’s diameter each time you swap workpieces.
Four-wheel rotary: built for taper
Four-wheel rotaries look like roller units with a twist: four individual wheels, one per corner, and each wheel pair is independently height-adjustable. That adjustment exists to counteract the taper of conical bottles and tumblers, so the narrow end and the wide end both sit correctly in focus. Honestly kind of elegant. The PiBurn V, by contrast, is the roller-style counterpart: no assembly needed, 62mm wheels. AlgoLaser‘s rotary chuck rounds out the concrete examples.
| Roller | Jaw chuck | Four-wheel | |
|---|---|---|---|
| Setup speed | Fastest for simple cylinders | Slower (key-tightened jaws) | Moderate |
| Slippage risk | Yes (friction drive) | No (mechanical grip) | Partial (friction, four contact points) |
| Second passes | No (misalignment risk) | Yes (grip holds registration) | Partial |
| Tapered/conical bottles | No | Partial | Yes (independent wheel-pair height) |
| Handled glass | No (hard to position) | Yes | Partial |
The decision tree collapses to bottle shape: straight cylinder, roller. Tapered or conical, four-wheel. Handled glass or maximum accuracy, jaw chuck.
Installing and calibrating the rotary
Setup is a fixed sequence: connector swap, software enable, 90° design rotation, then calibration. Skipping the rotation step alone ruins the engraving, so treat the order as load-bearing.
Hardware
- Lower the bed to its lowest point so the nozzle clears the rotary.
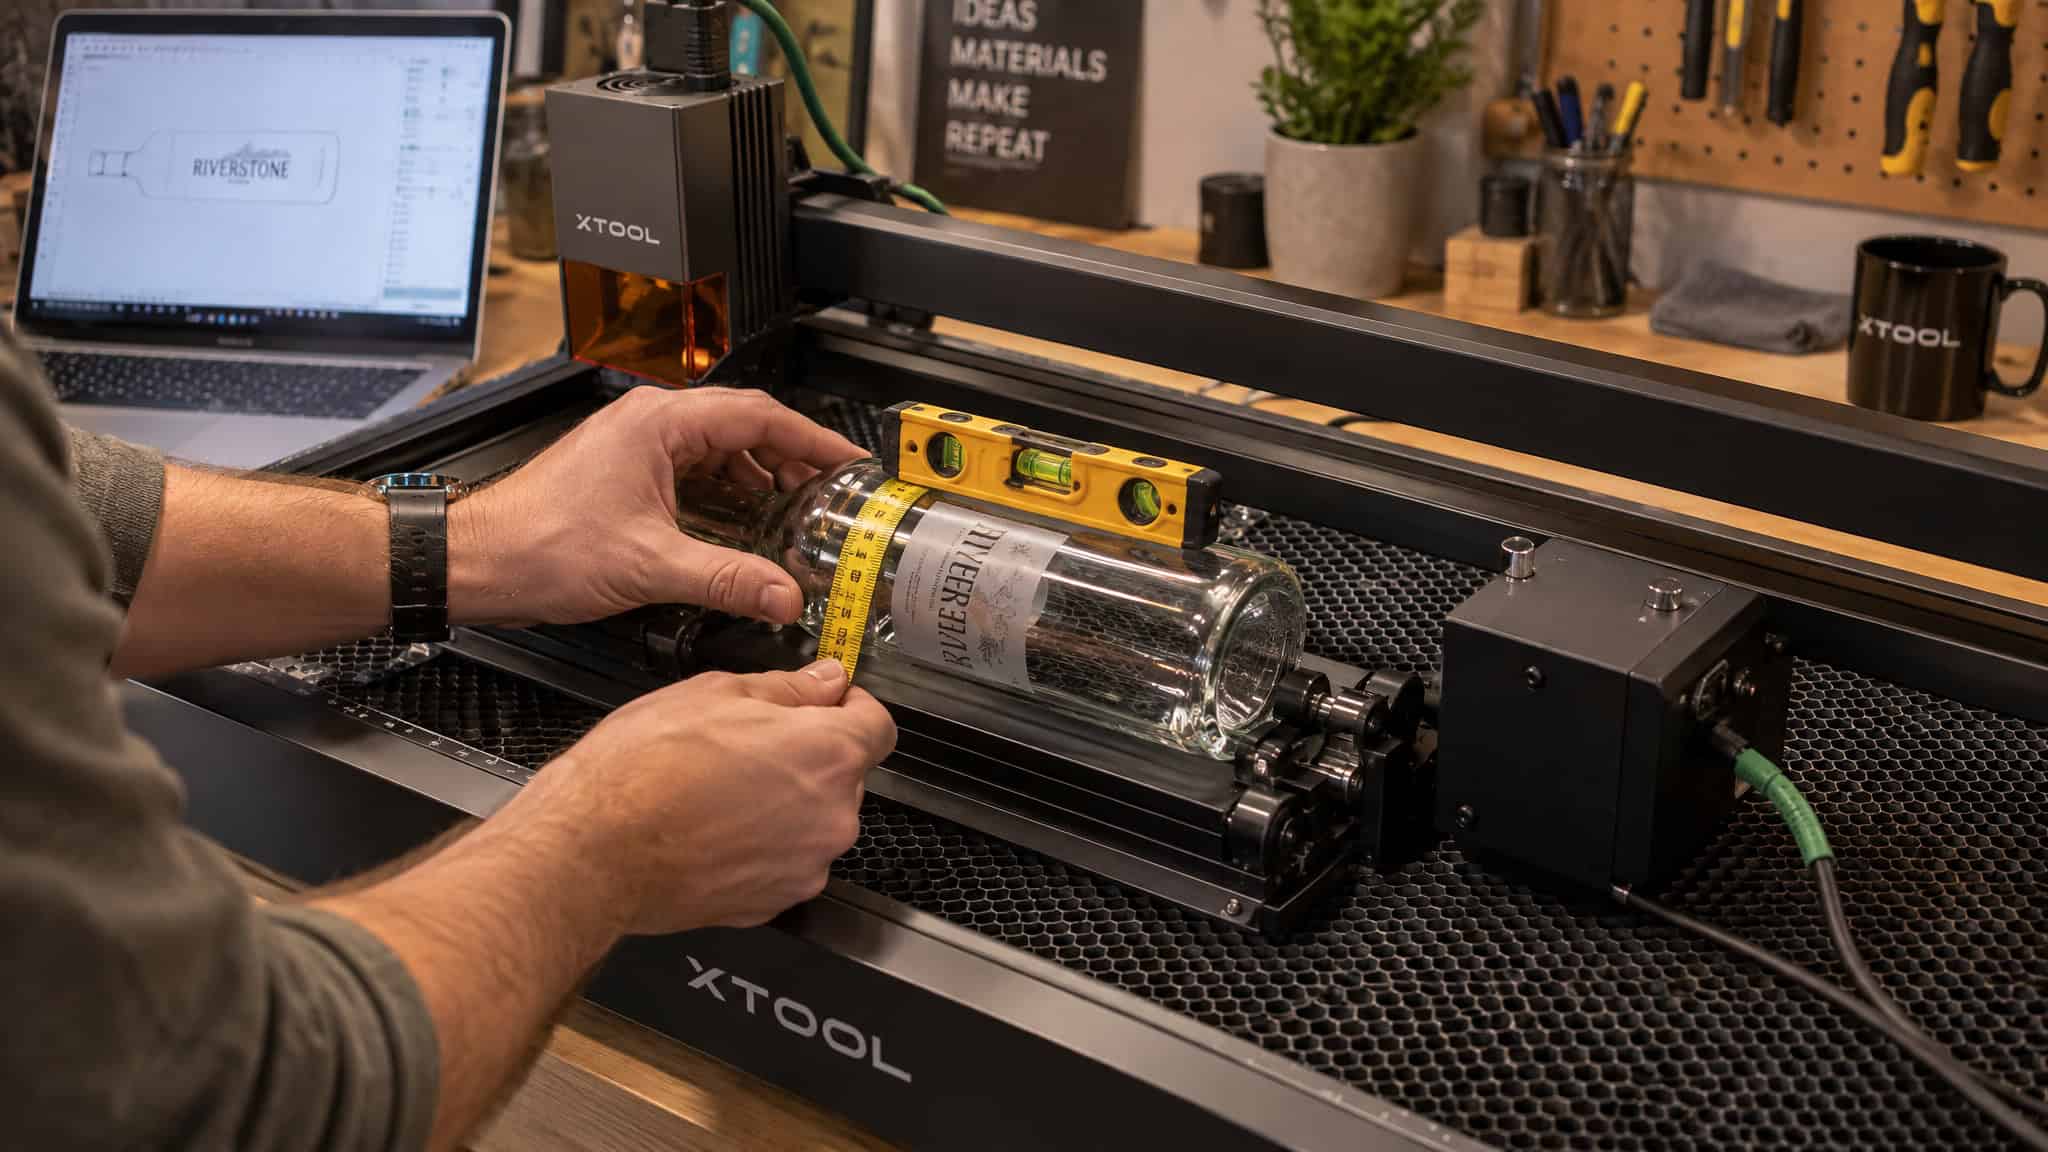
- Place the rotary with the chuck on the right, squared to the bed edge. Squaring is the step readers skip, and it’s the one that causes skew.
- Connect the round plug to the cabinet socket; it fits one way, then tighten the collar.
- Laser OFF, then swap the green connector from the Y-axis stepper controller to the rotary connector.
One small buy nobody warns you about: the xTool S1‘s RA2 kit needed a different cable, a couple of dollars.
Software
- In LightBurn, open Tools > Rotary Setup (Ctrl+Shift+R), enable rotary, select Chuck or Roller, and set the rotary axis to Y.
- Rotate the design 90°, top of the design to the right. The Y-axis now drives the rotary, so the design orientation has to follow it.
- In XCS, the equivalent is Laser Cylindrical mode.
- In LightBurn, switch coordinate mode from Absolute to Current position. Macros $22=0 and $22=1 disable and enable homing.
Calibration
- Steps-per-rotation typically lands between 10,000 and 15,000 pulses; start at 10,000 and adjust.
- Verify with a tape mark on the chuck plus LightBurn’s TEST button, or independently: draw a 100mm line, run it at 1-10% power and 20mm/s framed without firing, and adjust diameter or steps-per-rotation if it’s off. AlgoLaser’s chuck simplifies this with a consistent 96mm-per-rotation value set once per device.
- Level the object with a bubble level, lower idle and acceleration speeds so the object isn’t dislodged, and rotate slowly when framing so nothing slips.
- Measure circumference at the engraving height, not the base. Most first-attempt calibration errors I’ve watched come from measuring at the base and engraving at the label band, where the bottle is wider; the image compresses or stretches accordingly. The S1 tutorial, for instance, worked from a measured glass circumference of 272mm at the engraving band.
Field note: Circumference measured at the base but engraved at the label band is the most common first-attempt calibration error — the image compresses or stretches accordingly.
Where to engrave on a bottle and how to size the design
Want a distortion-free result? Target the label band, skip the seam and shoulders, and widen the graphic about 10% with aspect ratio unlocked.
Placement rules
Skip the moulding seam and ridged shoulders; both fall out of focus as the bottle rotates. Design width can’t exceed the object’s perimeter, and you measure that circumference at the engraving height, not the base.
Curvature math and dual-side work
Curved glass makes graphics look narrower, the same way a 2×2 Post-it looks compressed wrapped around a jar, so widen the graphic ~10% (2 in becomes 2.2 in) with the aspect ratio unlocked. For a second design on the opposite side, halve the circumference: 194.779/2 = 97.3 puts the second graphic’s midpoint dead opposite the first. LightBurn auto-links the diameter and circumference fields; XCS uses perimeter, and entering the wrong one distorts the engraving.
Coating your bottle: diode laser paint vs bare CO2 glass
Diode lasers need an opaque dark coating on clear glass; CO2 lasers engrave bare glass with no masking at all. That’s the whole contradiction resolved: it’s a laser-type distinction, not a debate about technique.
The physics is the fun part. Blue diode light passes straight through clear glass, so the coating is what absorbs the energy and transfers it to the surface. No coating, no absorption, no fracture, no mark.
The coating recipe that works, exactly: Dollar Tree spray tempera diluted 1:1 to 1:2 paint to water, about 4 light coats on pre-warmed glass (the first coats extra light so nothing runs; pre-warming dries it faster and reduces running). You want even coverage with no daylight gaps and no splatter texture, because those spots transmit straight through to the result. Clean the glass with rubbing alcohol first. It dries in about 20 minutes, washes off with warm water afterward, and produces no fumes. More coating options live in my piece on what to spray on glass before laser engraving.
On a CO2 machine, Trotec‘s alternative is a dampened single-layer paper towel with no overlaps and no air bubbles, air assist OFF, which yields clear white results. Application tape works too but gives grayish results instead, and the residue wipes off after engraving.
Engraving settings that work, and the LPI heat tradeoff
Tested starting values exist: on a 60W CO2 machine, 100mm/s at 20-25% power with a 0.1mm interval. Here’s the baseline I’d type in first.
| Setting | Starting value |
|---|---|
| Line layers | 100mm/s, 25% max / 20% min power |
| Fill layers | 100mm/s, 20% power |
| Interval | 0.1mm = 254 LPI (0.08mm = 318 LPI also gave good results) |
These came off a 60W OMTech with a Ruida controller. Line density is a decision, not a spec lookup: too few lines per inch leaves visible scan lines across the frost, too many injects more heat than the glass can shed and can crack the piece. It’s a tuning judgment between two failure modes.
Air assist, counterintuitively, should be minimal, just enough for positive nozzle pressure at the nozzle. More is not better here. The one exception: with the dampened paper towel technique, air assist goes OFF so the towel doesn’t dry out mid-job.
Two parameter-only heat reductions are worth knowing. Drop large graphics from 100% black to about 70% gray and switch rasterization to Ordered Dithering, keeping the same parameters. Less heat going in means less surface roughness. Photo engraving is its own sub-case: grayscale at 70% black, 500 dpi or higher, Ordered Dithering.
The caveat that matters: these values came from specific machines, a 60W CO2 tube and a 40W diode module. A lower-wattage machine needs more power or slower speed; that’s the knob to turn. The deeper version of this tuning problem lives in my glass power settings breakdown.
Running the job, cleaning up, and finishing the bottle
Cleanup depends on the laser type: a wire brush on a drill removes the sharp particles from bare CO2 work, with hand and eye protection, while painted diode work just needs a warm-water rinse.
The safety envelope is short: ventilation on, cooling water below 68°F (20°C), lid closed, never leave the machine unattended, emergency stop within reach, protective eyewear assumed. That’s the whole list.
Cleanup, and why it’s not a wipe
Remember the micro-fracturing physics from earlier? This is the payoff. A wire brush or wire wheel on a drill strips the sharp glass particles off the frosted surface, and it won’t damage the glass itself. But those particles are genuinely sharp, and on a drinking vessel that’s a real cut hazard most articles gloss over. Two hard rules sit next to that: never wire-brush a painted piece, and never just rinse fractured debris off bare glass and call it done.
The tonal outcomes
If you ran the Trotec paper towel method, the result comes out clear white; application tape leaves you with grayish instead. Either way, wash, inspect, and the piece is finished.
Troubleshooting: what each bottle failure actually means
Cracking and shattering have specific causes, high line density injecting excess heat, or lead crystal absorbing heat, and every other visible failure maps to one specific fix.
- Distorted or stretched image. Cause: a wrong diameter or circumference input; the fields are auto-linked, and XCS uses perimeter. I’ve seen a mis-engraved, distorted cup caused entirely by one wrong value. Fix: measure at the engraving height and re-enter.
Worked reference points: 56mm diameter pairs with 210mm circumference; 158.50 circumference derives a 62 diameter. Engraving speeds of 3,000 mm/min and 2,500 mm/min at 30% power are tested starting points, not gospel.
- Backwards engraving. Cause: the motor side of the chuck or roller facing the wrong way. Fix: reorient it, or flip the image with Mirror output.
- Skewed images. Cause: the rotary isn’t aligned to the laser gantry. Fix: bubble level on the object, square the rotary to the bed, and lower idle and acceleration speeds.
- Slippage. Cause: friction loss on a roller rotary. Fix: clean the contact surfaces, and don’t attempt second passes on a roller.
- Cracking. Cause: LPI set too high injects excess heat, or the piece is lead crystal absorbing heat. Fix: drop the line density, and avoid ridges and the moulding seam entirely.
Costs, alternatives, and making money with engraved bottles
Etching cream runs about $15-30 all-in with a stencil. Laser engraving’s real cost is the machine itself. The business case is real, though: one documented order scaled from two glasses to a hundred and twenty.
Laser vs etching cream, and picking a machine
Etching cream needs a stencil and chemical PPE. The laser needs no stencil, is faster, more precise, and batch-processable. The honest tradeoff: if you don’t already own a machine, that’s the entire cost barrier, and prices vary enough that I’d rather give you a selection checklist than numbers. CO2 is the most versatile pick and also removes powder coating from tumblers; bare stainless steel tumblers must not go on a CO2 laser, that’s fiber-laser work. UV marking machines are the glass specialist, and fiber lasers can even engrave mirror glass by removing only the back reflective layer, leaving the surface smooth.
A machine that can’t run LightBurn is usually a bad sign. Compatible brands include OneLaser, Boss, Aeon, OMTech, Thunder Laser Canada, and Laguna Tools; specific machines in this world include the OMTech 60W, xTool M1 (10W), xTool M1 Ultra, xTool P2, xTool S1 (40W), xTool F2, AlgoLaser Delta (22W), and the Trotec Speedy flexx, which puts a CO2 and a fiber source in one box. Accessories matter too; the xTool Riser Base and Honeycomb Panel is one example of the add-ons that make small machines more workable. On the software side, ecosystems like xTool Creative Space (XCS) and JobControl sit alongside LightBurn. Store-bought engraved glass is mass-produced via sandblasting or chemical etching; home laser results rival it, with customization commercial production can’t match.
The business case
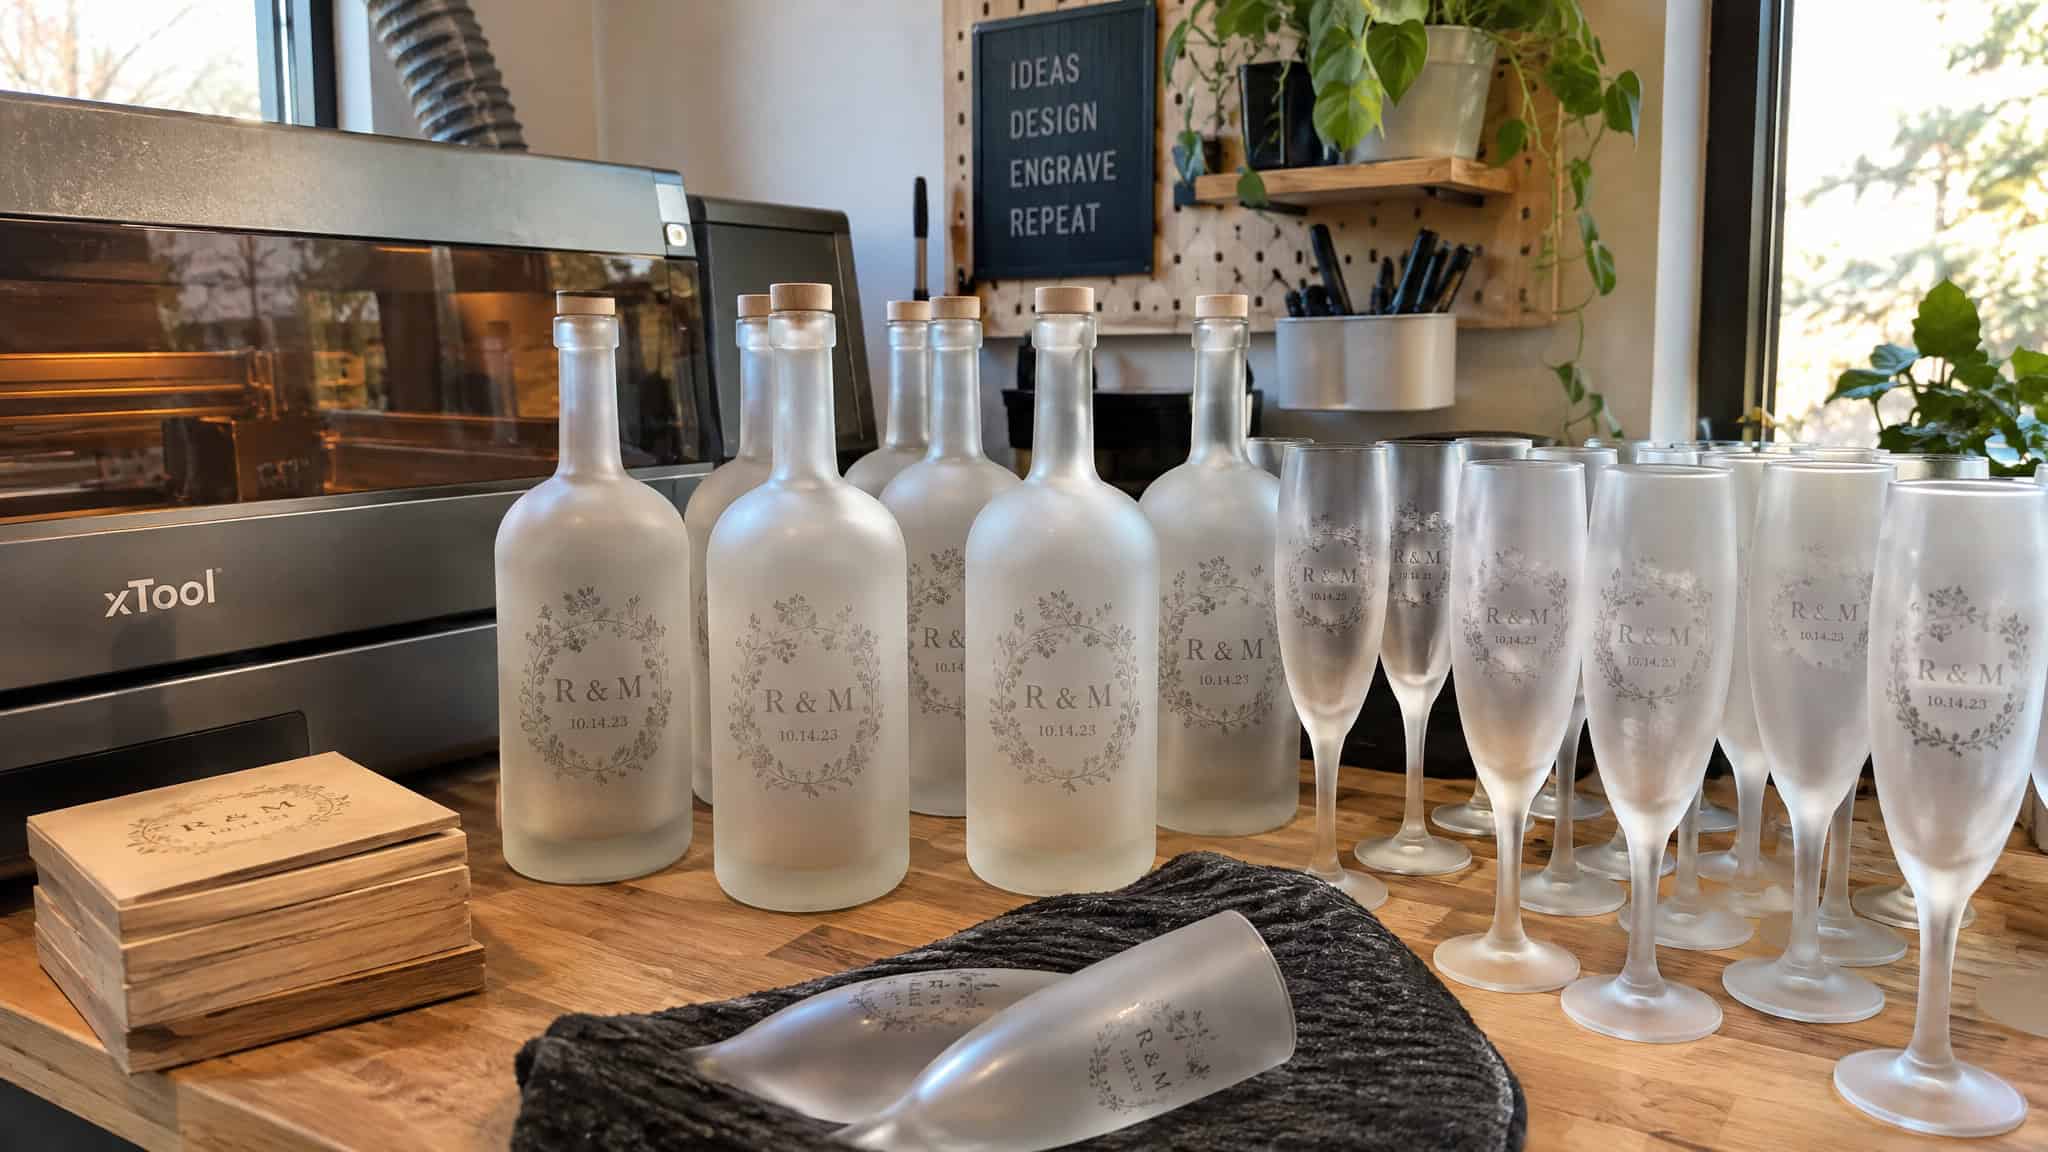
The documented arc: a customer requested 2 engraved champagne flutes for a wedding, saw the examples, and ordered 120 as guest mementos. The run was short and profitable. Once setup is learned, a job takes about 4 minutes on the S1 or just over 34 minutes on the OMTech, and bulk glassware is cheap while engraving adds significant value. A dedicated practice piece like a PiCAT calibration tumbler is worth having for dialing in rotary settings before customer glass goes under the beam.
For designs and walkthroughs, Creative Fabrica is a common source of graphics, and firstdayofhome.com is one of the project guides worth reading. Weddings, anniversary gifts, retirement cups paired with spirits bottles; Etsy or local markets both work. The pattern I keep seeing: the two-piece gift order turns into a bulk order once the client sees samples. After that, your bottleneck is keeping rotary setup consistent across dozens of identical bottles.
Frequently Asked Questions
Do you need a rotary attachment to engrave a curved glass bottle?
Yes. A laser’s beam is only about 0.1mm across with a shallow depth of focus, so fixed X/Y rails can’t hold focus on a curved surface — that’s why first attempts come out crisp in the middle and smeared toward the shoulder. A rotary spins the bottle under the beam so the surface being hit stays inside the focal point, making the curve effectively flat to the laser.
Laser engraving glass settings for a 60W CO2 laser
Start at 100mm/s with 25% max / 20% min power on line layers and 20% power on fill, at a 0.1mm interval (254 LPI); 0.08mm (318 LPI) also gave good results. These came off a 60W OMTech with a Ruida controller, so treat them as starting points — a lower-wattage machine needs more power or slower speed. Keep air assist minimal, just enough for positive nozzle pressure.
Do diode lasers need paint coating to engrave clear glass?
Yes — blue diode light passes straight through clear glass, so without an opaque dark coating there’s no absorption, no fracture, and no mark. The coating absorbs the energy and transfers it to the surface. CO2 lasers don’t have this problem and engrave bare glass with no masking at all; it’s a laser-type distinction, not a technique debate.
What are the downsides of laser etching?
The main gotchas are heat and geometry: too many lines per inch cracks the piece, and any diameter or circumference error stretches or compresses the design. The micro-fracturing process also leaves sharp glass particles on the surface — a real cut hazard on drinking vessels — so bare CO2 work needs a wire brush on a drill, not a rinse. And on a roller rotary, slippage misaligns the whole design, making second passes risky.
