Ever feel like your RF hacking projects are whispering when they should be shouting?
That’s how the first RF-Clown felt. Its short range and clunky controls were a real drag, making any wireless fun feel like you were working with one hand tied behind your back.
I’ve been there, and it’s frustrating.
With the new RF-Clown V2, things are totally different. We’re talking smarter hardware like a crisp OLED display, reliable battery charging with chips like the TP4056, and real control from tactile switches that actually click.
Let me walk you through how this wireless beast will keep you ahead of the game.
Key Takeaways
The RF-Clown V2 is built around three GT24 Mini radio modules and eight 8 dBi antennas, delivering a massive boost in range and signal strength for more effective wireless hacking compared to the V1.
It now features a 0.96-inch OLED display and three dedicated tactile switches for menu navigation, providing clear, real-time feedback. A NeoPixel LED offers simple, color-coded status lights, ending the confusion of random blinking.
At its heart is the powerful ESP32-WROOM-32U. Power management is handled by a TP4056 chip for safe battery charging, an LF33 for stable 3.3V power, and a CP2102 for easy USB programming.
Small aluminum heatsinks are now included for all radio chips to prevent overheating during extended use. Testing confirmed this leads to a more stable signal without unexpected shutdowns.
As an open-source project, all the code, PCB files, and build instructions are available for free on GitHub. This allows anyone to modify features, contribute improvements, or share new ideas for smarter RF hacking.
Table of Contents
What were the limitations of RF-CLOWN V1?
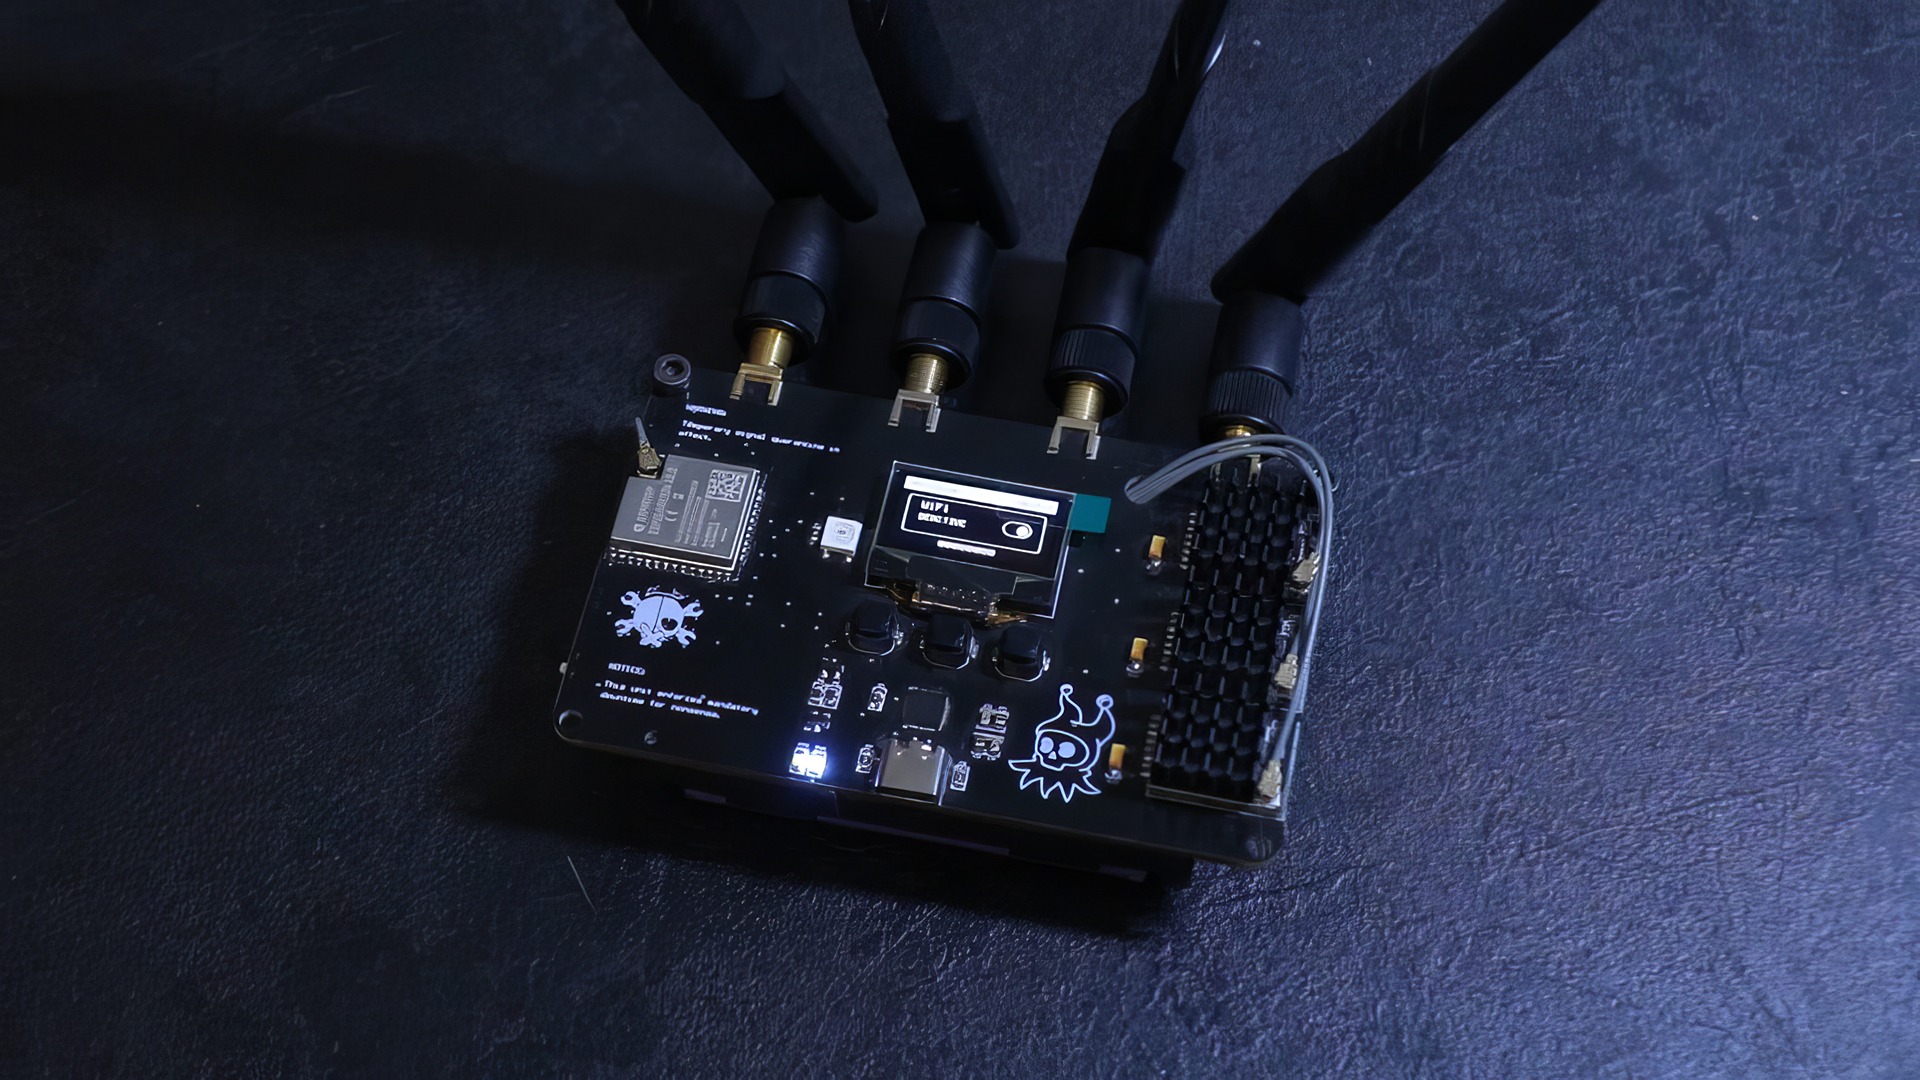
The original RF-CLOWN V1 was a cool little gadget, but it hit its limits fast. The one-button interface was a major pain point. Trying to switch modes felt like you were trying to enter a secret code, and you’d almost always forget the right sequence of presses.
You got a few blinking LEDs for status updates, but they often created more confusion than clarity. Was it connecting, or was the battery dying? It was anyone’s guess.
I lost track of functions so often I started taping cheat sheets next to my workbench.
The range was also a big issue. The built-in antennas were fine for tabletop experiments, but they couldn’t handle serious wireless hacking or Bluetooth jamming over any real distance. You were stuck with what you had, as there was no option to connect external antennas for a boost.
While the documentation and Arduino code files were on GitHub, they weren’t always clear, especially for people new to DIY electronics or ESP32 projects. It worked as a basic radio tool, but for a community of geeks used to powerful and flexible devices, it just wasn’t enough.
What are the main goals for RF-CLOWN V2?
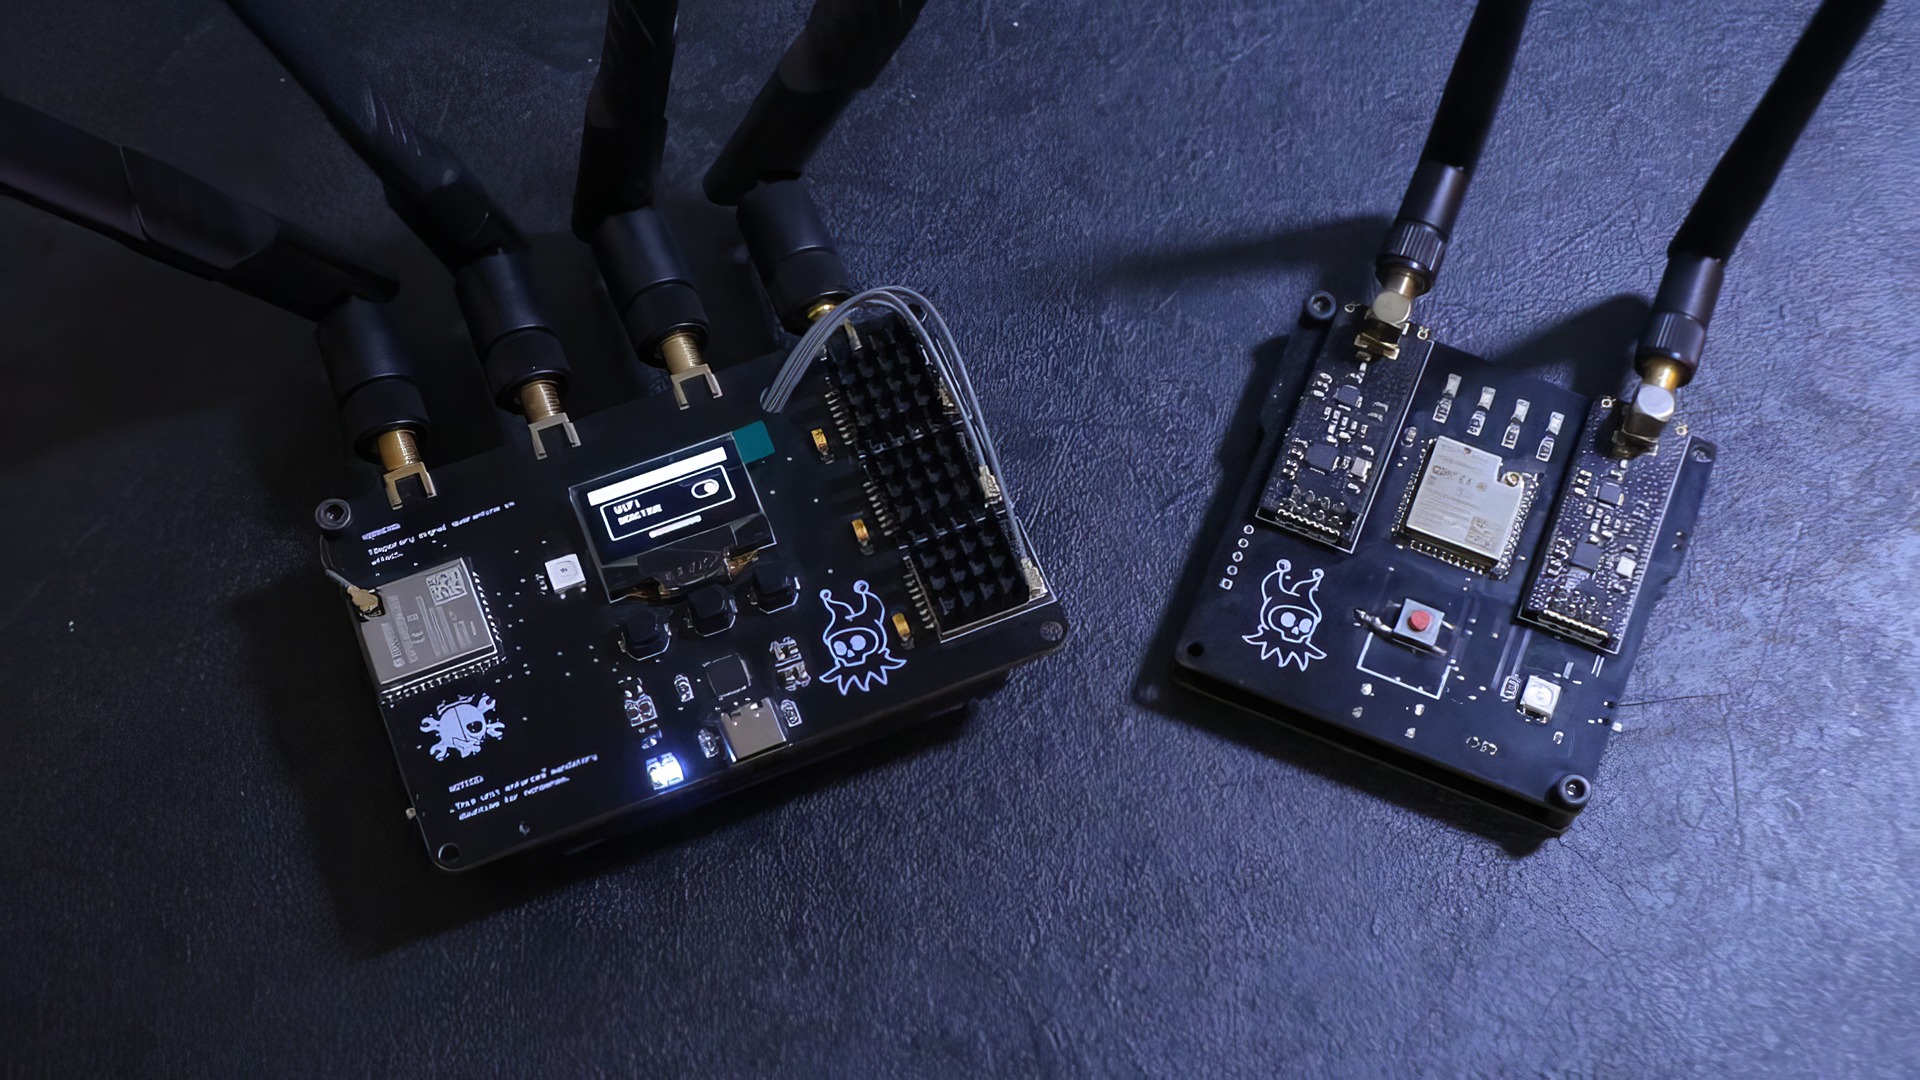
RF-Clown V2 was designed to be a true wireless beast, giving geeks a powerful tool for radio jamming, Bluetooth sniffing, and experimenting with smart gadgets. It’s all about making RF hacking easier and a lot more fun.
The core of the upgrade is the ESP32-WROOM-32U, a dual-core microcontroller that runs at a zippy 240 MHz. This power allows the V2 to not only manage multiple radios but also handle complex tasks like analyzing BLE advertising packets from the thousands of IoT devices around us.
The project aims to give you a flexible, open-source platform that you can build on and modify to your heart’s content.
How is the performance enhanced in RF-CLOWN V2?
The V2 now rocks three GT24 Mini modules working in harmony, up from just two. According to their datasheets, these modules can reach over 1,000 meters in an open field, giving you a massive signal reach.
To make the most of that power, the board connects to eight external antennas, each with an 8 dBi gain. Compared to a standard PCB antenna’s 2 dBi gain, this setup broadcasts powerful radio waves across the 2.4 GHz frequency, the same one used by Wi-Fi, Bluetooth, and many commercial drones.
Here’s what that power means for you:
- Better Coverage: Four IPEX extension cables let you position the antennas for the best possible signal, reducing interference.
- Stable Signal: Small heatsinks keep the radio chips cool, so the system won’t thermal throttle or slow down during long wireless hacking sessions.
- Faster Results: With a stronger signal, jammed devices drop their connections much more quickly and reliably.
I tested it myself while running a Bluetooth jammer against some smart devices. Even after hours of continuous use, the performance never dipped. For anyone interested in how to avoid drone surveillance tactics, this build has the power to do it without breaking a sweat.
What upgrades are made to the interface?
The clunky single-button setup from V1 is officially gone. Taking its place is a clean and practical interface that gives you real control.
The centerpiece is a 0.96-inch OLED display. These screens, often powered by the popular SSD1306 driver chip, are fantastic because they are high-contrast and use very little power. You get sharp, clear feedback on everything the device is doing.
Navigating menus is now a breeze thanks to three tactile switches built right into the board. No more guessing games.
Even the status light got a major upgrade. The confusing blinking LEDs have been replaced with a single NeoPixel LED. This tiny light, which is actually a WS2812B addressable RGB LED, can be programmed to show any color you want. The default code keeps it simple:
- Green: Active and running.
- Blue: In standby mode.
- Red: An error has occurred, or the device is overheating.
Why choose an open-source approach?
All the code, PCB files, and documentation for the RF-Clown V2 are freely available on GitHub. This open-source approach is all about giving you the freedom to tinker, modify, and improve the project.
Collaboration multiplies creativity.
When a project is open-source, the community can help squash bugs, add new features, and push the hardware to its limits. We see this all the time with amazing projects like the Flipper Zero, where the community has developed tons of third-party applications.
You have the freedom to change BLE functions, add new status indicators, or connect different antennas. This collaborative spirit is what helps a great wireless beast get even better every day.
What are the core components of RF-CLOWN V2?
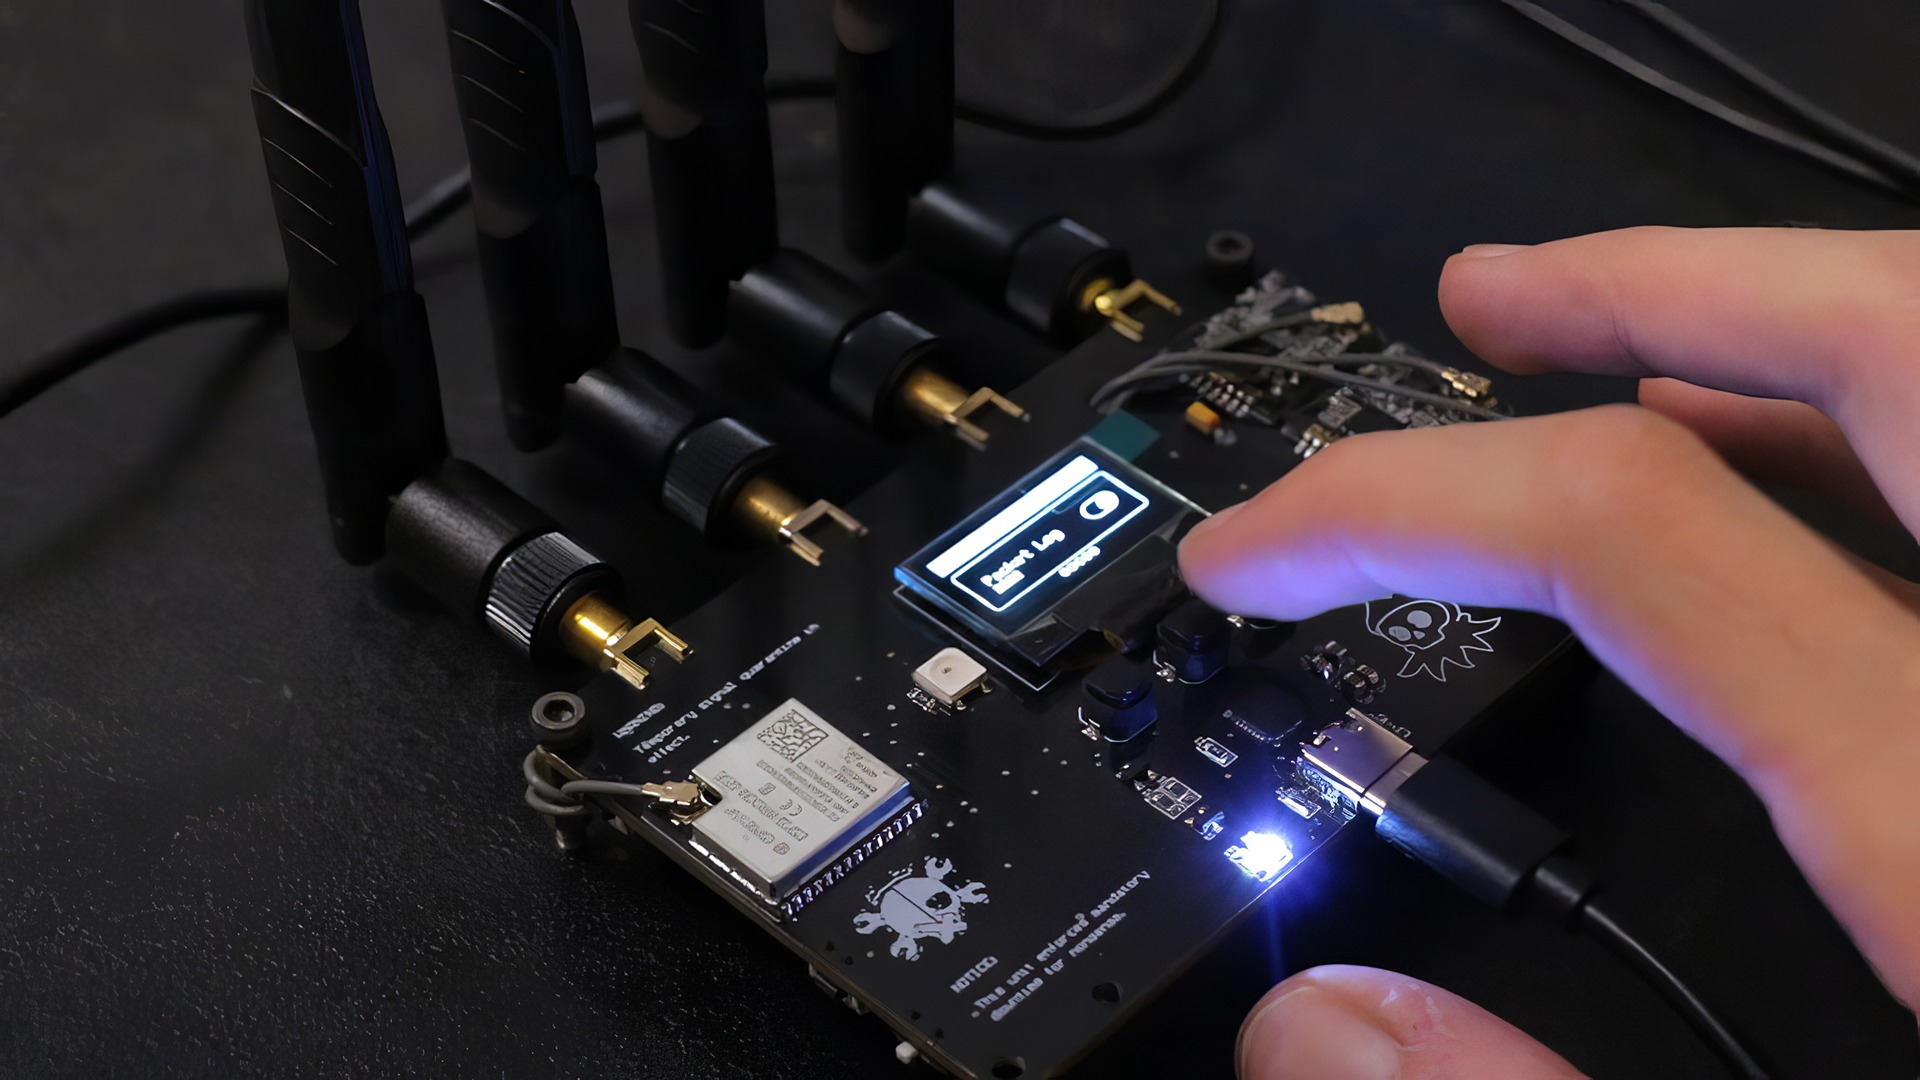
The RF-CLOWN V2 is packed with some seriously cool hardware. Each component was chosen to give you the best performance for your hacking adventures. Let’s break down what each piece does.
What role does the ESP32-WROOM-32U MCU play?
The ESP32-WROOM-32U is the brain of the whole operation. This powerful microcontroller unit, or MCU, coordinates everything the RF-Clown V2 does. Its dual-core processor runs at 240 MHz, giving it more than enough power to manage all the different components smoothly.
It handles:
- Wireless Communication: It manages both Wi-Fi and Bluetooth Low Energy (BLE), making it perfect for smart device experiments or running a Bluetooth jammer.
- Radio Coordination: It controls all three GT24 mini modules, allowing you to scan or transmit on multiple frequencies at once.
- User Interface: It drives the OLED display and reads the inputs from the tactile switches, giving you a responsive menu system.
How does the TP4056 handle battery charging?
With the ESP32 handling the complex wireless tasks, power management is left to the reliable TP4056 charger. This little chip is a hero in the DIY electronics world because it makes charging single-cell LiPo batteries safe and simple.
It constantly monitors the battery’s voltage and provides a steady 1A charging current, which is ideal for most hobby-sized batteries. Once the battery is full, it automatically cuts off the power to prevent overcharging. Many TP4056 modules you can buy from sites like AliExpress also come with a DW01A protection IC, which prevents over-discharge and short circuits.
Just plug in a USB cable, and the TP4056 gets right to work, with status indicator LEDs letting you know when it’s charging and when it’s done.
What is the function of the CP2102 programming chip?
The CP2102 chip is the bridge between your computer and the RF-Clown V2. It’s a USB-to-UART controller that translates the signals from your USB cable into a language the ESP32-WROOM-32U microcontroller can understand.
Thanks to this chip, updating the firmware or uploading your own custom code is incredibly easy. You don’t need any extra hardware. Geeks who love DIY electronics will appreciate this, as the CP2102 is known for its stable drivers from Silicon Labs, which are a lot less fussy than the CH340 chips found on cheaper boards.
Just plug it in, open your favorite code editor like the Arduino IDE, and you’re ready to go.
How does the LF33 voltage regulator work?
After the CP2102 helps you load your code, the LF33 voltage regulator ensures the device has clean, stable power. This tiny component maintains a constant 3.3V for all the sensitive parts, like the ESP32 and the NeoPixel.
The LF33 is a Low-Dropout (LDO) regulator. This is super important for battery-powered projects. It means that even as the battery drains and its voltage drops to something like 3.6V, the LF33 can still provide a steady 3.3V output. This maximizes your battery life and prevents weird glitches or random resets caused by unstable power.
I’ve fried microcontrollers in the past from unstable voltage, so a good regulator like the LF33 gives me real peace of mind.
What are the significant upgrades in RF-CLOWN V2?
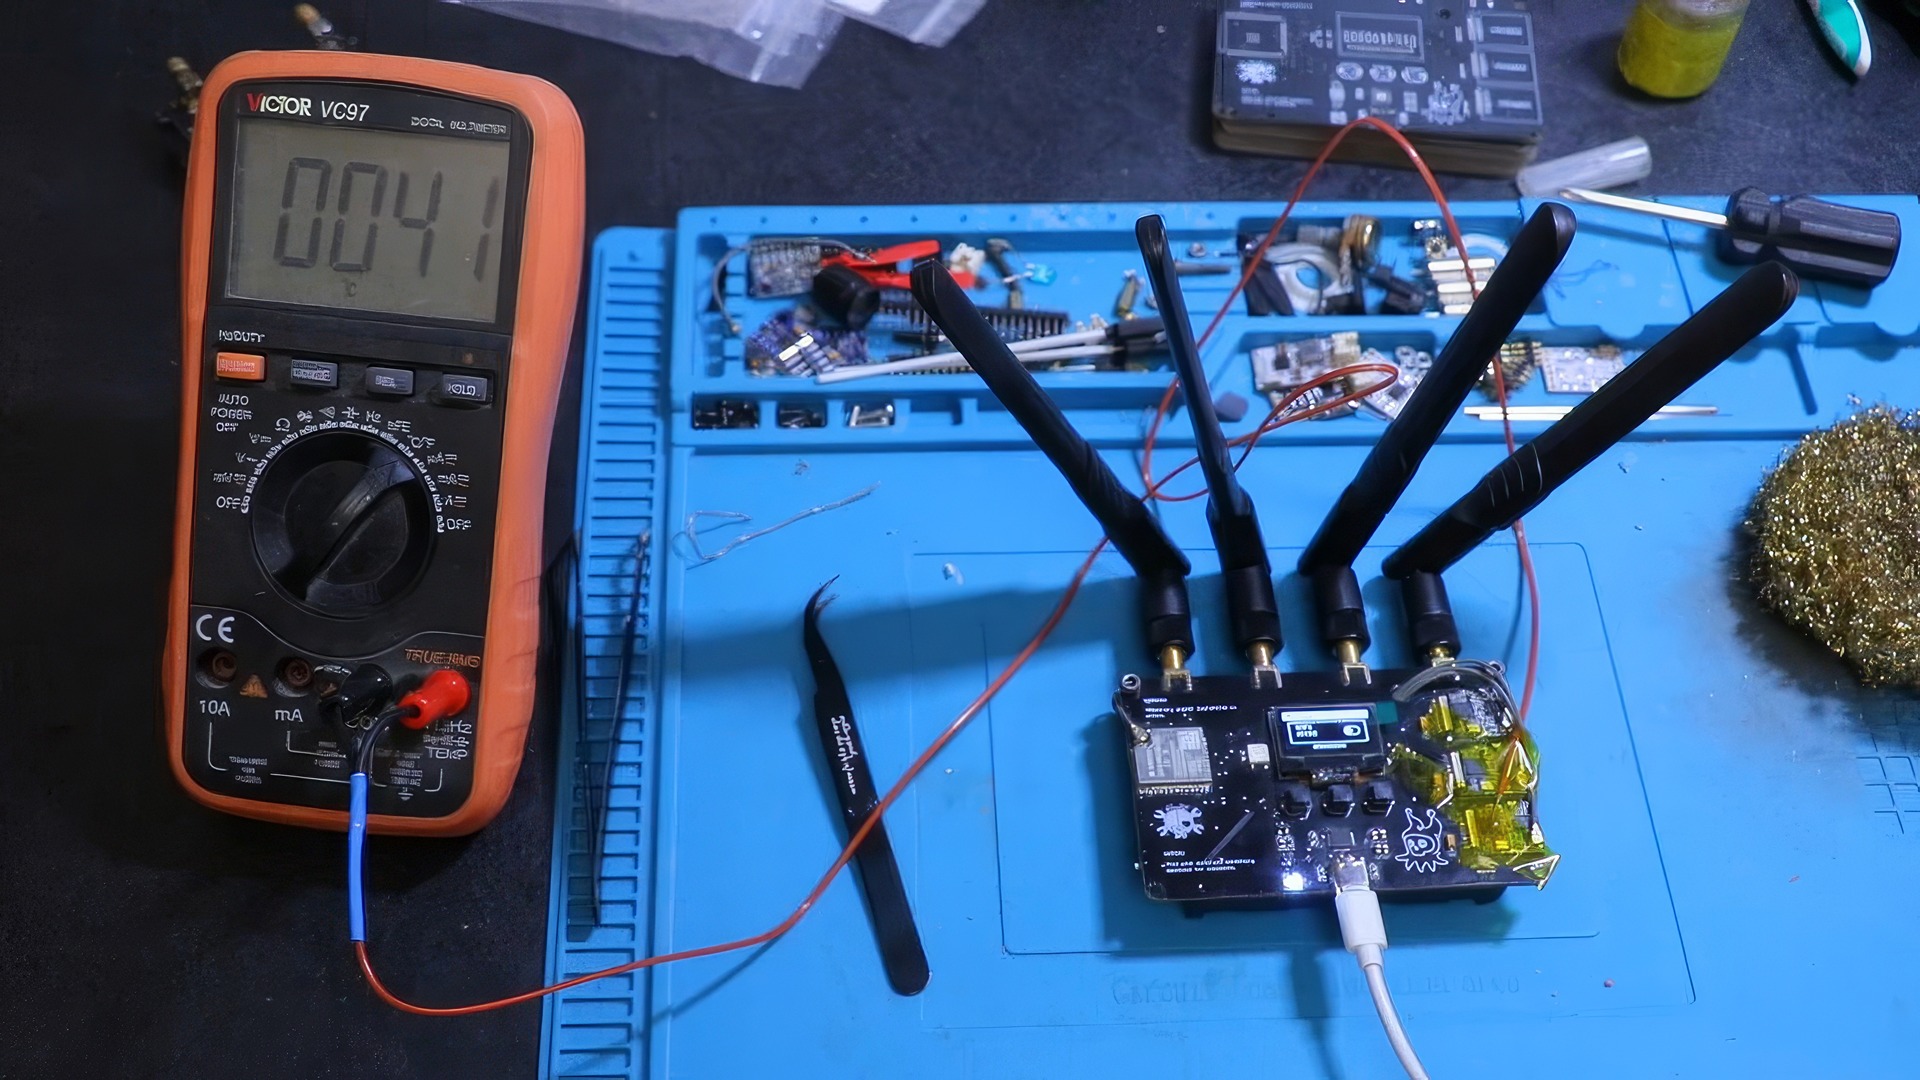
The RF-CLOWN V2 isn’t just a minor update, it’s a complete overhaul. The combination of a powerful ESP32 microcontroller and the triple-radio setup with GT24 mini chips takes RF hacking to a whole new level.
How was the number of transceivers increased?
The V2 now features three GT24 mini wireless transceivers instead of two. This triple-radio setup allows you to do much more at once. The ESP32-WROOM-32U is powerful enough to manage all three radios simultaneously, so you can scan or attack multiple frequencies without missing a beat.
Having more radios means you can get creative. For example, you could use one radio to scan for Wi-Fi networks, a second to perform a deauthentication attack, and a third to sniff for nearby BLE devices, all at the same time. It’s like having an extra pair of hands for your RF hacking projects.
Why add an OLED display and tactile switches?
The 0.96″ OLED display gives you instant, on-device feedback. You no longer need to be tethered to a laptop to see what’s going on. Paired with the three new tactile switches, you now have a full menu system at your fingertips.
Before, you just had one button. It was like trying to cook a whole meal with only a spoon.
Now, you can easily switch between a Bluetooth jammer mode and other wireless beast tasks in seconds. The screen is easy to read in any light, and the tactile buttons provide a satisfying click, so you know your input was registered. It’s a huge quality-of-life improvement.
How are external antennas incorporated?
The V2 was designed from the ground up to support external antennas. Four IPEX extension cables connect the radio modules directly to the antenna ports, ensuring a clean signal path with minimal loss. You need to use proper 50-ohm cables for this to prevent signal reflection.
The board is designed to be used with eight 8 dBi antennas. This gives you a massive boost in signal strength and coverage, which is perfect for both attacking and listening over longer distances. The IPEX connectors also make it incredibly easy to swap out antennas if you want to experiment with different types.
What benefits come from replacing LEDs with NeoPixel?
Swapping a bunch of single-color LEDs for one addressable NeoPixel makes the RF-CLOWN V2’s status indicator much cleaner and more informative. Instead of trying to interpret a confusing pattern of blinking lights, you get simple, color-coded feedback at a glance.
The specific LED used is a WS2812B, a favorite in the DIY community. The ESP32-WROOM-32U can easily control it to display millions of colors, so you can customize the status indicators in the code however you like. It’s a small change that makes the device feel much more polished and professional.
What challenges were faced in the PCB layout process?
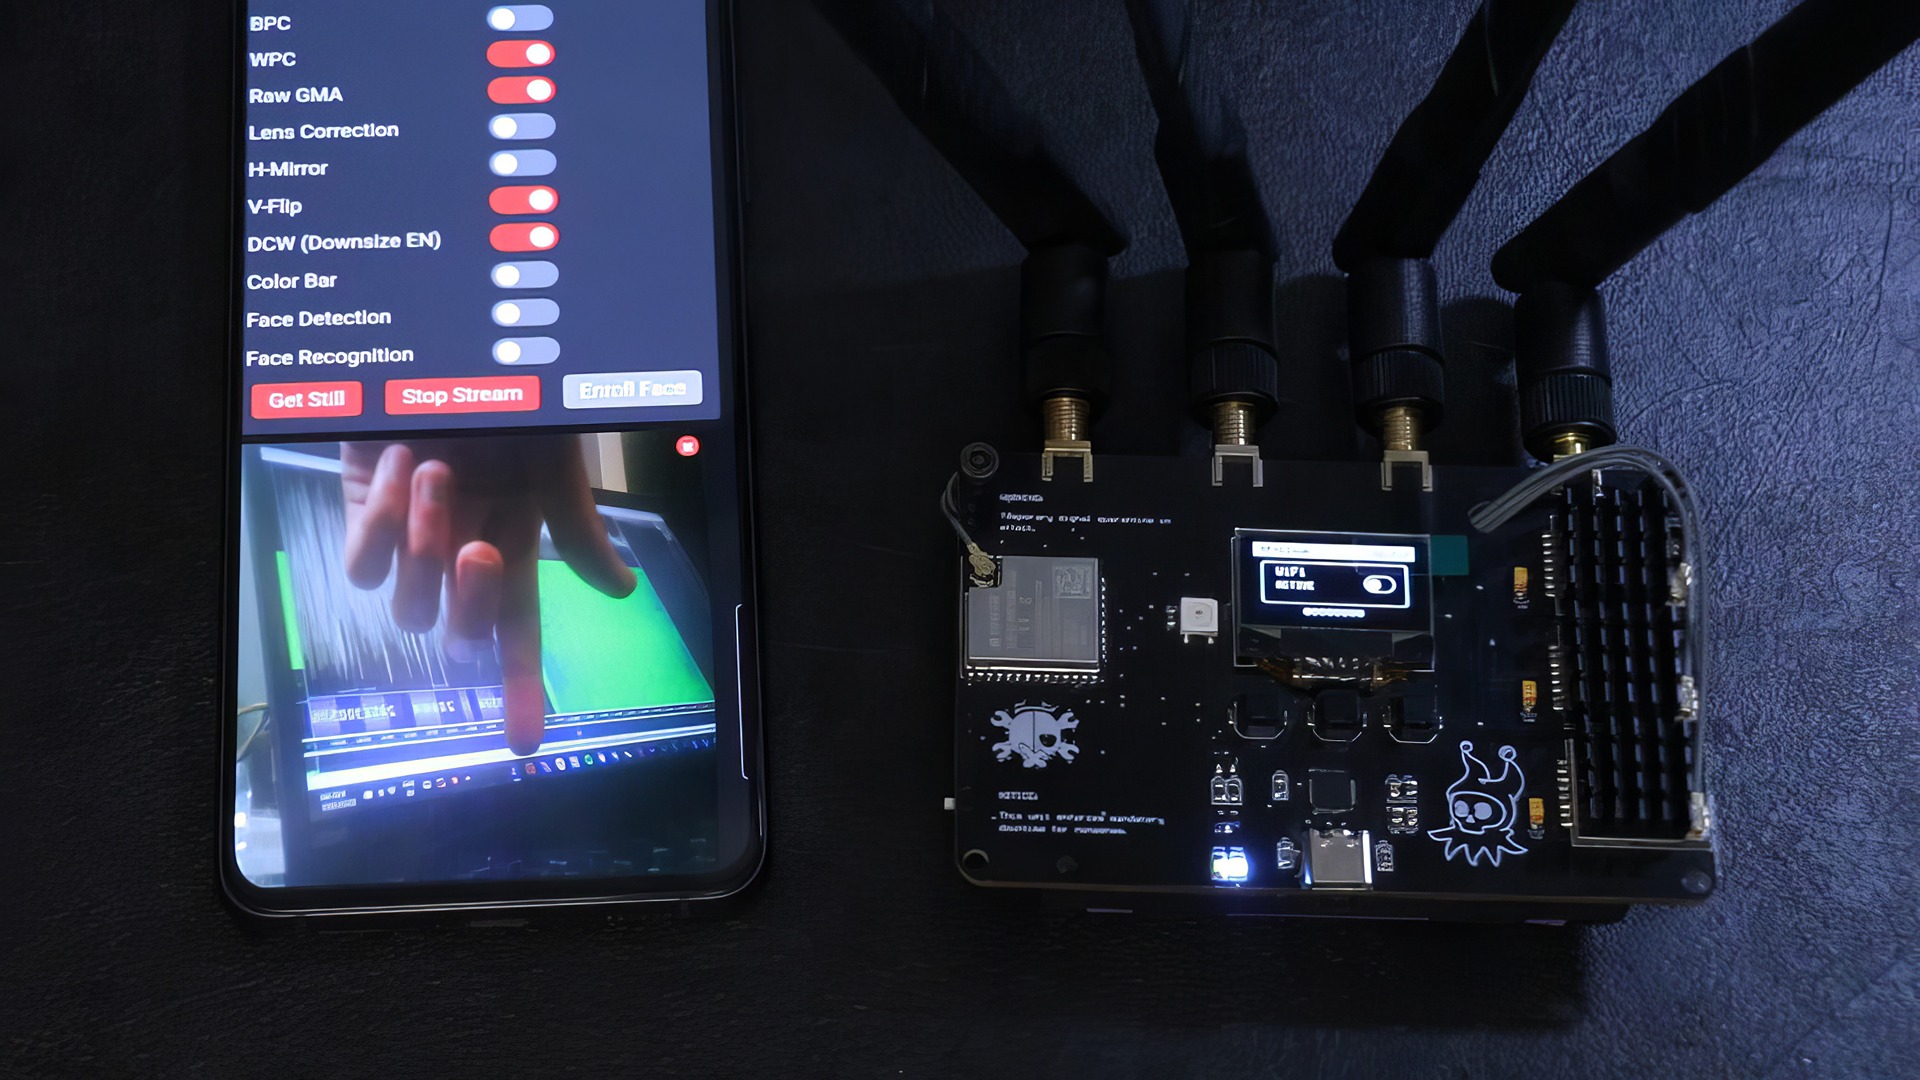
Fitting all the new components like the ESP32-WROOM-32U and CP2102 onto a compact board was like playing a high-stakes game of Tetris. Getting all the signal traces routed correctly without them interfering with each other was a major challenge, especially for the radio frequency sections.
A key principle in RF PCB design is “impedance matching.” The traces that connect the radios to the antennas must have a specific impedance, usually 50 ohms, to ensure maximum power transfer and prevent the signal from reflecting back and causing problems.
How was thermal management and heat addressed?
Running three powerful NRF24 radios at the same time can generate a surprising amount of heat. If the chips get too hot, their performance can become unstable, and they can even be permanently damaged. This isn’t your average gadget, these chips work hard.
To solve this, small aluminum heatsinks were added on top of each radio module. These heatsinks pull heat away from the chips and dissipate it into the air, keeping them cool and running stable during long hacking sessions. The large ground plane on the PCB also acts as a giant, passive heatsink for the ESP32 and other components.
What are the technical specifications of RF-CLOWN V2?
The RF-Clown V2 is loaded with powerful components chosen specifically for wireless hacking and experimentation. Here’s a quick rundown of what’s under the hood.
| Component | Specification |
|---|---|
| MCU | ESP32-WROOM-32U (Wi-Fi & BLE) |
| Radio Modules | 3x GT24 Mini |
| Display | 0.96-inch OLED |
| Status Indicator | 1x NeoPixel (WS2812B) |
| Antenna Ports | 8x External IPEX Connectors (for 8 dBi antennas) |
| Charging | TP4056 Charging Module (for single-cell LiPo) |
| Voltage Regulator | LF33 LDO (3.3V stable output) |
| USB Interface | CP2102 Programming Chip |
| Controls | 3x Tactile Switches for menu navigation |
| Cooling | Aluminum Heatsinks on all radio modules |
How did the interface transition from one-button to menu-based?
The old one-button system felt like trying to play a video game with just a single joystick. The new design uses three tactile switches that work with the OLED display to create an intuitive menu-based system. One button is typically for scrolling, one for selecting, and one to go back or change modes.
This setup allows the options to be displayed clearly on the screen, so you no longer have to memorize complex button-press sequences. The ESP32-WROOM-32U MCU makes the whole experience fast and responsive. This brings RF hacking out of the dark ages and gives you the sharp, precise control that every geek craves.
How was the signal range tested and improved?
Real-world testing was straightforward and effective. In one test, the team powered up the RF-Clown V2 near a Wi-Fi security camera. The camera’s feed immediately froze and remained stuck until the jammer was turned off.
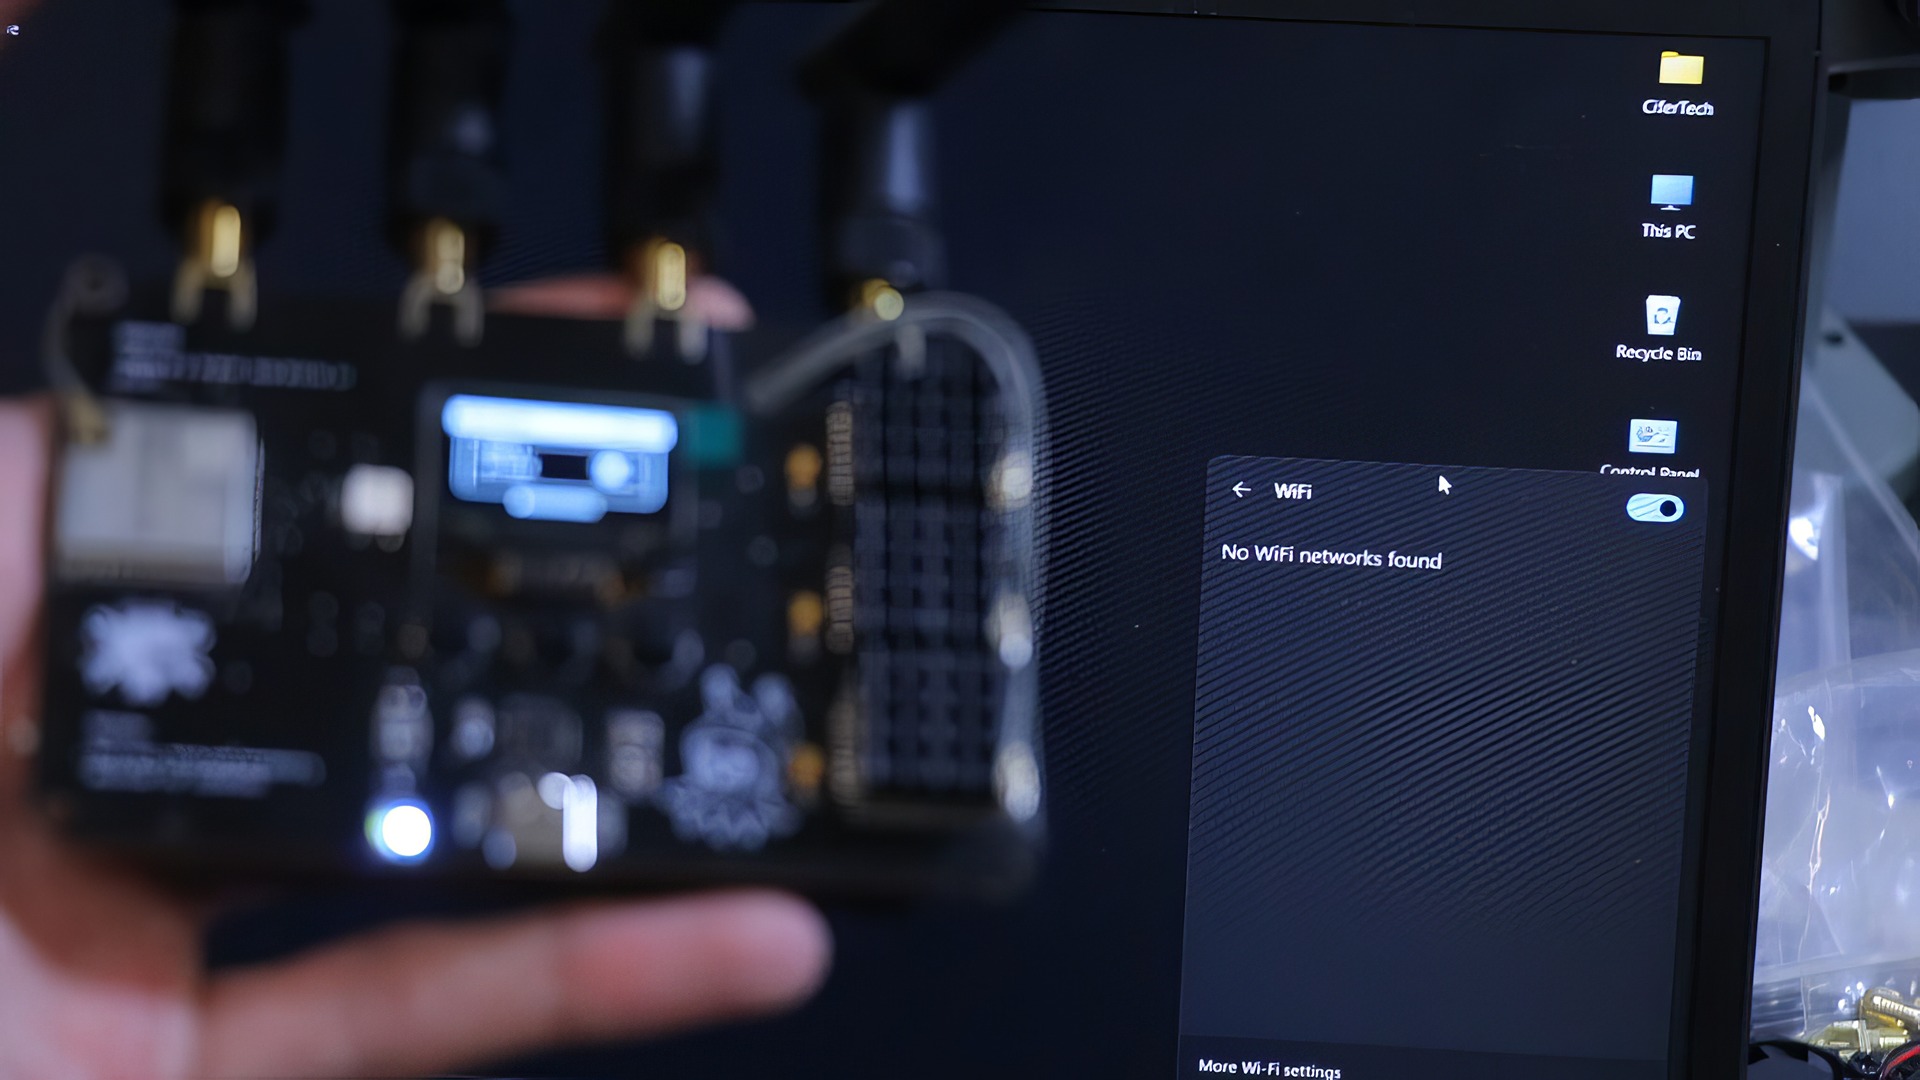
In another test, a laptop was unable to find any nearby Wi-Fi access points while the RF-Clown V2 was active. As soon as the device was shut down, the networks reappeared.
The triple-radio hardware and the upgraded external antennas were the keys to this huge improvement in range and signal consistency. More power and higher gain mean a longer reach and fewer dead spots than the previous version.
How are aluminum heatsinks implemented for heat management?
The aluminum heatsinks are attached directly to the top of the radio modules using thermal adhesive. This creates a direct path for heat to escape from the chips. Without them, this wireless beast would get too hot and start to slow down right in the middle of a session.
I saw a significant drop in operating temperatures right after installing them. This ensures stable performance, so you don’t have to worry about random shutdowns or a laggy signal when you need it most.
Who supported the development of RF-CLOWN V2?
A cool project like this often gets a boost from community partners. NEXTPCB provided significant support for the RF-Clown V2 by helping with the manufacturing of the printed wiring boards.
Many hobbyists and professionals choose NEXTPCB for reliable and fast circuit board manufacturing and assembly. Their support allowed the project to be built with high-quality components like the ESP32-WROOM-32U and OLED display without having to worry about build quality. When you have a partner like that, you can focus on solving hacking problems instead of dealing with hardware headaches.
Where can the GitHub repository for RF-CLOWN V2 be found?
Everything you need for the RF-CLOWN V2 project lives on GitHub. You’ll find the full documentation, the most up-to-date PCB files, and all the firmware code in one place. I found every schematic I needed there while building my own wireless beast.
Just type “rf-clown v2 github” into your favorite search engine, and it will be the first result. The repository is actively maintained, so you’ll see updates as the community provides feedback. If you have questions about BLE support or tweaking the NeoPixel settings, you can open an issue or join the discussions. The community is surprisingly responsive!
How satisfying was the upgrade process for the build?
It was incredibly satisfying to see the RF-Clown V2 come together. Watching it transform from a pile of parts into a powerful tool gave a real sense of accomplishment. The ESP32-WROOM-32U chip worked flawlessly, making everything feel faster and more responsive.
Swapping the old LEDs for a NeoPixel brought a splash of color to every test and made debugging way more fun. The OLED display and tactile switches gave the project a professional feel, and the reliable TP4056 charging circuit meant no more power worries.
With all these upgrades, this “wireless beast” finally feels complete, powerful, and much smarter.
How can readers explore and modify the RF-CLOWN V2 project?
The best way to start is by heading over to the RF-CLOWN V2 GitHub page. Download all the files and start exploring. You can tweak the source code in the Arduino IDE or PlatformIO and flash new firmware to the ESP32-WROOM-32U.
Don’t be afraid to experiment! Try adding new features to the menu on the OLED display, or change the colors of the NeoPixel. You could even try designing a 3D-printed case for it.
If you make a cool change, share it back on GitHub by submitting a pull request. Other geeks love to see new mods, and your upgrades could inspire someone else’s next big project. That’s the best part of the open-source community!
People Also Ask
What is RF-Clown V2, and how does it help with smarter RF hacking?
The RF-Clown V2 is a portable, open-source tool for radio frequency analysis and security testing. It stands out by integrating three GT24 Mini transceivers and powerful external antennas, giving you broader signal coverage than older single-radio gadgets. This all-in-one design means you can capture and interact with wireless systems on the go, without being tied to a computer.
How does the OLED display improve the user experience on RF-Clown V2?
The OLED display provides clear, real-time feedback on active modes and signal data right on the device.
Can beginners use RF-Clown V2 for their first steps into radio frequency projects?
Absolutely! While powerful, the RF-Clown V2 is managed through a simple menu system navigated by three tactile switches, making it straightforward for newcomers to start exploring. Many makers also publish their complete code and PCB designs on sites like GitHub, so you can see exactly how it works.
Why should someone upgrade to RF-Clown V2 instead of sticking with an old model?
Upgrading gives you a fully integrated and portable unit with a built-in battery circuit and user interface, which is a big step up from older setups that often required separate components and a host computer. The V2’s triple-radio design and improved external antennas also provide a significantly longer and more reliable signal range.
