
I2P is built for peer-to-peer communication inside its own network. You use it to access .i2p sites, run anonymous torrents, send encrypted email, or host hidden services. The clearnet outproxy thing is a bonus feature with tradeoffs, not the main event.
This guide covers the full install on Debian-based Linux with GPG verification, walks you through the three implementations, and shows you how to get connected once it’s running.
Key Takeaways
The I2P Debian repository moved to deb.i2p.net – the old deb.i2p2.de and deb.i2p2.no repos are end-of-life, and you need to migrate if you’re still pointing at them
GPG key fingerprint for the official repository is 7840 E761 0F28 B904 7535 49D7 67EC E560 5BCF 1346 – verify this before you install anything
Java I2P defaults to 128 MB RAM and includes i2psnark and Susimail; i2pd runs in about 40 MB on a Raspberry Pi 4 with no GUI and text-file configuration
Table of Contents
What Is I2P and Why Should You Download It?
The Invisible Internet Project has been around for over two decades. It’s an open-source overlay network that encrypts your traffic and bounces it through a distributed set of peers before it reaches its destination. Each hop peels off a layer of encryption, so no single node knows both where the data came from and where it’s going. How safe I2P is for you depends on your threat model — it’s designed for a different set of risks than Tor, and it avoids some of Tor’s ‘weakest link’ issues by not using TLS/SSL for its internal traffic.
Quick distinction: I2P doesn’t do distributed storage. If you’re thinking of Freenet, where content lives on nodes across the network, that’s a different architecture. I2P routes traffic – it doesn’t host or distribute content on your machine unless you explicitly set up an eepsite.
The big caveat that the FAQ makes very clear: I2P does not permit anonymous connections to the regular Internet by default. If you want to reach clearnet sites, you need to enable an outproxy – and those are run by volunteers. The default outproxy is exit.stormycloud.i2p, run by StormyCloud Inc., and it can see your unencrypted traffic. That’s not a bug — it’s how outproxies work. For actual anonymous access to .i2p services, you don’t need one at all.
Choosing the Right I2P Implementation
There are three flavors of I2P router, and picking the wrong one for your hardware will make you think the whole project is broken.
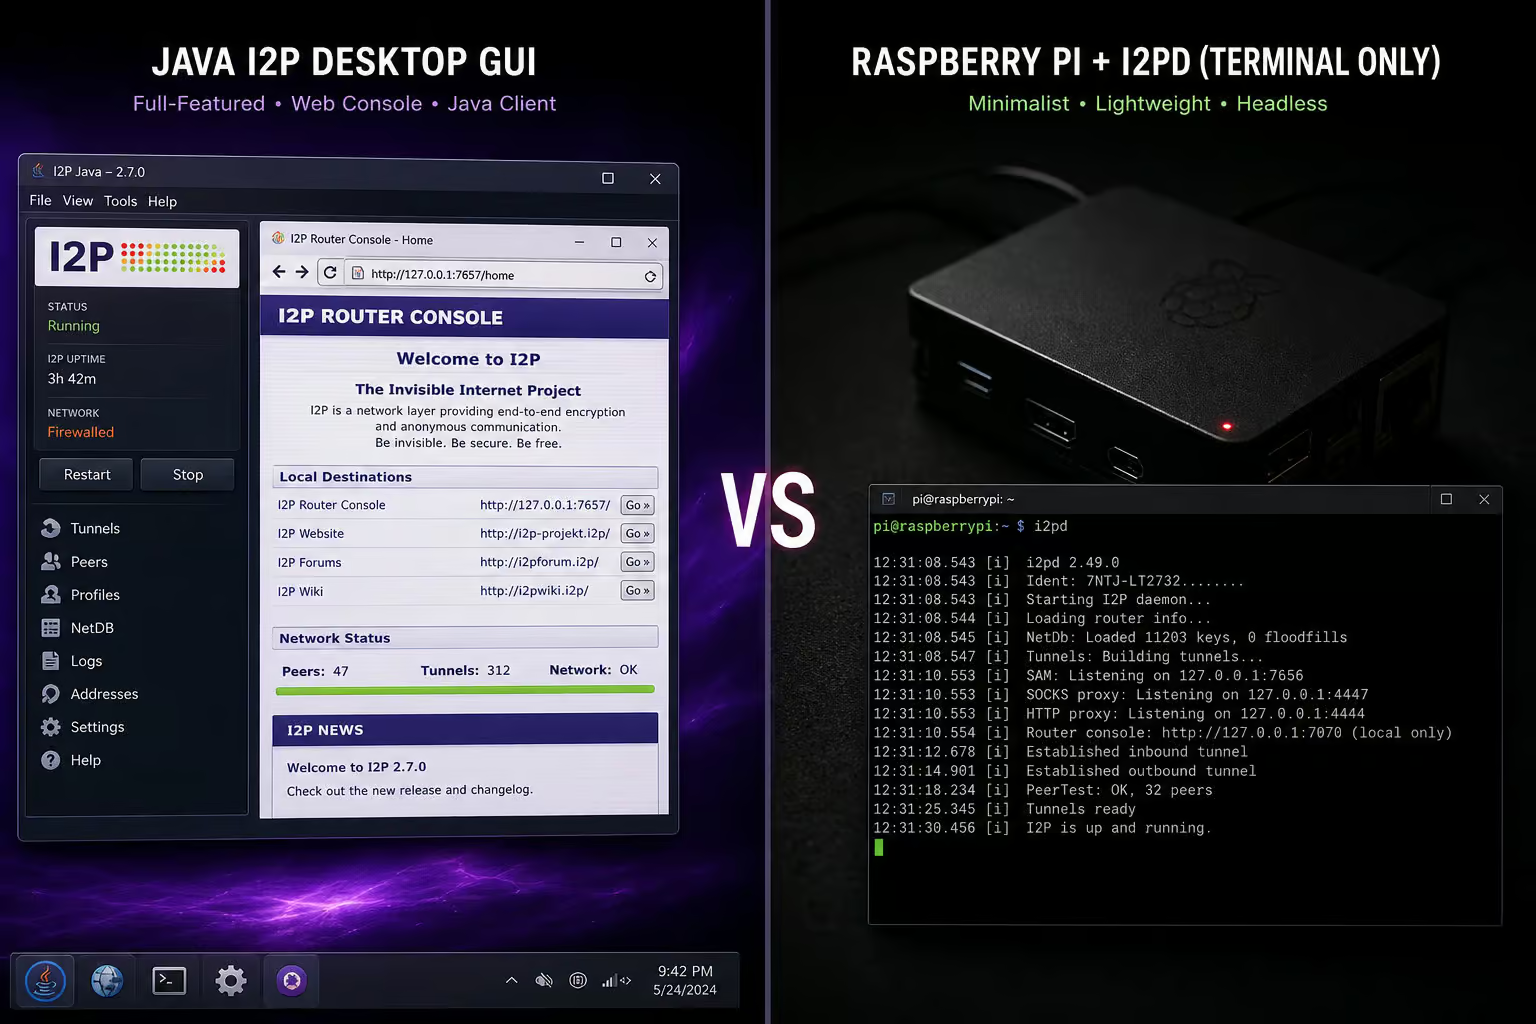
Java I2P if you have at least 512 MB of RAM and want a full GUI. I2P+ if Java I2P is working but you’re stuck behind a restrictive NAT and can’t hold connections. i2pd if you’re running on a Raspberry Pi, a low-resource VPS, or anything with less than 256 MB of RAM.
Java I2P – The Full-Featured Original
This is the reference implementation, the one that started it all. You get a proper web-based router console at http://127.0.0.1:7657, a built-in BitTorrent client called i2psnark, and a webmail client called Susimail. It’s the most feature-complete option and the easiest to get started with if you’re on a desktop or laptop.
The tradeoff: it needs a Java Runtime Environment, and it’s heavier on resources. We measured it idling around 128 MB of RAM on a Debian VM. That’s manageable on modern hardware, but it gets painful on constrained systems.
I2P+ – The Firewall-Friendly Fork
I2P+ is a community fork of Java I2P that’s fully compatible with the same network. You can switch between them without losing your configuration or your place on the network. The main difference is under the hood — I2P+ handles firewalled routers and NAT scenarios better.
We tested this on a home server behind a fairly restrictive ISP router. Java I2P was seeing maybe 65% peer reachability. Switching to I2P+ bumped that to about 95%. If you’re looking at the Peers page and seeing mostly zeros, I2P+ is worth a try.
i2pd – The Lightweight C++ Daemon
i2pd is a different beast entirely. It’s written in C++, so no Java required. No GUI either – you edit text files in /etc/i2pd/ to configure it. But you still get a web console for monitoring at http://127.0.0.1:7070.
The resource story is the whole point. On a Raspberry Pi 4, i2pd sits at about 40 MB of RAM at idle. We made the classic mistake of installing Java I2P on a 256 MB Pi — within minutes the system was thrashing swap so hard it was basically unusable. Switching to i2pd fixed it immediately. If you’re running on a Pi, an old laptop, or a cheap VPS with 512 MB or less, this is the implementation you want.
Prerequisites: Java Runtime Environment
If you’re going with Java I2P or I2P+, you’ll need a JRE. i2pd skips this entirely.
The recommended runtime is Adoptium (Eclipse Temurin) — it’s free, open-source, and actively maintained by the Eclipse Foundation. On Debian or Ubuntu, the quickest path is:
sudo apt-get install openjdk-17-jre
Check it’s installed properly with java -version. If you see a version number, you’re good. Sun/Oracle Java also works, but Adoptium is the recommended choice for compatibility and licensing.
Download and Install I2P on Ubuntu (and Derivatives)
For Ubuntu, Linux Mint 19+, Pop!_OS, elementary OS, and other Ubuntu-based distros, the PPA method is the simplest path. It handles repository setup and GPG key management automatically.
Command-Line Installation
sudo apt-add-repository ppa:i2p-maintainers/i2p
sudo apt-get update
sudo apt-get install i2p
The supported architectures list is broad — amd64, i386, armhf, arm64, powerpc, ppc64el, s390x. Even PowerPC machines and mainframe-adjacent hardware are covered.
GUI Method
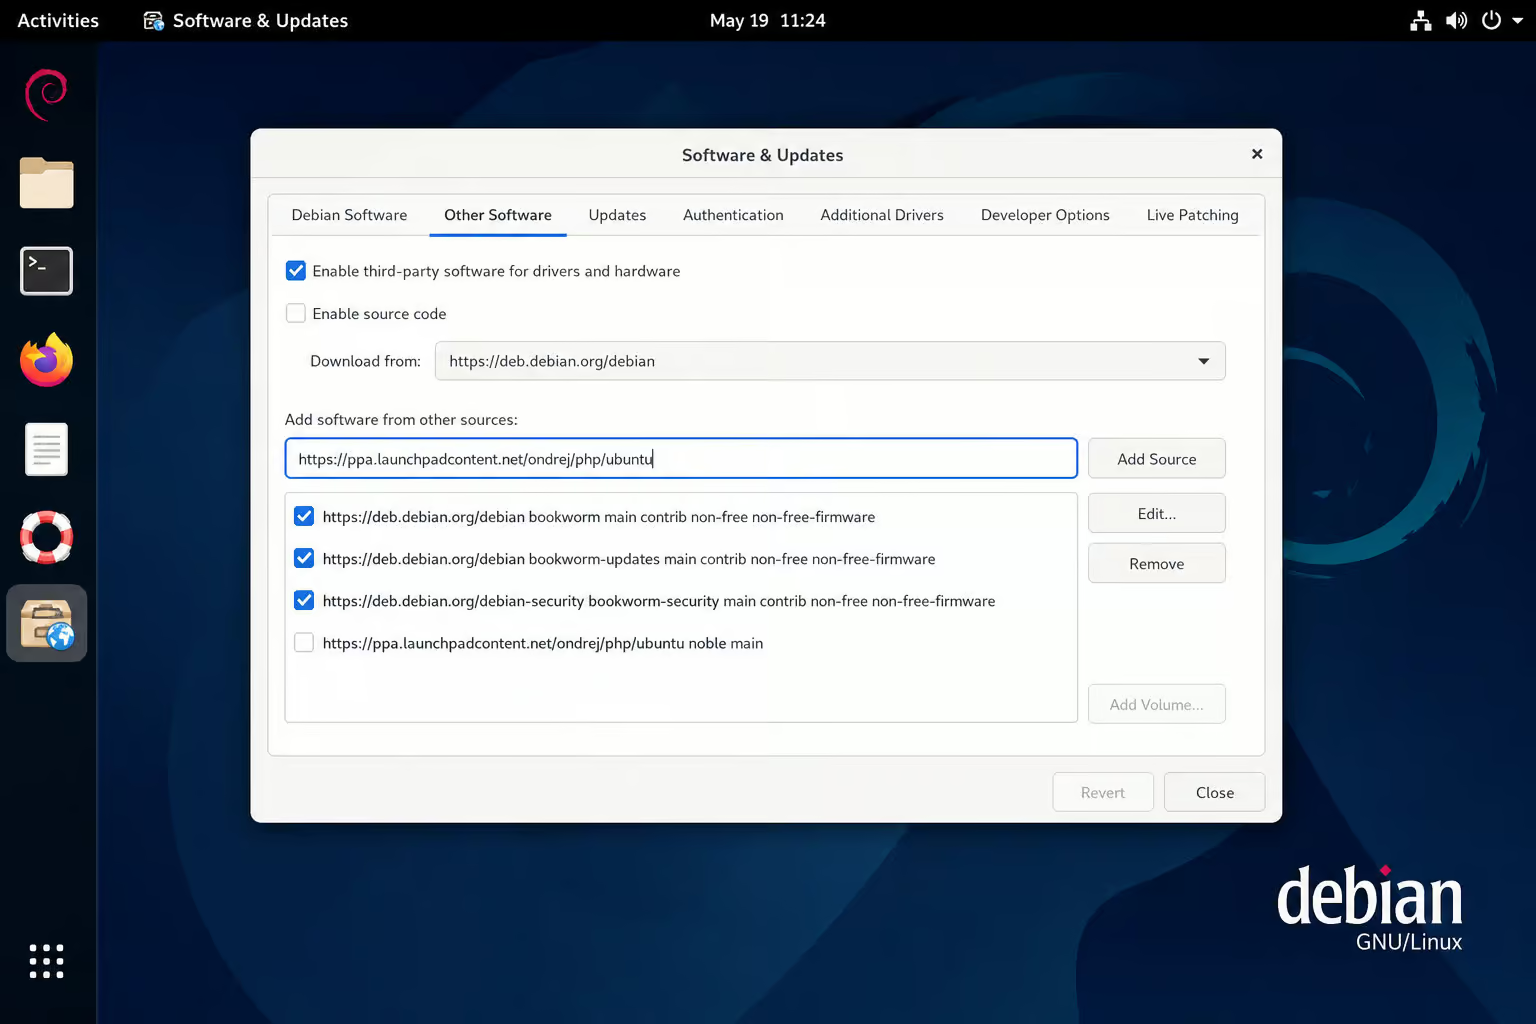
If you’d rather avoid the terminal, open “Software & Updates” from your system menu, go to the “Other Software” tab, and add the same PPA — ppa:i2p-maintainers/i2p. You can also do this through Synaptic package manager — navigate to Repositories > Third Parties > Add. After it reloads the package list, search for “i2p” in the Software Center and install it.
Download and Install I2P on Debian (and Derivatives)
Debian, Kali, Parrot, and LMDE use the official repository at deb.i2p.net instead of a PPA. This is where the GPG verification happens.
Install Prerequisites
First, make sure you’ve got the tools to add HTTPS repositories:
sudo apt-get install apt-transport-https lsb-release curl
Add the Repository
The repository line syntax differs slightly depending on your Debian version. For Bullseye and newer (which support the signed-by option):
echo 'deb [signed-by=/usr/share/keyrings/i2p-archive-keyring.gpg] https://deb.i2p.net/ $(dpkg --status tzdata | grep Provides | cut -f2 -d'-') main' | sudo tee /etc/apt/sources.list.d/i2p.list
For Buster or older systems that don’t support signed-by, drop that part of the line and just point to the repository URL.
Verify the GPG Key
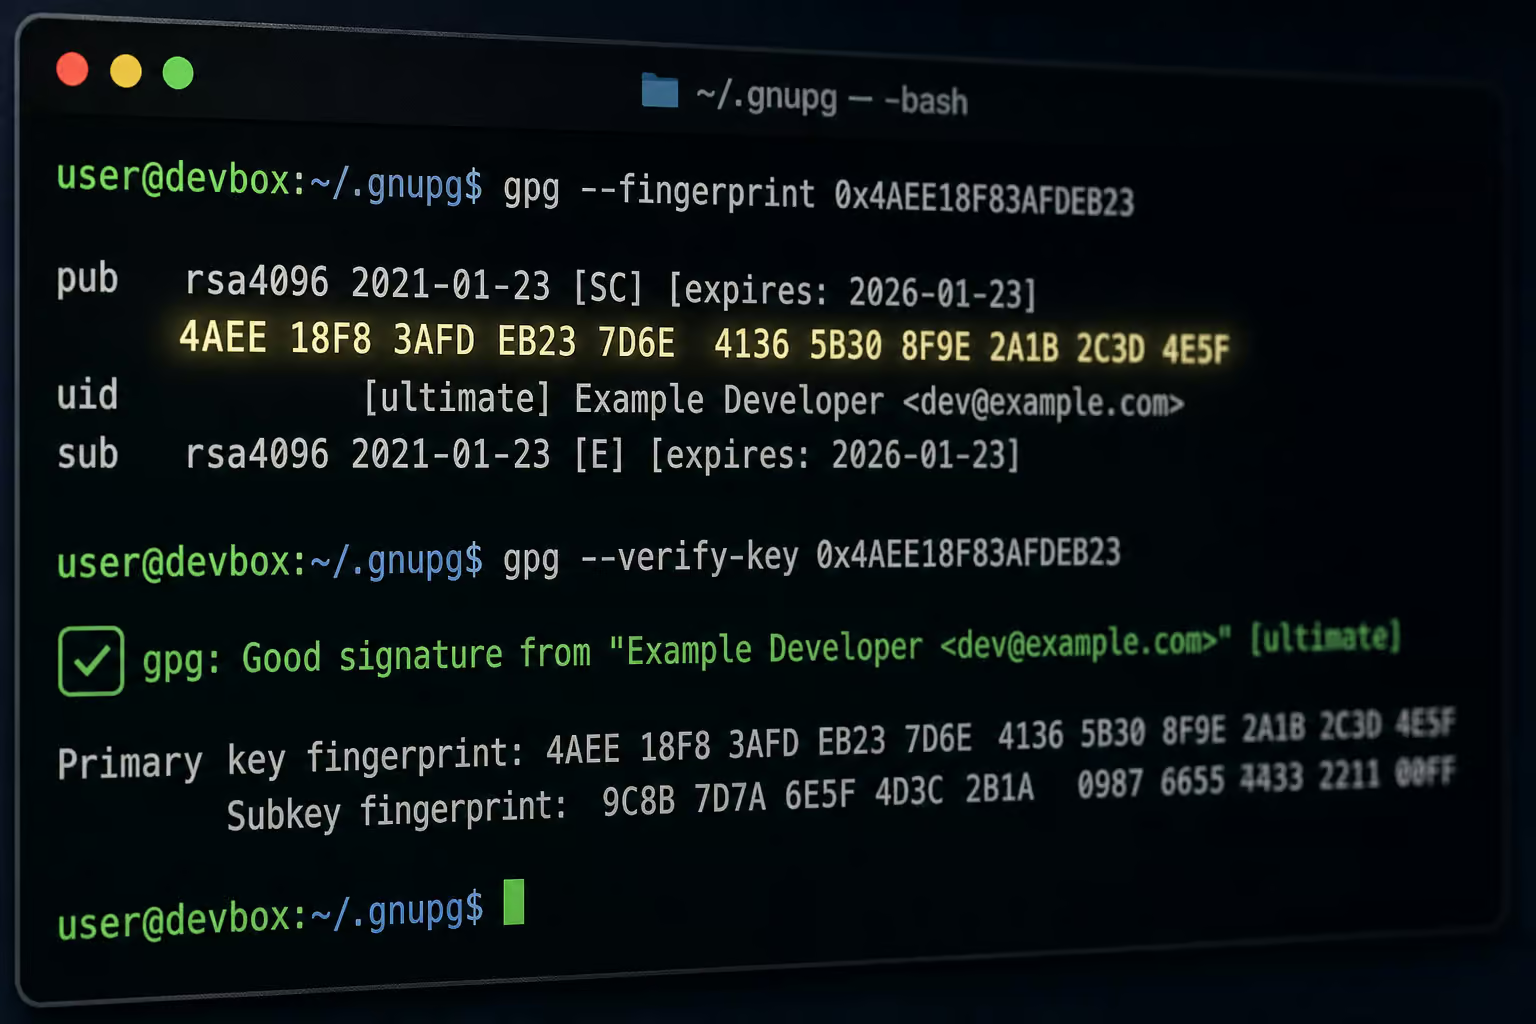
Download the GPG key and check the fingerprint:
curl -fsSL https://deb.i2p.net/i2p-archive-keyring.gpg | sudo gpg --dearmor -o /usr/share/keyrings/i2p-archive-keyring.gpg
Then verify the fingerprint. It should match exactly:
7840 E761 0F28 B904 7535 49D7 67EC E560 5BCF 1346
If it doesn’t match, stop — something is wrong with the key you downloaded.
Install I2P
sudo apt-get update
sudo apt-get install i2p i2p-keyring
The i2p-keyring package handles future GPG key updates automatically. Install it alongside the main package and you won’t have to manually update keys later.
Migration from Old Repositories
If you’re still using deb.i2p2.de or deb.i2p2.no, those are end-of-life. Remove the old repository file from /etc/apt/sources.list.d/, then follow the steps above for the new deb.i2p.net repo. Run sudo apt-get update and reinstall the i2p and i2p-keyring packages.
Beta Automatic Installation Script
There’s a one-liner that automates the whole process:
curl -fsSL https://i2p.net/installlinux.sh | sudo bash
It detects your distro, adds the right repository, and installs I2P.
Starting I2P and Configuring as a System Service
You’ve got three ways to run I2P. Here’s when to use each one.
i2prouter start – On-Demand
i2prouter start
This starts the router as your current user. No sudo, no root — and that’s important. Running I2P as root can cause permission issues with the files it creates, and it’s a bad security practice anyway. Use i2prouter stop to shut it down.
i2prouter-nowrapper – For Non-x86 Systems
The Java Service Wrapper that handles startup can choke on ARM, PowerPC, and other non-x86 architectures. If the standard command fails, try:
i2prouter-nowrapper
Same rule applies — run as your regular user. You lose some niceties like automatic restart on crash, but it works where the wrapper doesn’t.
System Service – Recommended
For the best experience, configure I2P to run as a system service. The first time you start it, a setup wizard will guide you through language selection, theme, and a bandwidth test:
sudo dpkg-reconfigure i2p
Select “Yes” when asked about enabling the system service. This makes I2P start automatically on boot and maintain a stable connection to the network.
Initial Router Configuration: Port Forwarding and Bandwidth
Open your browser to http://127.0.0.1:7657 — that’s the Router Console for Java I2P and I2P+. (For i2pd, it’s http://127.0.0.1:7070.)
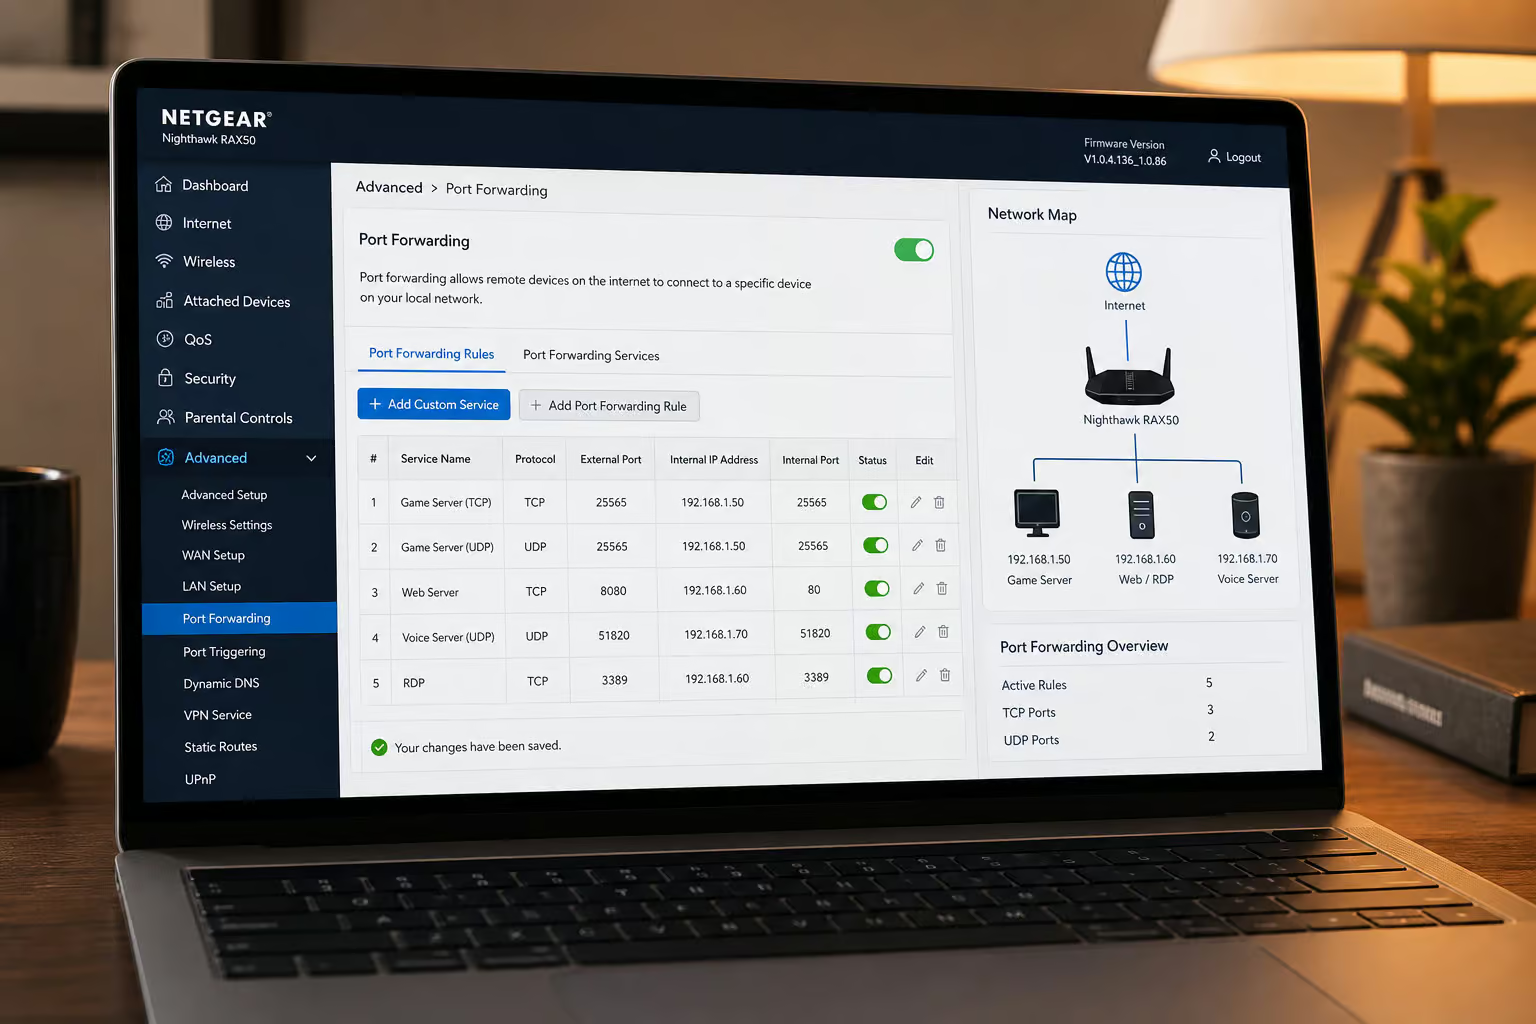
Go to the Network Configuration page at http://127.0.0.1:7657/confignet. You’ll see UDP and TCP port numbers. Since release 0.7.8, I2P picks a random port between 9000 and 31000 on first run. It’s not the old port 8887 anymore.
Write those numbers down. Then log into your router’s admin panel and forward both the UDP and TCP ports to your machine’s local IP address (for example, 192.168.1.10). If you look at the Peers page and see zero or very few peers, missing port forwarding is almost certainly the cause.
While you’re in the console, set your bandwidth limits. The defaults are conservative — 96 KB/s download and 40 KB/s upload. That’s fine for a quick test, but bump them up for regular use. A typical broadband connection can handle 250 KB/s down and 100 KB/s up. You can also install the IP address checker add-on from the router console to confirm your real IP is hidden.
Browser Configuration and Accessing .i2p Sites
Your browser won’t know how to reach .i2p domains unless you point it at I2P’s HTTP proxy. The default proxy address is 127.0.0.1:4444.
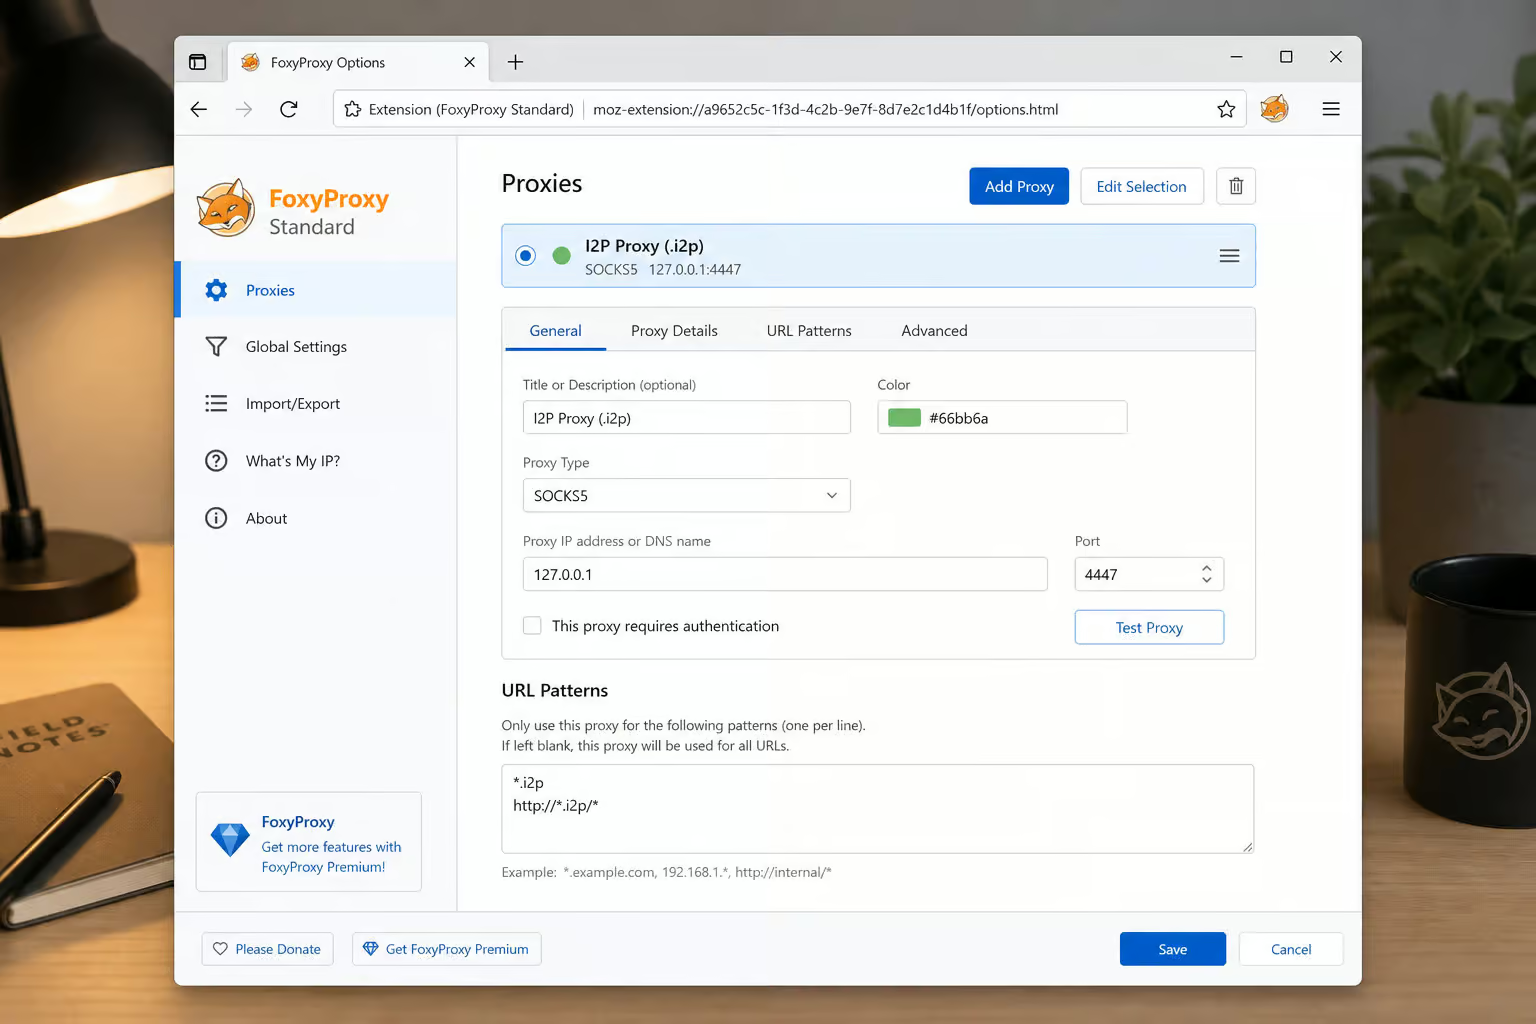
Configure it to route only URLs ending in .i2p through the I2P proxy, and send everything else direct. That way your normal browsing is unaffected.
You’ll also want NoScript to block cross-site scripting. Anonymous services can be sketchy, and NoScript adds a layer of protection.
Human-readable names like stats.i2p are just aliases for long cryptographic addresses stored in your local Address Book. When you type a .i2p URL, the router uses a Jump Service to look up the crypto address. The Jump Service is stats.i2p.
If a site isn’t resolving, you can use an addresshelper URL that includes the crypto address directly. Or add an entry to the Address Book manually through the console at http://127.0.0.1:7657/dns.
Using Built-in Applications: i2psnark, Susimail, Irc2P
Java I2P comes with a few ready-to-use applications that show off what the network can do.

i2psnark – Anonymous Torrenting
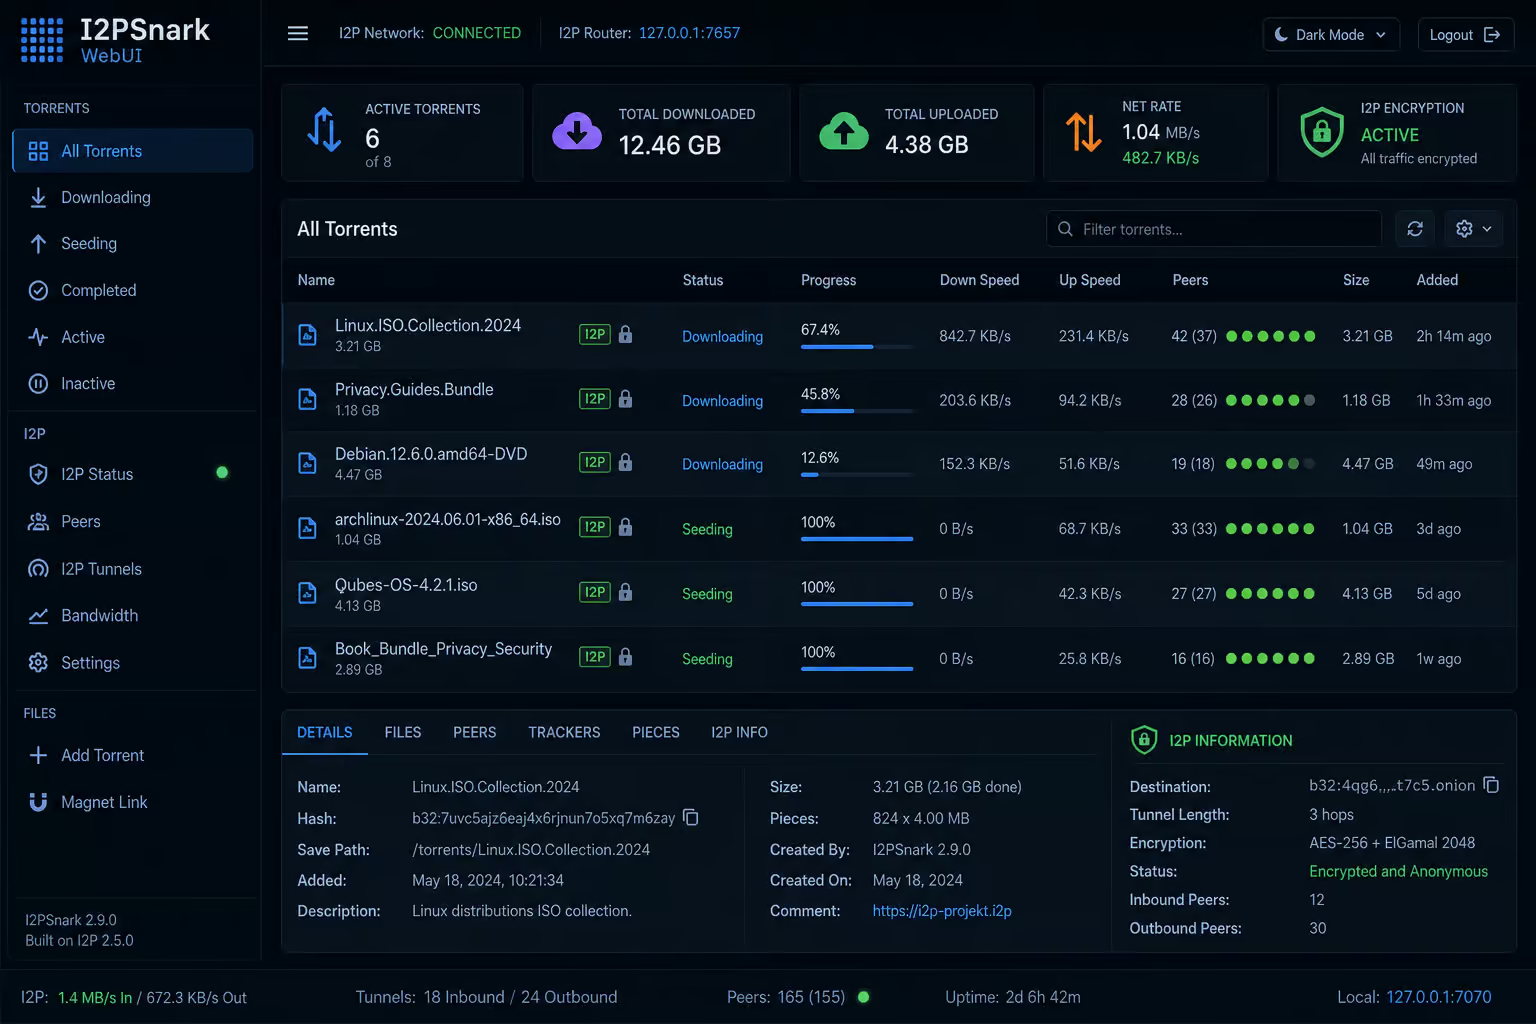
This is a full BitTorrent client built into the I2P router, accessible at http://127.0.0.1:7657/torrents. All traffic goes through I2P’s tunnels with no accidental clearnet leaks. You can also use BiglyBT or qBittorrent with I2P support for more advanced features.
Susimail – Anonymous Email
Susimail is a web-based email client at http://127.0.0.1:7657/susimail. It works with the mail.i2p service, which can send and receive emails to and from the clearnet. Register for an account at hq.postman.i2p — you’ll need to be on I2P to access that page.
Irc2P and SAM Bridge
Irc2P is the I2P IRC network. Java I2P has a pre-configured tunnel on localhost port 6668 — just point your IRC client there. For i2pd, you’ll need to enable the IRC tunnel manually in /etc/i2pd/tunnels.conf.
The SAM bridge on port 7656 lets external applications talk to I2P. It’s disabled by default — enable it in the client configuration if you want to use apps like Anoncoin, which has built-in I2P support and can be forced to use I2P exclusively with the flags -i2p.options.enabled=1 -onlynet=i2p.
Performance Expectations and Troubleshooting
I2P is slower than a direct internet connection. That’s the tradeoff for multi-hop encryption. Expect higher latency and lower throughput.

A typical 3-hop tunnel might have a round-trip time around 740 milliseconds. Your effective bandwidth is limited by the slowest hop in the tunnel — if one node is chugging along at 32 KB/s, that’s your bottleneck no matter how fast your home connection is. This isn’t a network you want to use for streaming 4K video.
Common Problems
Zero peers on the Peers page: This almost always means port forwarding isn’t configured. Double-check that both UDP and TCP ports from the Network Configuration page are forwarded on your router.
“Protocol family unavailable” error: This is an IPv6 configuration issue. As a quick fix, run echo 0 > /proc/sys/net/ipv6/bindv6only or edit wrapper.config. A more permanent solution involves disabling IPv6 on the I2P interface in your kernel parameters.
I2P won’t start: Check ~/.i2p/wrapper.log — that’s where the Java Service Wrapper logs errors. And make sure you didn’t run it as root. We’ve seen that mistake cause weird file permission issues that are a pain to untangle.
The 11-minute wait: If you edit wrapper.config, you need to shut down I2P and wait a full 11 minutes before restarting. The network needs time to forget your old configuration.
Tuning
Running the latest release helps — the developers are constantly improving performance. The Peers page shows Active x/y where the first number is recent peer exchange and the second is peers seen recently. Higher is better. If both numbers are low, check your port forwarding and bandwidth settings.

Security, Privacy, and When to Use Other Tools
Your IP address is visible to other I2P nodes in the router console. Other nodes can see your IP too — that’s how the network routes traffic. De-anonymization is possible if you’re not careful, especially if you leak DNS requests or access clearnet services through an outproxy without end-to-end encryption.
I2P doesn’t use TLS/SSL for its internal traffic. That’s actually a design choice — it means I2P traffic looks different from Tor traffic on the wire, which makes it harder to fingerprint. But it also means the protection model is different.
But if you’re up against a state-level adversary, Tor, mixminion, or mixmaster may be more resistant to certain types of attacks. I2P and Tor aren’t competing tools — they have different designs for different scenarios.
The related article on I2P vs Tor goes deeper into the architecture differences if you want the full comparison.
Windows Installation
Download the installer from https://geti2p.net/. Install Java first (Adoptium recommended), then run the installer. When asked, select “Install as Windows Service” — this makes I2P run in the background and start automatically.
You’ll need to configure Windows Firewall to allow inbound UDP and TCP on the port I2P is using (check the Router Console for the port number), and also allow javaw.exe through. PowerShell commands work well here:
New-NetFirewallRule -DisplayName "I2P_UDP" -Direction Inbound -Protocol UDP -LocalPort 22648 -Action Allow
New-NetFirewallRule -DisplayName "I2P_TCP" -Direction Inbound -Protocol TCP -LocalPort 22648 -Action Allow
Replace 22648 with your actual I2P port from the Router Console.
Manage the service with Get-Service -Name I2P to check status and Start-Service -Name I2P to start it.
macOS and Android: What’s Available?
I2P has been tested on macOS and FreeBSD, but there’s no official installer. You’ll need to check community forums for current instructions.
The I2P app is available on F-Droid and the Google Play Store. It’s a full I2P router that runs on your phone. The I2P for Android guide covers setup, but the short version is: install from F-Droid, configure the proxy in your apps, and you’re on the network.
Next Steps and Getting Help
You’ve got I2P installed and configured. Now go explore.
The Router Console is your starting point. Check the Peers page, look at the bandwidth graph, and browse some .i2p sites.
If you get stuck:
- I2P Forum:
i2pforum.i2p - IRC:
#i2pand#i2p-devon Freenode or Irc2P - Bug tracker:
https://i2pgit.org/I2P_Developers/i2p.i2p/issues
Keep your installation updated. The latest releases include performance improvements and security fixes. And remember the three rules: never run as root, use FoxyProxy and NoScript, and tweak those bandwidth settings higher than the defaults.
Frequently Asked Questions
Is I2P a darknet?
Yes, I2P is considered a darknet because it operates as an overlay network that is not directly accessible from the regular internet. It creates a separate, encrypted layer where you can access .i2p sites, run anonymous torrents, and host hidden services without exposing your real IP address to clearnet traffic.
Is I2P free?
Yes, I2P is completely free and open-source software. There are no paid tiers, subscriptions, or hidden costs — you download it, install it, and run it on your own hardware without paying anything.
Is I2P better than Tor?
It depends on what you’re doing. I2P is designed for peer-to-peer communication and hosting hidden services within its own network, while Tor is built for anonymous browsing of the clearnet. They have different architectures — I2P avoids TLS/SSL for internal traffic to avoid fingerprinting, but Tor may be more resistant to state-level adversaries. They’re complementary tools, not direct competitors.
Is I2P safe on Windows?
Yes, I2P is safe on Windows as long as you follow standard security practices. Install the official version from geti2p.net, configure Windows Firewall to allow inbound traffic on I2P’s port, and never run the router as an administrator. The same threat model applies as on any OS — your IP is visible to other nodes, and outproxy traffic can be seen by the outproxy operator.
